Mastering Excel Sheet Printing: Expert Tips and Tricks

Understanding Excel Print Settings

Before diving into the actual printing process, it’s crucial to understand Excel print settings. These settings allow you to control how your spreadsheet looks when printed, ensuring optimal readability and presentation.
- Page Layout: Access this via the 'Page Layout' tab. Here, you can set margins, orientation (portrait or landscape), paper size, and scaling options.
- Print Area: Define a specific range of cells to print. This prevents unnecessary data from being included on the printout.
- Page Setup: Further customize the print settings like page breaks, headers/footers, and print titles for easy data identification.
Here's how you can adjust some of these settings:
- Go to the 'Page Layout' tab.
- Select 'Margins' and choose a preset or customize.
- Choose 'Orientation' and decide between portrait or landscape.
- Select 'Size' to set the paper size.
- Use 'Print Area' to set the area you want to print.
- Click on 'Print Titles' to set rows and columns that should repeat on each page.
💡 Note: Remember, changing print settings affects all sheets in your workbook if you do not specify otherwise.
Optimizing Spreadsheet for Printing

To ensure your Excel sheets print out in the most effective way, follow these steps:
- Check Your Data: Remove any unnecessary rows or columns, hide sheets not needed for printing, and ensure all data fits within the print area.
- Formatting: Adjust cell widths, ensure fonts are clear and legible, and use borders judiciously to differentiate between data.
- Headers and Footers: Use these to add important information like the sheet name, date, or page numbers.
Here's a quick checklist for optimizing your spreadsheet:
| Task | Description |
|---|---|
| Data Cleanup | Remove extraneous data or hide non-relevant columns. |
| Font Size and Type | Use fonts that are printer-friendly; for example, Times New Roman is often recommended. |
| Cell Formatting | Adjust cell widths and heights to ensure readability. |
| Header/Footer | Include key information like sheet name, date, and page number. |

📝 Note: While optimizing your spreadsheet, save a separate version to avoid losing original data formatting.
Handling Large Spreadsheets

For those working with extensive datasets, managing print options can be more complex. Here are strategies to print large spreadsheets effectively:
- Page Breaks: Excel automatically inserts page breaks, but you can control these to avoid splitting vital data across pages. Go to 'View' > 'Page Break Preview' to manually adjust breaks.
- Print Area Setting: Print only specific ranges to reduce the number of pages, using 'Set Print Area' under the 'Page Layout' tab.
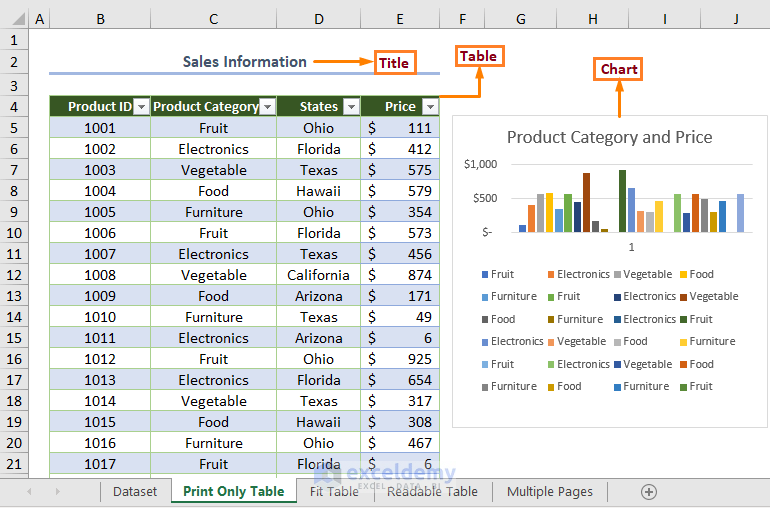
- Scaling: If your sheet contains multiple tables or charts, consider using 'Fit to One Page' under 'Scaling Options' in Page Setup.
- Print Titles: Ensure that row and column titles are repeated on each page for continuity.
Advanced Printing Features

Excel offers several advanced printing features to further enhance the printing experience:
- Print to PDF: Instead of printing, generate a PDF file which can be shared electronically or printed later. Access this via 'File' > 'Save As' > 'PDF'.
- Print Only Selected Cells: Select the cells you want to print, go to 'File' > 'Print', and choose 'Print Selection'.
- Ignore Errors: If you have error cells, you can hide them during printing by selecting 'Show Formulas' under 'File' > 'Options' > 'Advanced'.
- Color Printing: Choose to print in black and white or color, depending on your presentation needs.
Here are the steps for printing to PDF:
- Go to 'File' > 'Save As'.
- Select 'PDF' from the dropdown.
- Choose your settings (such as page range) and click 'Save'.
These advanced features cater to various needs, allowing for custom reports or preparing documents for digital distribution.
By mastering these aspects of Excel print settings, you can elevate your spreadsheet presentation and effectively share your data, whether on paper or electronically. Remember, each adjustment in settings or formatting can significantly improve the readability and impact of your printed materials.
The final remarks to note are that the key to perfect Excel printing lies in meticulous preparation, understanding the tools at your disposal, and applying the most suitable settings for your specific needs. This will not only save you time but also ensure that your spreadsheets are communicated exactly as intended. Whether it’s for a meeting, report submission, or for personal use, these tips will help you become a pro at Excel sheet printing.
How can I set different margins for each page in Excel?

+
In Excel, you cannot set different margins for individual pages within the same worksheet. However, you can adjust margins for different sheets within the workbook. To do this, navigate to each sheet separately and set the desired margins using the ‘Page Layout’ tab.
Can I print headers and footers on every page?

+
Yes, you can use the ‘Print Titles’ feature under ‘Page Layout’ to repeat headers and footers on every printed page. Go to ‘Print Titles’, select your row or column headers under ‘Rows to repeat at top’ or ‘Columns to repeat at left’.
What is the best way to print large spreadsheets without losing readability?

+
To maintain readability when printing large spreadsheets, consider the following:
- Use ‘Fit to One Page’ scaling if possible, but remember that this can reduce the text size.
- Set manual page breaks to ensure critical data isn’t split across pages.
- Use larger fonts and increase cell size if necessary.
- Print only the essential data using ‘Print Area’ settings.
- Consider printing to PDF for a digital review first to adjust before final printing.


