Split Excel Sheets Into Multiple Tabs Easily

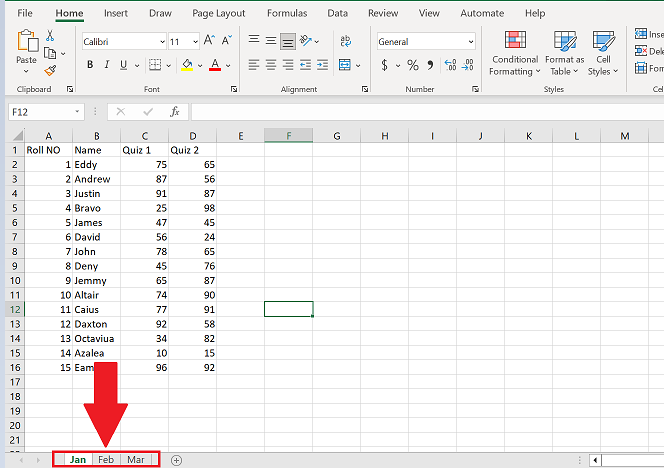
The task of managing large datasets in Excel often requires you to split a single worksheet into multiple tabs. This not only helps in organizing data better but also makes navigation and analysis more efficient. In this comprehensive guide, we'll walk through various methods to split Excel sheets into multiple tabs and discuss why you might need to do so.
Understanding the Need to Split Sheets

There are several reasons why you might want to split Excel sheets into multiple tabs:
- To categorize data by specific criteria like dates, types of products, or departments.
- To reduce the file size by splitting large datasets into smaller, more manageable units.
- To enhance performance when working with large datasets, as Excel can handle fewer rows at a time better.
- To facilitate easier collaboration where different team members can work on different tabs without overwriting each other’s work.
Manual Splitting

The simplest way to split an Excel sheet is manually:
- Open your Excel workbook.
- Select the data you want to move into a new tab.
- Right-click on the selection and choose ‘Cut’ or press Ctrl+X (Windows) or Cmd+X (Mac).
- Insert a new worksheet by clicking the ‘+’ icon at the bottom of the workbook or right-clicking on an existing sheet tab and selecting ‘Insert’.
- Paste the data into the new tab with Ctrl+V or Cmd+V.
Using Excel VBA

For a more automated approach, especially if you need to split data frequently or deal with large datasets, you can use VBA (Visual Basic for Applications) scripts:
How to Set Up a VBA Script

- Open Excel and press Alt + F11 to open the VBA editor.
- Insert a new module by right-clicking on any of the objects in the Project Explorer, choosing ‘Insert’, then ‘Module’.
- Paste the following script into the module:
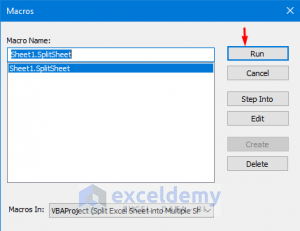
- Run the macro by placing your cursor within the script and pressing F5 or by creating a macro button in Excel to run it.
Sub SplitDataIntoSheets()
    Dim ws As Worksheet
    Dim i As Integer
    Dim col As Integer
    Dim rowCount As Integer
    Dim HeaderRow As Range
    Dim CriteriaList As Range

Set ws = ThisWorkbook.Sheets("Sheet1") 'Modify the sheet name as needed
Set HeaderRow = ws.Range("A1:F1") ' Adjust based on your header row
Set CriteriaList = ws.Range("G2:G10") ' List of criteria values

col = HeaderRow.Column
rowCount = ws.Cells(ws.Rows.Count, col).End(xlUp).Row

For i = 1 To CriteriaList.Rows.Count
    If CriteriaList(i, 1).Value <> "" Then
        ws.Rows("1:1").Copy
        With ThisWorkbook.Worksheets.Add(After:=ThisWorkbook.Worksheets(ThisWorkbook.Worksheets.Count))
            .Name = CriteriaList(i, 1).Value
            ws.Range("A1").PasteSpecial Paste:=xlPasteFormats
        End With
        ws.Range("A1", ws.Cells(rowCount, col)).AutoFilter Field:=1, Criteria1:=CriteriaList(i, 1).Value
        ws.AutoFilter.Range.Copy Destination:=ThisWorkbook.Worksheets(CriteriaList(i, 1).Value).Range("A2")
    End If
Next i
ws.AutoFilterMode = False


End Sub
💡 Note: Ensure you adjust the script according to your data layout, particularly the criteria list and header row range.
Using Power Query

Power Query offers another efficient method to split Excel sheets into multiple tabs without VBA:
Steps to Use Power Query for Splitting Sheets

- Go to the ‘Data’ tab, click ‘Get Data’ > ‘From Other Sources’ > ‘Blank Query’.
- In the Advanced Editor, enter or copy your Power Query M code to load and transform your data.
- Use ‘Group By’ to split data by your criteria.
- Close & Load the data into separate sheets.
Here is a simplified example of a Power Query M code:
let
    Source = Excel.CurrentWorkbook(){[Name="Sheet1"]}[Content],
    #"Filtered Rows" = Table.SelectRows(Source, each [Column1] = "CriteriaValue")
in
    #"Filtered Rows"
💡 Note: Modify the 'Column1' and 'CriteriaValue' to match your data source and splitting criteria.
Using Microsoft Power Automate

For users familiar with workflow automation, Power Automate can automate the process of splitting Excel sheets:
- Create a flow that triggers on file modification.
- Use the ‘Excel Online (Business)’ connector to manipulate Excel files.
- Set up steps to read the worksheet, filter the data, and save each filtered set into a new tab.
Conclusion

By exploring various methods to split Excel sheets into multiple tabs, you can choose the one that best fits your level of comfort with Excel, the frequency of your data manipulation tasks, and the size of your datasets. Whether you opt for a manual process, write a VBA script, leverage Power Query, or use Power Automate, each method offers unique advantages to make data management in Excel more efficient and organized. Remember, organizing data properly can lead to better analysis, easier collaboration, and a more streamlined workflow.
What are the benefits of splitting an Excel sheet into multiple tabs?

+
Organizing data into multiple tabs can improve clarity, facilitate easier collaboration, reduce the file size, and enhance performance when working with large datasets.
Can I revert back after splitting my Excel sheet into multiple tabs?

+
Yes, you can consolidate tabs back into one sheet by copying and pasting data, but this process must be manually handled or automated through VBA or other methods.
What if I need to split sheets based on non-exact matches?

+
You would need to adapt your filtering criteria in the method you choose. For example, with VBA or Power Query, you can use functions like ‘LIKE’ or partial string matching.


