Excel Mastery: Quick Guide to Remove Rows & Columns

Mastering Excel means knowing how to efficiently manage and manipulate data. One essential skill is learning how to remove rows and columns to streamline datasets, reduce noise, and enhance data visualization. Here’s a comprehensive guide to removing rows and columns in Excel, ensuring you're equipped to handle any spreadsheet challenge with finesse.
Why Remove Rows & Columns?

Understanding why you'd want to remove rows and columns is crucial before we delve into the how:
- Clutter Reduction: Eliminate irrelevant or redundant data to improve focus and comprehension.
- Data Cleaning: Sometimes, datasets contain errors, duplicates, or irrelevant entries that need to be removed.
- Visual and Layout: Removal can help with spacing, alignment, or fitting data within one-page views for reports or presentations.
- Performance Optimization: Reducing the size of your workbook can lead to faster processing times.
Methods to Remove Rows in Excel

There are several ways to remove rows in Excel:
1. Manually Selecting and Deleting

If you know exactly which rows you want to delete:
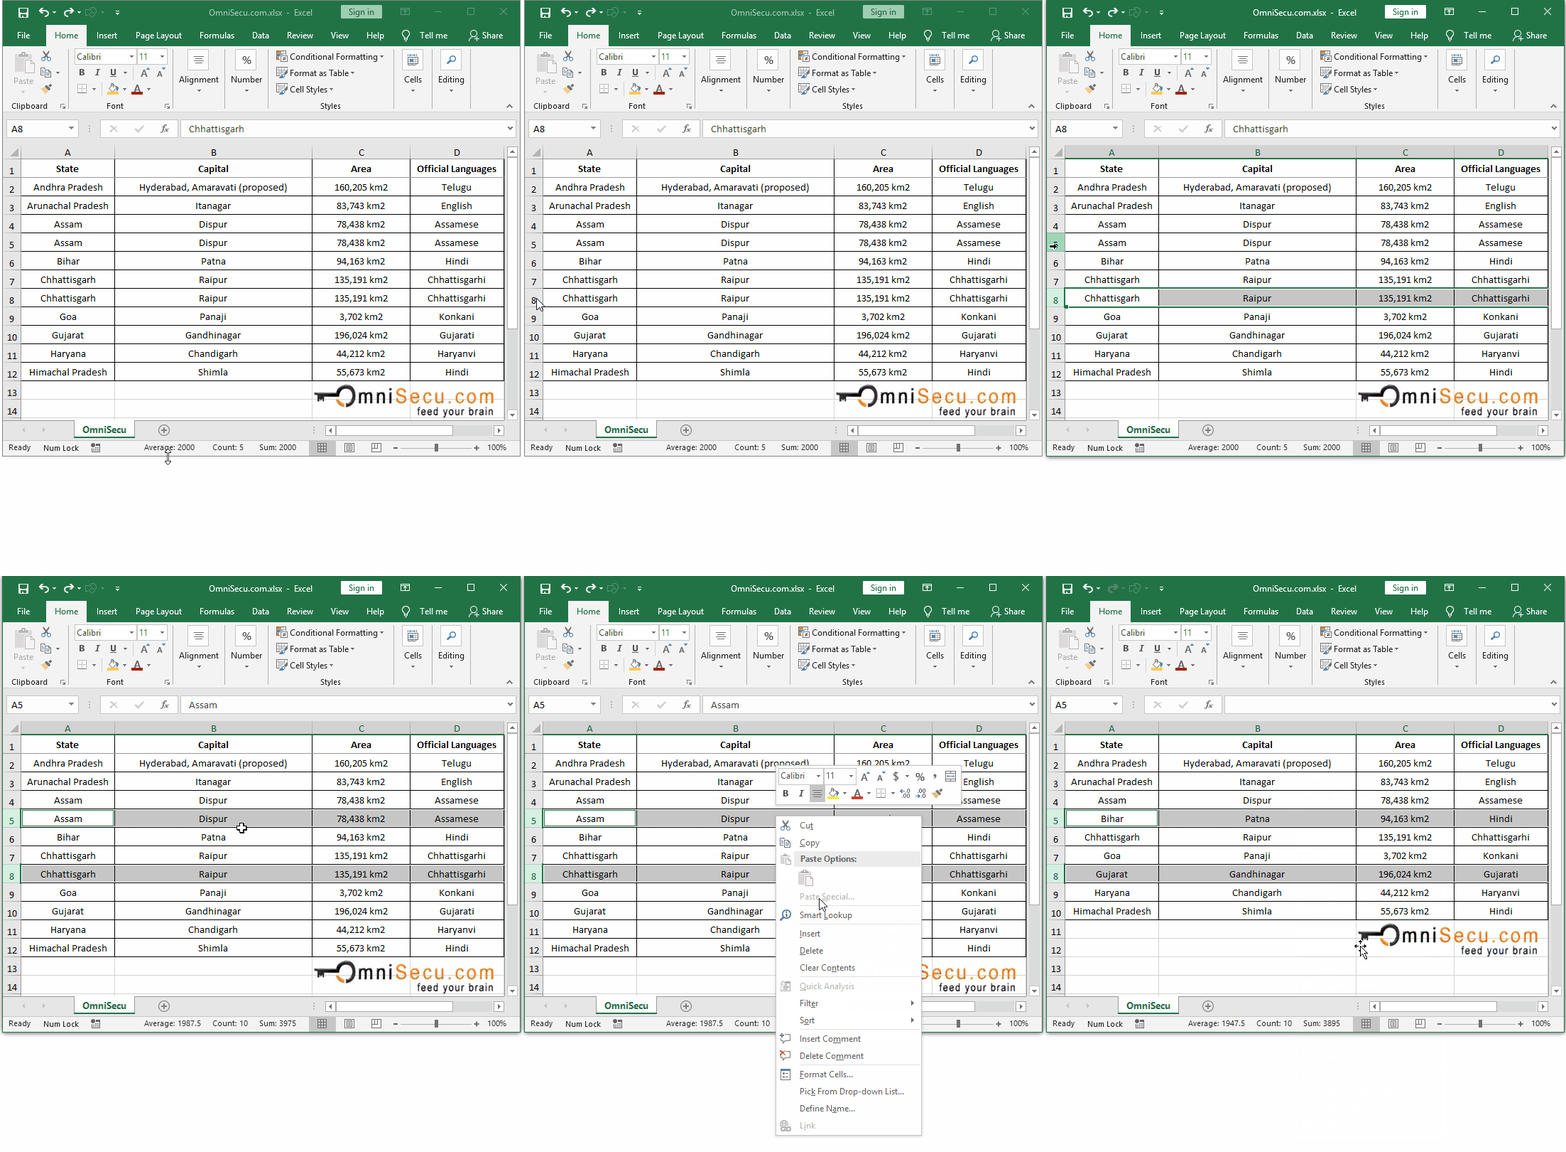
- Click the row number on the left side of the window to highlight the entire row.
- Right-click on the row number and choose "Delete".
This method is straightforward but time-consuming if you're dealing with multiple rows.
2. Using Keyboard Shortcuts

For efficiency:
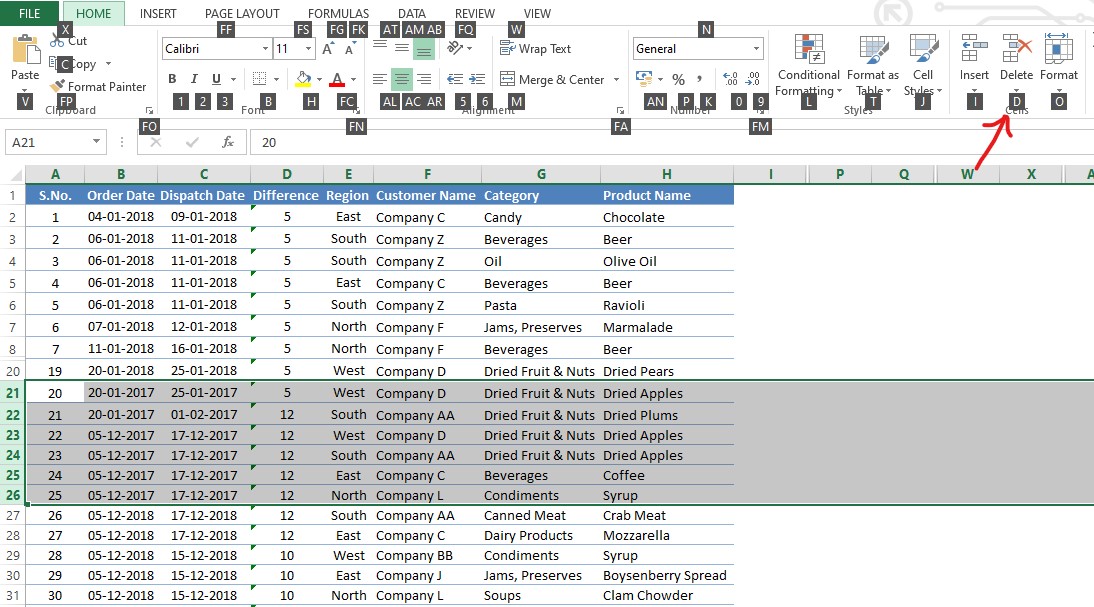
- Highlight the rows you want to delete by dragging over the row numbers.
- Press Ctrl + "-" (Control and Minus keys together).
- In the dialog box that appears, select "Entire row" and click "OK".
👉 Note: Using keyboard shortcuts significantly speeds up your workflow, especially when managing large datasets.
3. Using Filters to Remove Rows Based on Criteria

When you need to remove rows based on specific values:
- Apply a filter to your data range by selecting your data and clicking "Sort & Filter" > "Filter" from the Home tab.
- Use the dropdown arrows in the header row to filter out the rows you wish to delete.
- Once filtered, select the visible rows, right-click, and choose "Delete Row".
- Remove the filter by clicking "Sort & Filter" > "Filter" again to return to the full dataset.
4. Go To Special for Blank Rows

If you want to remove rows containing blank cells:
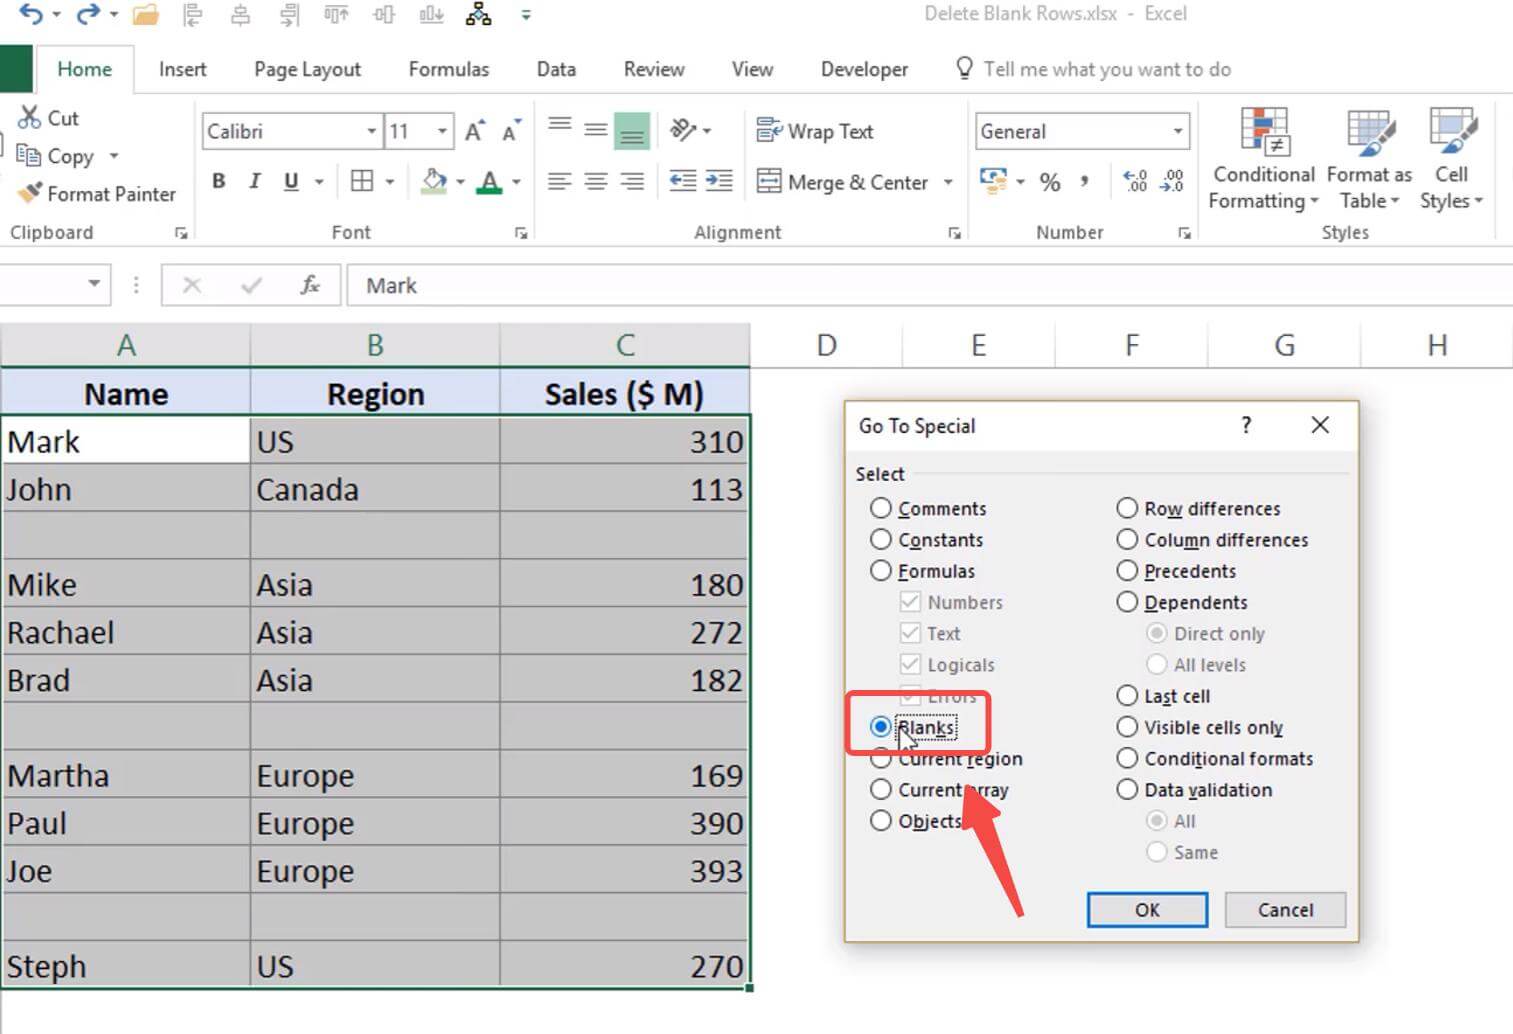
- Select the area with potential blank rows.
- Press F5 or Ctrl + G to open the Go To dialog.
- Click "Special", then select "Blanks" and click OK.
- Now with only the blank rows selected, right-click, and choose "Delete" > "Entire Row".
Methods to Remove Columns

1. Manually Selecting and Deleting

Similar to rows, for individual or a few columns:
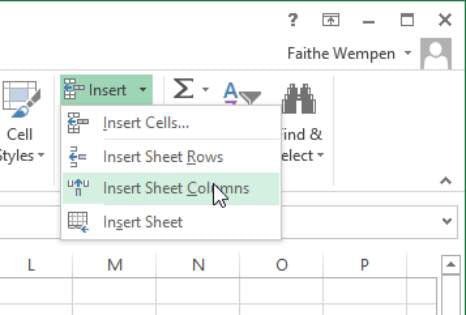
- Click the column letter at the top of the window to highlight the entire column.
- Right-click on the column letter and choose “Delete”.
2. Using Keyboard Shortcuts

For speed and ease:
- Highlight the columns you want to delete.
- Press Ctrl + “-”.
- From the dialog box, select “Entire column” and click OK.
3. Using Filters to Remove Columns

If you’re looking to remove columns based on content:
- Apply a filter to your header row.
- Use the filter options to hide columns you want to delete.
- Select the visible column(s), right-click, and choose “Delete”.
Additional Tips and Notes

When removing rows or columns in Excel, consider these tips:
- Always backup your workbook before performing mass deletions to avoid data loss.
- Use the Undo function (Ctrl + Z) if you make a mistake.
- Be cautious when deleting rows with formulas as other formulas might depend on the data being removed.
- If you’re looking to remove columns based on criteria not supported by Excel’s built-in filters, consider using VBA or external tools like Power Query.
📌 Note: When using filters, make sure you aren't inadvertently deleting valuable data. Always double-check your filters before deleting.
When to Use Caution

There are situations where removing rows or columns might be risky:
- If your workbook is used by multiple people or in a shared environment, communicate any changes made to the structure.
- Be wary of conditional formatting or hidden data that might be important for analysis.
- Removing rows or columns might affect pivot tables or charts, so review these before deletions.
The key to mastering Excel is not just in knowing the commands but understanding when and why to use them. Removing rows and columns efficiently is just one aspect of Excel mastery, but it's a foundational skill that can significantly enhance your ability to manage and present data effectively.
What should I do if I accidentally delete rows or columns?

+
If you’ve accidentally deleted rows or columns, immediately use Ctrl + Z (Undo) to revert your last action. If you’ve saved the workbook or closed it, you’ll need to recover from a backup or redo your work.
How do I know if it’s safe to delete rows or columns?

+
Check for dependencies, especially in formulas, pivot tables, and charts. Also, ensure that the data isn’t being used in other sheets or workbooks, and if it’s shared, communicate changes with others.
Can I remove rows or columns based on multiple criteria?

+
Yes, you can use the Advanced Filter option to set complex criteria for filtering. Alternatively, you might consider using VBA or Power Query for more sophisticated conditional deletions.


