Effortless Guide: Remove Duplicate Names in Excel Instantly

Duplicate data in Excel can create a clutter in your spreadsheets, making analysis difficult and diminishing the readability and efficiency of your work. Whether you're handling a small list or a vast database, the task of identifying and removing duplicate names becomes essential. This guide will walk you through the most effective methods to remove duplicate names in Excel instantly, ensuring your data remains clean and manageable.
Understanding Duplicate Data in Excel

Before diving into the removal process, it’s beneficial to understand what duplicate data entails:
- Exact Match: Duplicates are entries where every piece of data is identical across all fields.
- Partial Match: This includes instances where certain fields match, but others might vary.
Using Conditional Formatting to Highlight Duplicates

Here are the steps to use conditional formatting to identify duplicate names:
- Select the range of cells where you want to find duplicates.
- Go to the ‘Home’ tab, click on ‘Conditional Formatting’, and choose ‘Highlight Cell Rules’, then ‘Duplicate Values’.
- Choose a format for the duplicates; Excel suggests default options like Light Red Fill with Dark Red Text.
👀 Note: Conditional formatting only highlights duplicates and doesn’t remove them. It’s a preliminary step to visualize where the duplicates lie within your dataset.
Removing Duplicates with Excel’s Built-in Tool

Follow these steps to automatically remove duplicate names:
- Select the range or the entire column containing names.
- Go to the ‘Data’ tab, click on ‘Remove Duplicates’.
- In the dialog box, ensure all the columns you want to check for duplicates are selected.
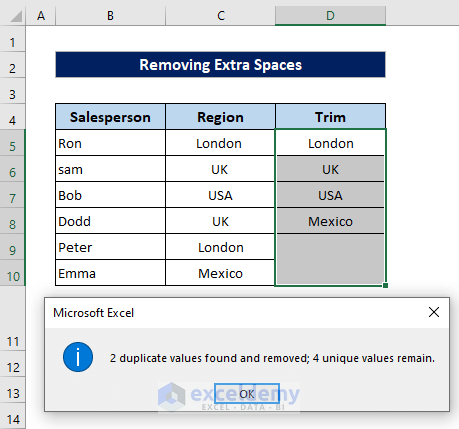
- Click ‘OK’, and Excel will remove the duplicates, leaving only unique entries.
💡 Note: Excel’s ‘Remove Duplicates’ function treats blank cells differently, consider sorting your data if blanks are important to your analysis.
Using Power Query for Advanced Duplicate Removal

Power Query offers more sophisticated ways to manage duplicates, especially useful for large datasets or complex conditions:
- Select your range, go to the ‘Data’ tab, and choose ‘From Table/Range’ to open Power Query Editor.
- Under the ‘Home’ tab, click on ‘Remove Duplicates’ to initiate the process.
- Select the columns by which you want to remove duplicates.
- Close and Load your query to apply the changes to your Excel sheet.
Alternative Methods for Specific Scenarios

Manual Deletion

For smaller lists:
- Sort your data by the column you want to clean.
- Scroll through and manually delete the duplicates that appear together.
VBA Macro for Automation

If you’re comfortable with VBA, here’s a simple macro to automate the removal:
Sub RemoveDuplicateNames()
    Dim lastRow As Long
    lastRow = Cells(Rows.Count, 1).End(xlUp).Row
    Range(“A1:A” & lastRow).RemoveDuplicates Columns:=1, Header:=xlYes
End Sub
Now, understanding the nuances of duplicate removal can greatly improve your data management workflow. Excel provides various tools suited for different data sizes and complexities. Remember to choose the method that aligns best with your dataset's needs and your proficiency with Excel. Employing these techniques ensures your spreadsheets remain clean and your analysis accurate, minimizing the risk of errors and boosting productivity.
Can Excel remove duplicates in multiple columns?

+
Yes, Excel can remove duplicates across multiple columns. When using the ‘Remove Duplicates’ function, you can select multiple columns to check for duplicate entries, thus ensuring a comprehensive clean-up.
Does using conditional formatting delete duplicates?

+
No, conditional formatting only highlights duplicates visually. It doesn’t remove or delete any data.
Will Excel’s ‘Remove Duplicates’ feature delete my original data?

+
Excel’s ‘Remove Duplicates’ feature will only remove the extra copies of the duplicate entries, keeping one instance of each unique data. Your original data is safe.


