Print Excel Sheets with Lines: Quick Guide

In today's fast-paced business environment, efficiently printing documents and maintaining accuracy and clarity is crucial. One common challenge for many professionals is printing Excel sheets with grid lines, which can greatly improve readability and accuracy when sharing or presenting data. This article provides a comprehensive guide on how to print Excel sheets with lines, ensuring your spreadsheets look as neat and organized in print as they do on your screen.
Understanding Gridlines in Excel

Before diving into the process, let's briefly discuss what gridlines are in Excel. Gridlines are the faint lines you see in the worksheet that separate cells, making it easier to view, edit, and navigate through your data. By default, Excel gridlines are visible on-screen to help with data organization but they are not printed.
- Screen Display: Gridlines are visible to aid in data entry and review.
- Print Settings: Excel does not print gridlines by default to save ink and reduce visual clutter.
Step-by-Step Guide to Print Gridlines in Excel
Step 1: Open Your Spreadsheet

Open the Excel workbook containing the sheet you want to print.
Step 2: Access Page Layout Tab
Navigate to the Page Layout tab in the Excel ribbon at the top of the window.

Step 3: Modify Page Setup Options
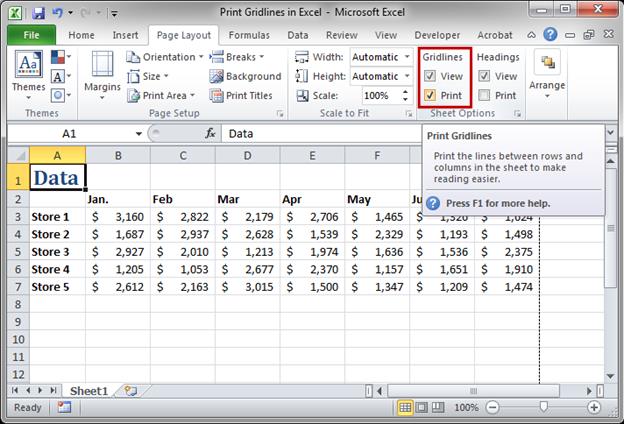
Click on the Page Setup group dialog launcher. This opens the Page Setup dialog box where you can adjust print settings.
Step 4: Enable Gridlines for Printing

In the Sheet tab of the Page Setup dialog box:
- Check the box next to Gridlines to include them in your printout.
| Feature | Description |
|---|---|
| Print Gridlines | Enables the gridlines to be printed |
| Print Headings | Prints row and column headings |

Step 5: Print Your Document

After setting up your gridlines:
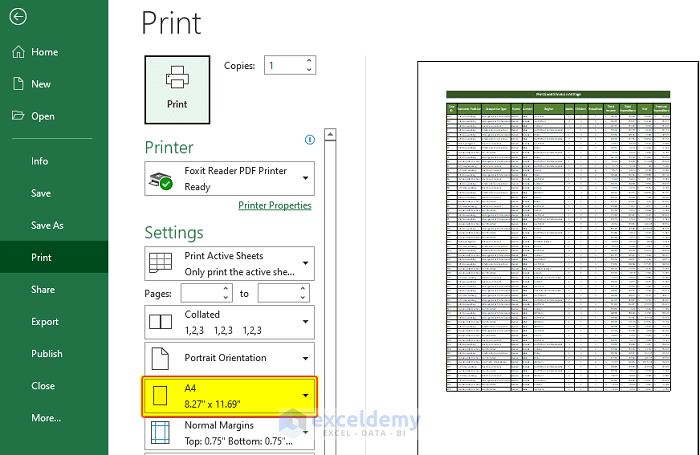
- Go back to the File tab or use the keyboard shortcut Ctrl+P.
- Preview your document to ensure gridlines are shown.
- Choose Print to start the printing process.
Step 6: Check Your Printout

Ensure your printed document displays the gridlines as expected. If they're not visible:
📌 Note: Sometimes, gridlines may not appear if the sheet's color is too light or if the print settings do not match the intended area for printing.
Additional Tips for Better Printing

- Adjust Print Area: Excel allows you to set a specific area for printing. Go to Page Layout > Print Area and select "Set Print Area" to define your print boundaries.
- Use Print Preview: Always use the print preview feature to see how your document will appear before printing.
- Check Printer Settings: Confirm that your printer settings do not interfere with Excel's print commands.
In summary, printing Excel sheets with lines ensures clarity and professionalism in your documents. By understanding how to manipulate Excel's print settings, you can print gridlines or borders effectively, enhancing readability and accuracy in your data presentation. Remember to adjust print settings, review the document in print preview, and ensure your printer settings align with your intentions. This guide will help you achieve professional-looking spreadsheets for various purposes, from data analysis to presenting financial reports.
Why don’t my gridlines print by default?

+
Excel conserves ink by not printing gridlines by default. You need to manually enable this feature in the Page Setup options.
Can I print only specific parts of my spreadsheet?
+
Yes, you can set a print area by selecting the cells you want to print and then going to Page Layout > Print Area > Set Print Area.
What should I do if my gridlines are faint on the printout?

+
Ensure your printer’s ink is sufficient and check for any settings like draft mode which might be reducing print quality. Also, consider setting the background of your sheet to a lighter shade if it’s currently dark.
