5 Simple Tips to Print Excel Sheets Nicely

When it comes to presenting data effectively, Microsoft Excel is a powerful tool widely used in various professional and personal settings. However, the way data is printed can significantly impact its readability and overall presentation. Whether you're preparing a report for management, a project proposal, or just organizing your personal finances, printing Excel sheets neatly and efficiently can enhance your work's visual appeal and clarity. Here, we'll explore five simple yet effective tips to ensure your Excel sheets look their best when printed.
1. Setting Print Areas

One of the most straightforward yet overlooked features in Excel is defining the print area. This functionality allows you to select specific ranges of cells for printing, excluding unnecessary data that could clutter your printout:
- Select the Range: Highlight the cells you wish to print. You can do this by dragging your mouse over the cells or by using the keyboard to select a range.
- Set the Print Area: Go to the ‘Page Layout’ tab, click on ‘Print Area’, and then choose ‘Set Print Area’. This will lock in the selected area for printing.
2. Adjusting Page Layout

Excel provides options to modify your print layout to fit the content onto the page in the most efficient manner:
- Page Orientation: Decide whether your data looks better in portrait or landscape. You can change this under the ‘Page Layout’ tab by selecting ‘Orientation’.
- Fit to Page: Use ‘Page Setup’ to choose how many pages wide or tall your print should be. ‘Fit to Page’ can automatically adjust your content to fit onto the least number of pages possible.
- Margins: Adjust margins to give your document a cleaner look, reducing wasted space. Normal or Narrow settings usually work well for most documents.
- Scale: If your data doesn’t fit well even after adjusting the orientation, you can scale your printout to make it smaller or larger to fit within the page margins.
💡 Note: Remember that scaling too much can make your text unreadable, so balance between scale and readability is key.
3. Enhancing Readability with Page Breaks

Excel automatically decides where to break your print across pages, but sometimes these decisions can lead to awkward page splits:
- Insert Manual Page Breaks: If your data requires specific breaks, insert manual page breaks to control where pages start and end. Go to ‘Page Layout’, click on ‘Breaks’, and then ‘Insert Page Break’.
- Remove Unnecessary Breaks: You can also remove or reset page breaks that are not working for you by going back to the ‘Breaks’ menu.
4. Headers, Footers, and Print Titles

Headers and footers add context and make your document look professional. Here’s how to set them up:
- Add Headers/Footers: Click on ‘Insert’ > ‘Header & Footer’. Here you can add title, date, page numbers, or file path, which can be useful for keeping track of multiple documents.
- Print Titles: If your spreadsheet spans multiple pages, consider repeating column or row titles on each page. Go to ‘Page Layout’ > ‘Print Titles’ to set this up.
📝 Note: Headers and footers can significantly enhance document navigation, especially in large datasets or reports.
5. Print Preview and Adjustments

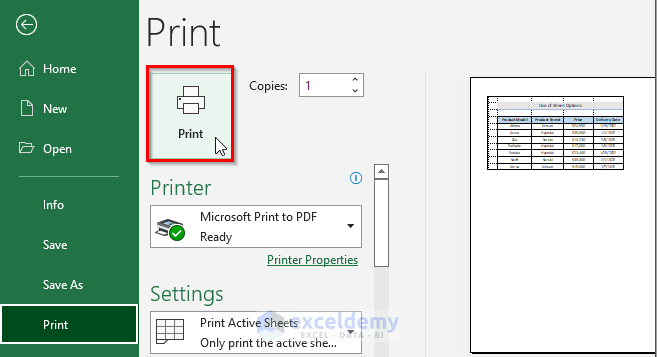
Before you send your Excel sheet to the printer, always use the Print Preview feature:
- Review Layout: This allows you to see exactly how your document will look on paper, giving you a chance to make final adjustments.
- Adjust Settings: If something isn’t right, you can go back to the ‘Page Layout’ settings or tweak your print area to fix any issues you spot.
To summarize, printing Excel sheets neatly involves:
- Defining the print area to include only what’s necessary
- Optimizing page layout for readability and space efficiency
- Using page breaks strategically to maintain data flow
- Enhancing documents with headers, footers, and print titles
- Using print preview to make last-minute adjustments for a perfect print
Following these tips will not only make your Excel documents look professional but also ensure that your data is presented in a clear and organized manner, regardless of the printing scenario. Whether for a meeting, a presentation, or personal use, well-printed Excel sheets convey professionalism and attention to detail.
Why is it important to set a print area in Excel?

+
Setting a print area is crucial because it allows you to print only the relevant parts of your worksheet, avoiding unnecessary pages filled with irrelevant data.
Can I save my print settings for future use?

+
Yes, Excel allows you to save your print settings as part of your workbook. When you save your workbook, these settings will be preserved for future use.
What if I want to print in color for better presentation?

+
To print in color, make sure your printer supports color printing and that the color option is selected in the printer settings from the Print dialog box in Excel.


