How to Print Excel Sheets with Freeze Panes Easily

If you've ever worked extensively with Microsoft Excel, you know that one of the most helpful features is the ability to freeze panes. This function is crucial for keeping rows or columns fixed while scrolling through the spreadsheet, enabling you to maintain an overview of headers or key data points. However, printing an Excel sheet with frozen panes can be quite the challenge for those unfamiliar with the settings. This comprehensive guide will walk you through the steps on how to print Excel sheets with freeze panes easily.
Understanding Freeze Panes in Excel

Before diving into the printing part, it's important to understand what freeze panes are and why they're useful:
- Freeze Top Row - This option locks the first row of your sheet, allowing you to scroll through the rest of the document while the top row remains visible.
- Freeze First Column - Similar to freezing the top row, this keeps the leftmost column in view, which is essential for datasets where column headers provide context.
- Custom Freeze Panes - Here, you can choose exactly which rows or columns to freeze, ideal for complex spreadsheets.
These options make navigation through large datasets more manageable, reducing the risk of losing track of what each row or column represents.
Steps to Print Excel Sheets with Freeze Panes

Follow these steps to ensure your printouts reflect the freeze pane settings in your Excel document:
1. Preparing Your Excel Sheet for Printing

Before you print, make sure:
- Your data is clean and formatted correctly.
- All freeze panes are set according to your needs.
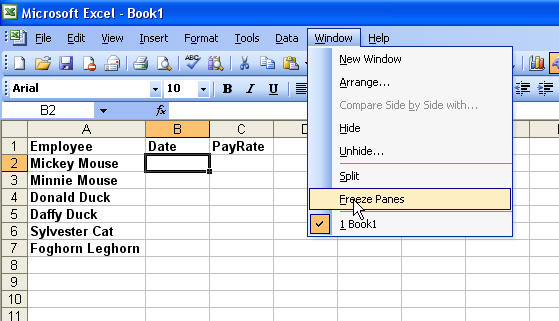
To set freeze panes, navigate to View tab, and click on Freeze Panes. You can choose from the options mentioned above.
2. Setting Up Print Area

When you print an Excel sheet with freeze panes, you need to define the print area:
- Select the range of cells you want to print. If you have multiple areas to print, select each separately, press Ctrl, and then combine the selections.
- Go to Page Layout > Print Area > Set Print Area.
3. Adjusting Print Settings

To print the sheet with the freeze panes intact:
- Go to File > Print.
- In the print settings dialog, under Print What, select Worksheet.
- Under Settings, choose Print Entire Workbook or Print Active Sheets, depending on your needs.
4. Special Settings for Frozen Panes

Excel doesn't directly provide an option to print with frozen panes, but you can simulate this by:
- Setting Print Titles under Page Layout > Print Titles to repeat the frozen rows or columns on each printed page.
⚠️ Note: Ensure you select the right rows or columns for Print Titles. This mimics the freeze pane effect on printed pages.
5. Printing

After setting everything up, click the Print button, and Excel will print the document with the selected rows or columns repeated on each page.
Common Issues and Solutions

Here are some common issues users face when printing with freeze panes:
- Pages Not Printing Correctly: This can occur due to incorrect print area setup or not setting Print Titles correctly. Review these settings and adjust as needed.
- Pages Break Mismatching: Use the Page Break Preview option under View to manually adjust where pages break.
- Rows or Columns Not Printing: Ensure you've selected the correct print area, and if using Print Titles, that these are accurately set to include the necessary rows or columns.
💡 Note: Sometimes, manual page setup adjustments can help. Check the Page Layout for margins, orientation, and paper size to make sure your printing aligns with your needs.
In conclusion, printing Excel sheets with freeze panes isn't as straightforward as one might expect, but with these steps, you can achieve a printout that mirrors your spreadsheet's on-screen layout. Remember to define print areas, set print titles for repetition, and use manual adjustments when necessary. This will help you maintain visibility of headers or critical information on each printed page, making your printed spreadsheets as functional as their digital counterparts.
Why can’t I print with freeze panes directly in Excel?

+
Excel doesn’t provide a direct “print with freeze panes” feature. Instead, you must use print titles to simulate the freeze pane effect on printed pages.
Can I print multiple areas of my spreadsheet?

+
Yes, you can select multiple areas by holding down the Ctrl key while selecting different ranges. Then set these as your print area for printing.
How do I adjust page breaks in Excel?

+
Under the View tab, select Page Break Preview to manually adjust where your page breaks occur. Drag the blue lines to adjust.


