5 Simple Steps to Password-Protect Your Excel Sheet

Ensuring the confidentiality and security of sensitive data is paramount in today's digital world. Whether you're an accountant protecting financial records, a manager overseeing payroll information, or an educator handling student grades, knowing how to password-protect your Excel sheet is an essential skill. Here's a comprehensive guide detailing five simple steps to safeguard your spreadsheets:
Step 1: Open Your Excel Workbook

Begin by opening the Excel workbook you wish to secure. Make sure you have full control over the file since you’ll need administrative permissions to apply the protection.
Step 2: Navigate to the ‘Review’ Tab

In Excel, click on the ‘Review’ tab in the ribbon at the top. This tab houses all the tools for reviewing and securing documents:
- Here, you’ll find options for sharing, changes, commenting, and crucially, for our purposes, Protect Workbook and Protect Sheet.
Step 3: Protect the Sheet

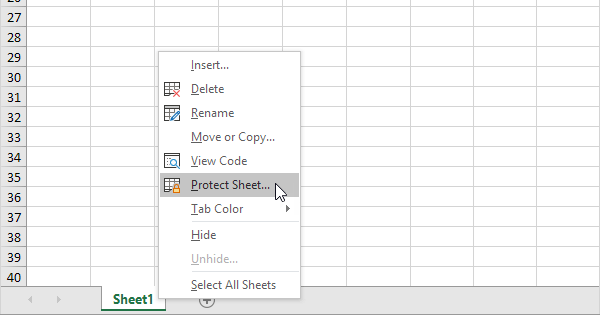
Select ‘Protect Sheet’ from the ‘Review’ tab. This action opens a dialog box where you can configure the protection settings:
- Password: Enter a strong, memorable password to prevent unauthorized access. Remember, passwords are case-sensitive.
- Allow All Users: Choose which actions users can perform even with the sheet protected, like formatting cells or sorting data.
🔑 Note: Keep your password secure. There’s no way to retrieve it if forgotten, and using weak or guessable passwords can defeat the purpose of protection.
Step 4: Set Encryption for the Entire Workbook

For added security, you might want to encrypt the entire workbook. This ensures that even if someone gains access to your file, they can’t open it without the password:
- From the File menu, select ‘Info.’
- Click ‘Protect Workbook’ and then ‘Encrypt with Password.’
- Set a robust password here too.
🔒 Note: Workbook encryption provides an additional layer of security, protecting the document even if someone has access to your computer.
Step 5: Save and Verify Your Protection

After setting up all your protections:
- Save your workbook with the ‘Save As’ option to apply the changes.
- Close and reopen the file to verify if the password protection works by attempting to access the sheet without entering the password.
It’s vital to test the password protection to ensure your sensitive data is indeed secured.
By following these straightforward steps, you can effectively password-protect your Excel sheets, adding an additional layer of security to your confidential data. Remember, protecting your data doesn't stop with passwords; maintaining a secure environment, regular updates, and cautious sharing practices are all part of data security.
Can I protect different sheets with different passwords?

+
Yes, you can protect individual sheets with different passwords for enhanced security, though this requires setting passwords for each sheet individually.
What if I forget my password?

+
There’s no official way to recover a forgotten password; you must keep it secure or use password recovery software, which isn’t foolproof.
Can I still use Excel features like formulas when a sheet is protected?

+
Yes, you can customize what users can do even with the sheet protected, including using formulas, sorting, and filtering.


