How to Add Names to Your Excel Sheet Easily

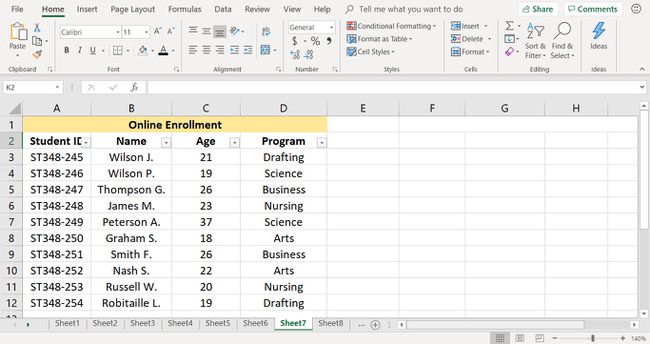
Managing large datasets in Excel can often feel overwhelming, especially when it comes to organizing names. However, with the right tools and techniques, adding names and maintaining an organized list in Excel becomes a streamlined process. In this post, we'll explore several effective methods to help you manage names in your Excel sheets with ease, whether you're compiling a guest list for an event, managing employee records, or sorting customer databases.
Understanding Excel’s Structure

Before diving into specific methods, it’s important to understand the basic structure of Excel:
- Cells: Each box in Excel is called a cell, identified by its column letter and row number (e.g., A1, B2).
- Rows and Columns: Data is organized in rows and columns, where columns are vertical and labeled with letters, and rows are horizontal, labeled with numbers.
- Range: A group of cells can be referred to as a range. For example, A1:A10 refers to cells A1 through A10.
Simple Input of Names

The most straightforward way to add names to an Excel sheet is by:
- Selecting the cell where you want the name to appear.
- Typing the name directly into the cell and pressing Enter.
This method is best for small lists or when inputting names one by one.
Using Data Entry Forms

For larger datasets, using a data entry form can make the process more efficient:
- Go to the Developer tab. If it’s not visible, enable it via Excel Options > Customize Ribbon > Developer.
- Click on Insert, then Form.
- You’ll see a form that allows you to input data into specific fields.
🗒️ Note: Ensure your data is structured in a tabular format to use this feature effectively.
Importing Names from External Sources

If names are already compiled elsewhere, you can import them:
- Use the Get External Data tool under the Data tab to import from various sources like CSV, text files, or even databases.
- Configure the import settings to ensure names are placed into the correct columns.
Data Validation for Consistency

To maintain data integrity:
- Select the cells where names will be entered.
- Go to Data > Data Validation.
- Choose List from the Allow dropdown, and specify your source as the range of acceptable names or a named range.
This helps in ensuring only predefined names are entered, reducing errors.
Formulas for Name Management

Excel’s formula capabilities can automate several tasks:
- VLOOKUP: To find related information to names.
- CONCATENATE: To merge first and last names into one cell.
- RIGHT, LEFT, MID: For extracting parts of names.
Macros and VBA for Advanced Users

For those comfortable with coding, VBA scripts can automate name management:
- Create custom functions to parse or validate names.
- Automate data entry or updating of records.
- Develop forms that can be shared among users for uniform data entry.
Sorting and Filtering Names

Once your names are in place:
- Sort: Click on the column header and choose how you want to sort (e.g., A to Z).
- Filter: Use the AutoFilter to display only specific names or groups.
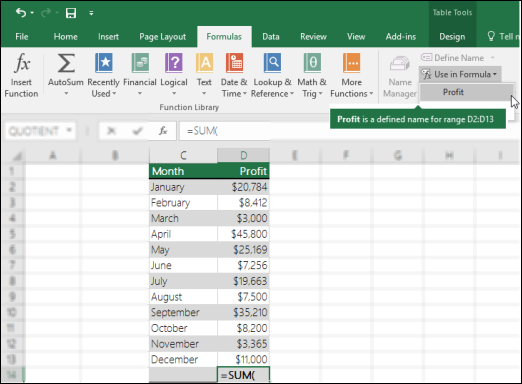
Using Named Ranges

Named ranges can simplify data referencing:
- Highlight the range containing names.
- Go to Formulas > Define Name and give your range a name.
- Now you can reference this range by its name in formulas or data validation.
Conclusion

Managing names in Excel doesn’t have to be a daunting task. By understanding Excel’s structure and utilizing features like data entry forms, data validation, formulas, and even VBA, you can make the process smoother and more error-free. Whether you’re organizing a simple list or handling complex datasets, these tools ensure your data remains structured, consistent, and easily manageable. Remember, the key is to choose the method that best fits the scale and complexity of your data management needs.
Can I use Excel for large-scale name management?

+
Yes, Excel can handle thousands of names. For very large datasets, consider using Excel’s Power Query feature to manage data more efficiently.
What if my names have different formats?

+
You can use functions like LEFT, RIGHT, and MID to standardize names or employ data validation to enforce a particular format during entry.
How can I share my Excel sheet with others?

+
Use Excel’s Share feature to invite others to view or edit your workbook. Ensure you set up the proper permissions and consider cloud-based solutions like OneDrive or SharePoint for collaborative work.


