5 Ways to Remove Blank Rows in Excel Instantly

The presence of blank rows in a spreadsheet can be more than just an annoyance; it can disrupt your workflow, affect your data analysis, and make your documents appear cluttered and unprofessional. Removing these empty rows can instantly streamline your Excel data, making it easier to manage, analyze, and present. Here are five effective methods to get rid of those unwanted blank rows in Excel, ensuring your data looks and functions at its best.
Using the Filter Function

Excel's Filter function can quickly help identify and eliminate blank rows:
- Select the column(s) where you want to remove blank rows.
- Click the "Data" tab and choose "Filter."
- Click the filter dropdown arrow and uncheck the box labeled "(Blanks)."
- Select all the visible rows excluding the header, then right-click and choose "Delete Row."
This method provides a visual way to remove blank rows, but be cautious, as this approach will also affect data above the selected rows.
The Go To Special Feature

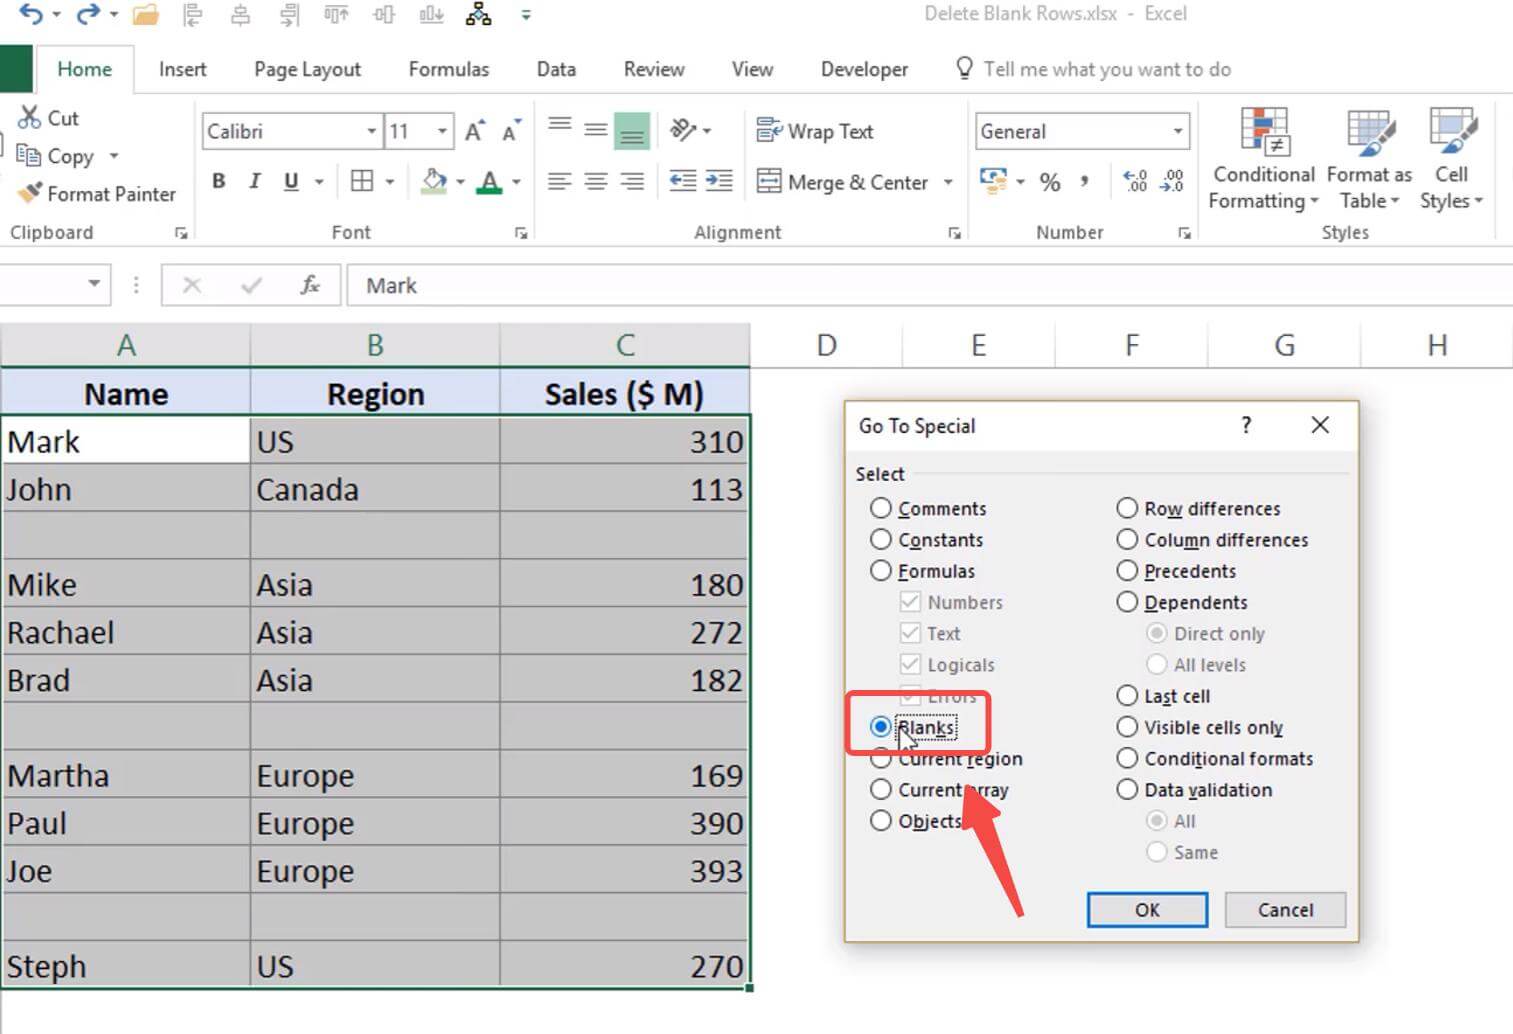
The Go To Special feature is perfect for targeting blank rows:
- Select the entire dataset by clicking the top-left corner of the sheet.
- Press Ctrl + G or choose "Find & Select" from the "Home" tab, then "Go To Special."
- In the dialog, choose "Blanks" and click "OK."
- All blank cells will be selected. Now, you can either right-click to delete or press Ctrl + - to delete rows.

⚠️ Note: Be cautious when deleting rows using this method, as it deletes all rows containing selected blank cells.
Sort and Remove Blank Rows

Sorting your data allows you to group blank rows together, making their removal straightforward:
- Select the column with the blanks.
- Go to the "Data" tab and click "Sort & Filter" then "Sort A to Z" or "Z to A."
- This sorts the column, placing all blanks at the top or bottom.
- Select the blank rows and delete them using the right-click menu or the Delete key.
Using a Macro

For repetitive tasks or large datasets, creating a simple VBA macro can automate the blank row removal process:
Sub RemoveBlankRows()
    Dim rng As Range
    Dim row As Range
    Dim i As Long

    Set rng = ActiveSheet.UsedRange

    For i = rng.Rows.Count To 1 Step -1
        If WorksheetFunction.CountA(rng.Rows(i)) = 0 Then
            rng.Rows(i).Delete
        End If
    Next i
End Sub
This macro will iterate through the used range, deleting any entirely blank rows.
Power Query for Advanced Users

Power Query in Excel provides a powerful tool for cleaning and transforming data:
- Select your data or the entire table you want to work with.
- Go to the "Data" tab, then "From Table/Range" to load data into Power Query Editor.
- Under "Home," click "Remove Rows" and select "Remove Blank Rows."
- Apply the changes, and Power Query will clean your data by removing all blank rows.

💡 Note: Power Query is available in Excel 2010 and later versions with Power Pivot add-in enabled.
In summary, Excel offers multiple pathways to efficiently remove blank rows, whether through simple filtering, advanced selection tools, or automation via macros or Power Query. These techniques not only clean up your data but also enhance its accuracy and presentation, making your work in Excel smoother and more professional. By adopting these methods, you ensure your Excel sheets are always ready for analysis or reporting.
Can I remove blank rows in Excel without affecting the data?

+
Yes, using techniques like Filter or Power Query ensures that only blank rows are removed without altering other data.
What if my dataset has completely empty rows?

+
All methods discussed can remove entirely blank rows. For sorting or filtering, these rows will group at the end or top of your list, making deletion easy.
Is it safe to use macros for deleting blank rows?

+
Yes, if you create the macro correctly. Always test it on a small sample first, and consider adding backup functions or using Power Query as an alternative for more control.


