Split Excel Sheets: Quick Tips for Easy Data Management

Understanding Excel Sheet Splitting

Splitting Excel sheets might seem like a simple task, but it can significantly improve your data management. With multiple sheets, Excel workbooks can become cluttered, making it difficult to manage and analyze data efficiently. Here’s how to streamline your workflow by effectively splitting your Excel sheets:
Why Split Excel Sheets?

- Organization: Keep related data together for easier analysis and review.
- Performance: Excel performs better when handling smaller datasets.
- Collaboration: Share specific data with team members without exposing the entire workbook.
- Archival: Archive or backup certain data sets separately for future reference.
How to Split Sheets in Excel

Method 1: Manual Splitting
The simplest way to split sheets in Excel is through manual manipulation:- Open your Excel workbook with multiple sheets.
- Right-click on the sheet you want to split, and select 'Move or Copy'.
- In the dialog box, under 'To Book:', choose 'New Book'.
- Check the 'Create a Copy' box if you want to keep the original data intact.
- Click 'OK'. Excel will create a new workbook with the copied sheet.
📋 Note: This method preserves the original workbook, creating a new one with just the selected sheet. Ensure you save this new workbook with an appropriate name.
Method 2: Using VBA (Visual Basic for Applications)
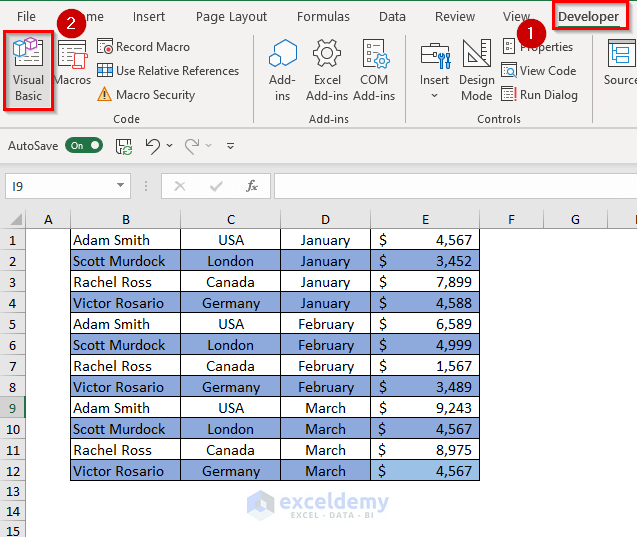
For those comfortable with coding or managing multiple sheets frequently, VBA offers a more automated approach:- Press `Alt + F11` to open the VBA editor.
- Go to 'Insert' > 'Module' to create a new module.
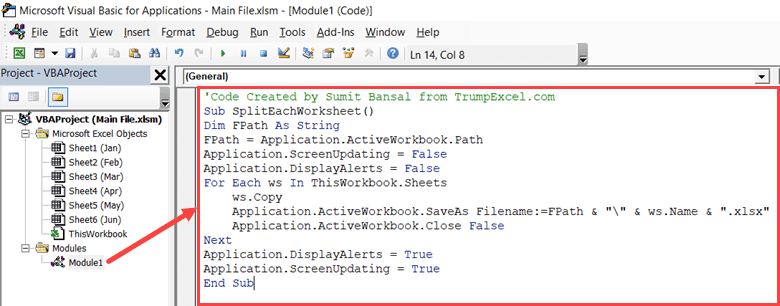
- Paste the following code into the module:
Sub SplitSheetsToNewWorkbooks()
    Dim ws As Worksheet
    For Each ws In ThisWorkbook.Sheets
        ws.Copy
        ActiveWorkbook.SaveAs "C:\Users\YourUsername\Desktop\" & ws.Name & ".xlsx"
        ActiveWorkbook.Close False
    Next ws
End Sub
- Modify the file path in the code to where you want the new workbooks saved.
- Close the VBA editor.
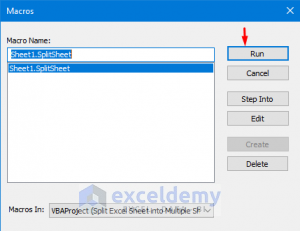
- Run the macro by pressing `Alt + F8`, selecting the macro name, and clicking 'Run'.
💾 Note: This macro will create individual Excel files for each sheet in your current workbook. Be cautious with the file path and ensure there's enough space for the new files.
Advanced Techniques for Splitting Excel Sheets

Using Power Query

Excel’s Power Query is an incredibly powerful tool for data transformation and management:
- Go to the 'Data' tab, then 'From Table/Range' or 'From Other Sources'.
- Select 'From Table/Range' to load your data into Power Query.
- Once in Power Query Editor, click 'Home' > 'New Source' > 'Blank Query'.
- Enter the following code in the Advanced Editor to create a custom function for splitting:
let
    splitList = (Table as table) =>
    let
        columnName = Table.ColumnNames(Table){0},
        splitBy = Table.Column(Table, columnName),
        splits = List.Split(splitBy, {100}),
        result = List.Transform(splits, each Table.FromList(_, null, null, null, columnName))
    in
        result
in
    splitList
- Save and close the Advanced Editor.
- Use this function to split your data into separate tables, then load each back into Excel as new sheets.
🔎 Note: Power Query can be used to apply more complex splitting criteria than simple row counts, allowing for greater data manipulation flexibility.
Using Third-Party Add-Ins

For those less familiar with coding or wanting a user-friendly GUI:
- Use tools like ASAP Utilities or Kutools for Excel.
- These add-ins often provide straightforward options to split sheets based on various criteria like content, size, or even filtering rules.
Managing Split Sheets

Organizing Split Sheets

Once you’ve split your Excel sheets:
- Save each new workbook with a descriptive name indicating the content or purpose of the data.
- Create a master sheet or document listing all the split files for easy reference.
Data Integrity

When splitting:
- Ensure formulas that reference other sheets are updated or preserved.
- Check for data consistency across the split files to avoid discrepancies.
- Use conditional formatting or Data Validation rules to maintain data integrity.
Best Practices for Excel Sheet Management

Regularly Review and Organize Sheets

- Regularly review your sheets to keep them up-to-date, removing or archiving unnecessary data.
- Use named ranges or defined names for clarity and ease of navigation.
Archiving and Version Control

- Maintain archived versions of split sheets to track changes or revert if needed.
- Utilize version control if multiple users are working on the data.
Backup and Recovery

- Regularly back up your Excel workbooks, especially after major changes or splitting operations.
- Consider using cloud storage solutions for easy recovery and accessibility.
In summary, splitting Excel sheets can enhance your data management, allowing for better organization, collaboration, and performance. Whether you choose manual methods, VBA, Power Query, or third-party tools, the key is to ensure data integrity and maintain a structured approach to managing your data. By understanding these methods and following best practices, you can make your Excel workflow more efficient, reducing the time spent searching for or analyzing data.
What’s the benefit of splitting Excel sheets?

+
Splitting Excel sheets can improve data management by reducing clutter, speeding up file performance, making sharing easier, and aiding in archival processes. It helps in maintaining organization and focusing on specific data subsets.
Can I undo a split sheet?
+If you’ve manually split sheets, you can manually combine them back. However, if you’ve used a macro or add-in, you might need to keep a backup or manually merge the files. Always ensure you have a backup before splitting.
How do I ensure data integrity when splitting sheets?
+To maintain data integrity:
- Update or preserve formulas that reference other sheets.
- Verify data consistency across split files.
- Use conditional formatting and data validation rules to ensure data accuracy.


