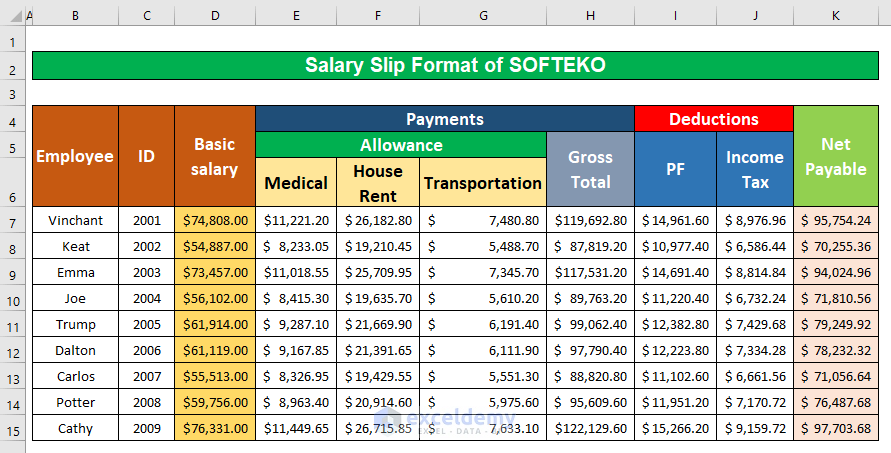
5 Easy Steps to Create a Salary Slip in Excel

Creating a salary slip in Excel is an essential skill for anyone involved in payroll management, financial administration, or even personal finance tracking. A well-structured salary slip not only ensures transparency in payment details but also acts as an official document for tax filings, loan applications, and other financial verifications. This guide will take you through five straightforward steps to craft a detailed, accurate, and professional-looking salary slip using Microsoft Excel.
Step 1: Setting Up Your Spreadsheet

Before diving into the creation process, prepare your Excel environment:
- Open Microsoft Excel and create a new workbook.
- Save your file with a descriptive name like “Salary Slip - [Employee Name].”
- Set up the page layout by adjusting margins, orientation, and print area.
Step 2: Header Information

Begin your salary slip with the company and employee details:
- Company Name
- Logo (if available)
- Salary Slip Title
- Employee Details (Name, ID, Department)
- Pay Period
Here’s how to format the header:
- Merge cells A1 to E1 for the company name.
- Insert the logo in A1 with wrap text and alignment options to center it.
- Insert the title “Salary Slip” in B2.
- Enter employee details from B3 to E3.
- Enter the pay period in A4.

Step 3: Earnings and Deductions

The core of the salary slip includes:
- Earnings: Basic Pay, HRA (House Rent Allowance), Conveyance, Medical, Bonus, etc.
- Deductions: Provident Fund (PF), Employee State Insurance (ESI), Income Tax (TDS), Professional Tax, etc.
To structure this part:
- Begin your table from A5 to D9, using headers like “Earnings,” “Deductions,” “Amount,” and “Total.”
- List each component of earnings in the Earnings column with corresponding amounts.
- Similarly, list all deductions under the Deductions column.
- Use formulas to sum up the totals for each category. For example, in D9, use “=SUM(B6:B9)” for total earnings.
Step 4: Calculating Net Pay

Net Pay is the actual amount the employee takes home:
- Subtract total deductions from total earnings. In D11, enter the formula: “=D9 - D10.”
- Label this cell with “Net Pay.”
💡 Note: Always ensure that all formula inputs are correctly referenced to avoid calculation errors.
Step 5: Finalizing and Formatting

Once the core calculations are done, finalize the slip:
- Proofread: Double-check all figures, formulas, and text for accuracy.
- Format: Use Excel’s formatting tools to:
- Make titles and headings bold.
- Use borders or gridlines for clarity.
- Align figures and text appropriately.
- Apply cell color to distinguish between sections (earnings vs. deductions).
- Format numbers as currency with proper decimal places.
- Signature: Add space for signatures or approvals at the bottom.

Creating a salary slip in Excel not only streamlines payroll processing but also ensures that both the employee and employer have a clear, accurate document for financial records. By following these steps, you can produce a professional document that serves its purpose effectively.
Can I use this template for multiple employees?

+
Yes, you can easily modify this template to accommodate different employees by changing personal details and adjusting the formula references.
What if my company uses different earning or deduction components?

+
Simply replace or add components to fit your company’s payroll structure. Ensure to update your formulas accordingly.
How do I secure the salary slip to prevent unauthorized changes?

+
Excel allows you to password-protect your workbook or worksheet. You can also lock cells to prevent editing of formulas and data.
Can this be automated for recurring salaries?

+
With the use of macros or Excel’s Power Query, you can automate much of the data entry and calculation processes, making it easier to update and distribute salary slips each month.


