Excel Magic: Transform One Sheet into Many

When working with large datasets, managing everything in one Excel sheet can become unwieldy and difficult to navigate. This is where the power of splitting a single sheet into multiple sheets comes into play. Whether you're managing a business database, compiling research data, or simply trying to organize personal finances, Excel provides a variety of methods to achieve this with ease and efficiency. In this comprehensive guide, we'll delve into different techniques for transforming one Excel sheet into many, offering you a step-by-step process, tips for optimization, and solutions to common pitfalls.
Why Split Excel Sheets?

Before we jump into the methods, let’s understand why you might want to split your Excel data:
- Improved Organization: Segregating data into different sheets helps in organizing information, making it easier to find what you need.
- Data Management: Managing separate sheets can reduce errors during data entry or analysis, as each sheet can focus on a specific category or dataset.
- Enhanced Performance: Smaller datasets within separate sheets can improve Excel’s performance, especially when dealing with large files.
- Better Collaboration: Different team members can work on different sheets simultaneously, which can streamline workflows.
Method 1: Using Excel’s Built-in Features

Using Filters and Copy-Paste

One of the simplest ways to split data into separate sheets is by using filters:
- Select your data range or entire sheet.
- Apply filters (Ctrl + Shift + L or Home > Sort & Filter > Filter).
- Filter by a specific column which you want to split by.
- Copy the filtered data and paste it into a new sheet.
- Repeat for all relevant categories.
This method is quick but can be repetitive if you have numerous categories:
Using Advanced Filter

Another built-in tool is the Advanced Filter, which can be more efficient:
- Define a criteria range to filter your data.
- Go to Data > Advanced, select your list range, and the criteria range.
- Choose to copy to another location and specify the destination.
- Hit OK to get the filtered data in the new sheet.
⚠️ Note: When using advanced filters, ensure your criteria range is set up correctly to avoid incomplete or incorrect data splits.
Method 2: VBA Macro for Automated Splitting

Visual Basic for Applications (VBA) offers a more automated approach:
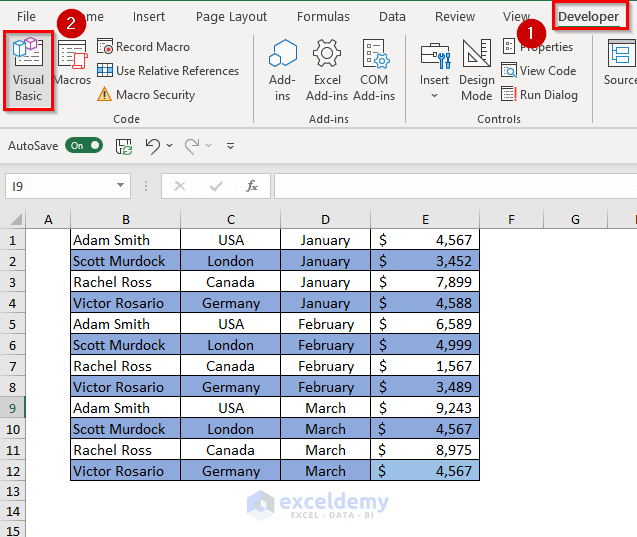
- Creating a VBA Macro: Go to Developer > Visual Basic, insert a new module, and write or paste the following code:
Sub SplitSheet() Dim ws As Worksheet Dim lastRow As Long, lastCol As Long Dim wsName As String Dim i As Long, j As Long Dim newWs As WorksheetSet ws = ActiveSheet lastRow = ws.Cells(ws.Rows.Count, 1).End(xlUp).Row lastCol = ws.Cells(1, ws.Columns.Count).End(xlToLeft).Column For i = 2 To lastRow wsName = ws.Cells(i, 1).Value On Error Resume Next Set newWs = Sheets(wsName) On Error GoTo 0 If newWs Is Nothing Then Set newWs = Worksheets.Add(After:=Sheets(Sheets.Count)) newWs.Name = wsName End If For j = 1 To lastCol ws.Cells(i, j).Copy Destination:=newWs.Cells(Rows.Count, 1).End(xlUp).Offset(1, 0) Next j Set newWs = Nothing Next i
End Sub
This macro assumes data in column A determines new sheet names. Adjust as necessary for your data structure.
Method 3: Power Query and Power Pivot

Power Query and Power Pivot are advanced tools for Excel that can offer powerful data manipulation capabilities:
Power Query

To split data using Power Query:
- Go to Data > Get Data > From Other Sources > Blank Query.
- Use M language to script the data transformation:
let Source = Excel.CurrentWorkbook(){[Name=“Sheet1”]}[Content], GroupedRows = Table.Group(Source, {“Category”}, {{“Data”, each _, type table}}), SplitIntoSheets = GroupedRows[Data], NewTables = List.Transform(SplitIntoSheets, (x) => {“Create ” & x{0}[Category], “Worksheet”, x}) in NewTables - Load these into Excel, and each table will appear on a separate sheet.
Power Pivot

If you’re dealing with complex data relationships:
- Use Power Pivot to create relationships between tables, then export each related table into separate sheets.
Tips for Seamless Splitting

- Backup your data: Always keep a backup before manipulating large datasets.
- Name your sheets logically: Use clear and descriptive names for sheets to enhance navigation.
- Use dynamic named ranges: This can help when your data changes frequently, ensuring that your sheets update automatically.
Splitting an Excel sheet into multiple sheets can streamline your data management, enhance performance, and improve the overall usability of your Excel workbooks. By mastering these techniques, you can automate your work processes, collaborate more effectively, and handle large volumes of data with ease. Remember, while Excel provides many tools for data manipulation, the key is to use them wisely to maximize efficiency and accuracy.
What is the simplest way to split data in Excel?

+
The simplest method involves using the AutoFilter feature to sort your data by a specific column and then copy-pasting the filtered data into new sheets.
Can I automate the process of splitting data in Excel?

+
Yes, you can automate this process using VBA macros or Power Query to dynamically create new sheets based on your criteria.
What should I do if I want to split data but keep the original data intact?

+
Always work on a copy of your data. Use techniques like advanced filters or VBA macros where you can choose to leave the original data unchanged.


