3 Easy Steps to Copy Excel Sheets to Google Drive

Managing spreadsheets can be a daunting task, especially when it comes to sharing and collaborating on documents. While Microsoft Excel has been the traditional tool for handling such data, Google Sheets offers seamless cloud storage, collaboration features, and access across multiple devices. In this blog, we'll walk through three easy steps to copy your Excel sheets into Google Drive, making your data readily accessible and collaborative. Here's how to get started:
Step 1: Prepare Your Excel File

Before you dive into transferring your Excel sheets to Google Drive, it’s crucial to ensure your Excel file is ready for the move. Here’s what you should do:
- Review and clean up - Check for any errors, remove unnecessary cells, and confirm all formulas work as expected.
- Save as Excel Workbook - If you’ve been working in Excel Online or an older version, make sure to save it in the latest Excel workbook format (.xlsx).
- Make a backup - Always create a backup of your original Excel file to avoid data loss during transfer.
🔍 Note: Remember to check for compatibility issues if your Excel file contains macros or VBA scripts as these might not transfer directly to Google Sheets.
Step 2: Upload to Google Drive

Now that your Excel file is prepped, let’s get it onto Google Drive:
- Navigate to Google Drive and sign in with your Google account.
- Click on the “New” button on the left side, then select “File upload” to open your local file explorer.
- Find your Excel file, select it, and hit “Open” to start the upload process.
Once the file has been uploaded, it will appear in your Google Drive. Here is where you can see its status and ensure the upload was successful:
| Status | Description |
|---|---|
| Green Check | File uploaded successfully. |
| Red X | File failed to upload; retry or check your connection. |
| Spinning Icon | File is still uploading; wait for completion. |

⏳ Note: Large files might take longer to upload. Make sure your internet connection is stable throughout the upload process.
Step 3: Convert to Google Sheets

Now, the final step is to convert your Excel file into a Google Sheet:
- Right-click on the uploaded Excel file in Google Drive.
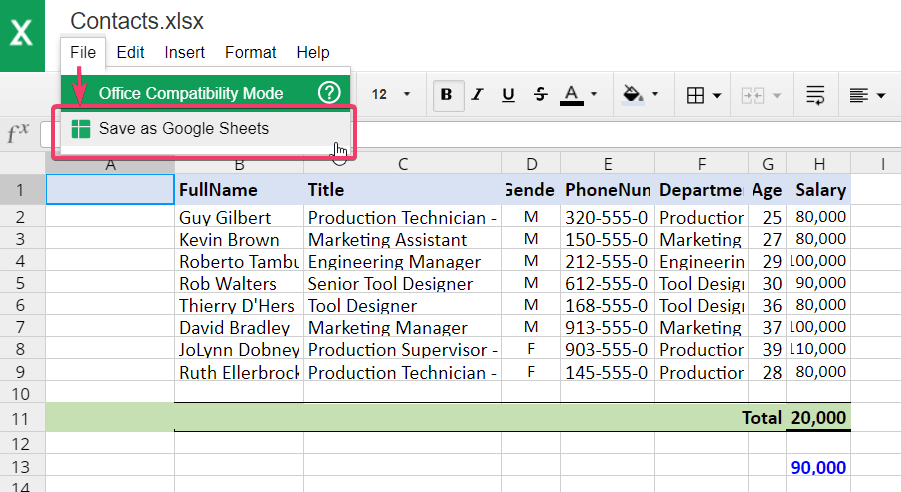
- Choose “Open with”, then select “Google Sheets”. This action will open your Excel file in a new tab, converting it to a Google Sheet.
- If you wish to keep both formats, you can select “Make a copy” instead, which will create a duplicate Google Sheets file while keeping the original Excel format intact.
📝 Note: Once converted, you can decide to delete the original Excel file if you no longer need it, or you might want to save it as a backup.
And there you have it! Your Excel sheet is now live in Google Drive, ready for collaboration and sharing. Remember, these steps ensure that your spreadsheet data is not only accessible but also protected through Google's robust security measures.
By following these straightforward steps, you've made your Excel data easily sharable and editable in the cloud, enhancing collaboration and productivity. Keep in mind, the transition from Excel to Google Sheets can occasionally encounter formatting issues, so it's good practice to review your sheets after conversion.
How do I know if my file has successfully converted?

+
After the conversion, the file should open in a new tab with the Google Sheets interface. If the conversion was successful, you will see all your data intact in the new Google Sheet, though some Excel-specific features might not transfer over perfectly.
Can I still access my original Excel file after converting it to Google Sheets?

+
Yes, unless you choose to delete it, the original Excel file remains in your Google Drive. You can always revert back if needed or keep it for backup purposes.
What should I do if I encounter issues during the upload or conversion process?

+
Check your internet connection first. If it’s stable, try uploading again. For conversion issues, ensure your Excel file isn’t too large or contains complex formatting or macros that aren’t supported by Google Sheets.


