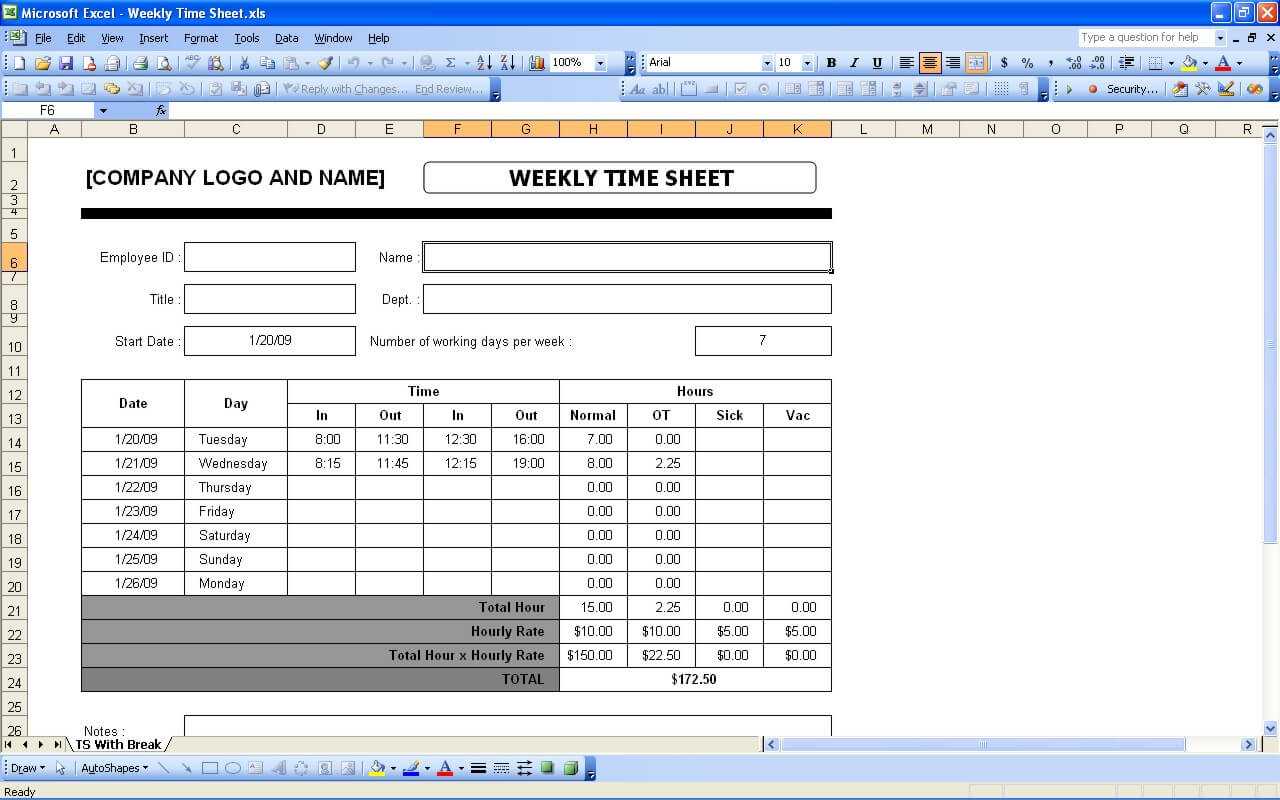
5 Simple Ways to Calculate Timesheets in Excel

Timesheets are essential tools for businesses and freelancers alike, enabling efficient time management and accurate payroll processes. Excel, Microsoft's powerful spreadsheet software, is widely used for this purpose due to its flexibility and functionality. Here are five simple ways to create and calculate timesheets using Excel, making your time tracking both effective and straightforward.
1. Using Basic Formulas

To start with basic timesheet calculation, you'll need to:
- Create headers for Date, Start Time, End Time, and Total Hours in your spreadsheet.
- Input the date, start, and end times in their respective columns. Ensure time entries are in the format hh:mm.
- To calculate the total hours worked, use the formula:
=TEXT(B2-A2, "hh:mm")
This formula subtracts the start time from the end time. Here’s how it breaks down:
- B2: Cell containing the start time
- A2: Cell containing the end time
TEXT(..., "hh:mm"): Converts the time difference into a readable format.
🛈 Note: Ensure time values are entered as hh:mm or hh:mm:ss for accuracy.
2. Leveraging Excel's Time Format

Excel has a special time format that can directly calculate the difference:
- Change the cell format for the Total Hours column to Time.
- Enter the formula:
=D2-C2
Where D2 and C2 are the cells containing the end and start times respectively. Excel will automatically display the result in time format, but you can format it further to show only hours and minutes.
3. Creating a Weekly Summary

For a more comprehensive weekly view:
- Set up a table with columns for each day of the week.
- Use the sum function to calculate the total time for each day:
=SUM(Day1!C2:D7,Day2!C2:D7,...)
Here, Day1, Day2, etc., are different sheets or tabs within the workbook for each day of the week. Replace C2:D7 with the actual range where times are entered.
4. Implementing a Timesheet Template with Macros

Macros can automate repetitive tasks like:
- Filling in dates automatically.
- Formatting cells as needed.
- Summing up hours at the end of the week or month.
To implement a macro:
- Go to Developer tab > Visual Basic, then Insert Module.
- Enter your VBA code to automate tasks:
Sub AutoFill()
    'Automate date filling for a week
    With ThisWorkbook.Worksheets("Timesheet")
        .Range("A2").Value = Date
        .Range("A2:A7").DataSeries Rowcol:=xlColumns, Type:=xlChronological, Date:=xlDay, Step:=1, Trend:=False
    End With
End Sub
This macro automatically fills in the dates for one week when you press a button.
⚠️ Note: Using macros requires enabling the Developer tab in Excel and understanding basic VBA.
5. Advanced Timesheet with Conditional Formatting and Validation

To enhance your timesheet:
- Use Data Validation to limit input types and ensure data accuracy.
- Apply Conditional Formatting to highlight overtime, late arrivals, or specific time thresholds:
=A2>="17:00"
This will highlight any end time entry that's after 5 PM in red, indicating overtime.
A summary table for your timesheet might look like this:
| Day | Total Hours | Over Time |
|---|---|---|
| Monday | 8:00 | 0:00 |
| Tuesday | 7:45 | 0:15 |
| Wednesday | 9:00 | 1:00 |
| Thursday | 8:00 | 0:00 |
| Friday | 8:30 | 0:30 |

💡 Note: Advanced features like this make the timesheet more interactive and user-friendly, increasing productivity by minimizing errors.
In conclusion, Excel offers versatile tools for creating timesheets. Whether you are a freelancer needing to track hours worked or a company managing employee time, these methods range from simple formulas to complex macros, providing solutions that fit various needs. By employing these techniques, you can ensure time management is both accurate and streamlined, leading to more efficient operations and better financial oversight.
How do I ensure accuracy when using formulas in Excel timesheets?

+
Regularly check the formula inputs and outputs, and ensure time entries are formatted correctly. Consider using Data Validation to restrict input types, reducing the chance of incorrect data entry.
Can I share my Excel timesheet template?

+
Yes, you can share your Excel timesheet template through file sharing methods like email attachments or cloud storage. Ensure sensitive information is protected when sharing, especially if using macros or conditional formatting.
What are the benefits of using macros for timesheets?

+
Macros can automate repetitive tasks like formatting, data entry, and calculations, saving time and reducing errors. They allow for custom functions tailored to your timesheet’s unique requirements, making it more efficient to track and analyze time worked.


