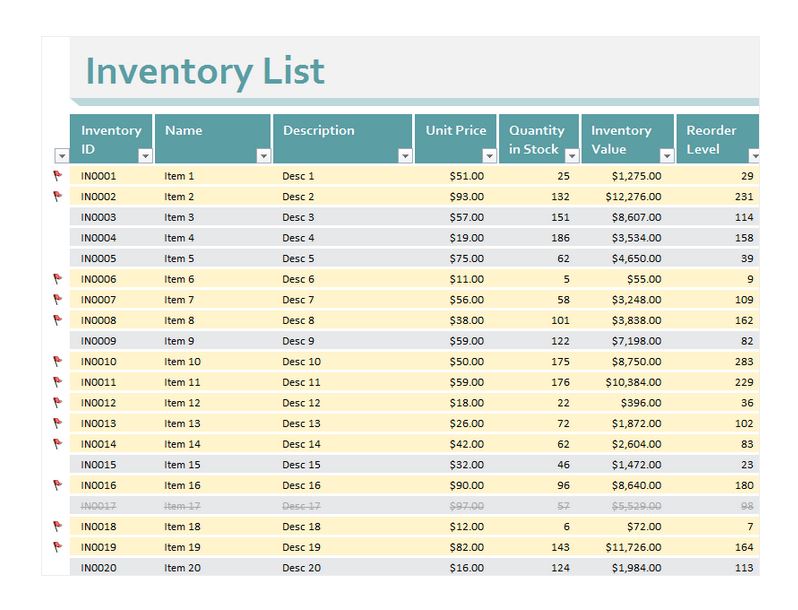
5 Advanced Excel Tips for Inventory Sheets

Managing inventory is crucial for any business that deals with physical products, and Excel remains one of the most versatile tools for this task. While many businesses start with basic spreadsheets for their inventory tracking, leveraging advanced Excel features can dramatically enhance efficiency and accuracy. Here are five advanced Excel tips specifically tailored to help you manage and optimize your inventory sheets.
1. Using Named Ranges for Easy Navigation

Named ranges in Excel allow you to assign meaningful names to specific cells or ranges, which can simplify navigation, formulas, and overall readability of your inventory sheets. Here’s how you can set up named ranges:
- Select the Cell or Range: Choose the cells you want to name.
- Open the Name Box: Located to the left of the formula bar.
- Type the Name: Enter a descriptive name for your range (e.g., ProductID).
- Confirm: Press Enter to save the name.
Benefits include:
- Easier navigation through large datasets.
- More intuitive formula writing, reducing errors and speeding up work.
- Reduced need to remember cell references, which can be particularly helpful in complex sheets.
2. Conditional Formatting for Visual Inventory Alerts

Excel’s conditional formatting feature lets you apply formatting based on cell values, making it easier to spot inventory issues at a glance. Here’s how to set it up:
- Select the Data Range: Highlight the cells where you want to apply conditional formatting.
- Access Conditional Formatting: From the Home tab, click on “Conditional Formatting.”
- Create New Rule: Choose “New Rule” and select the type of condition (e.g., Cell Value or Formula).
- Set the Condition: For example, set up a rule to highlight cells where inventory levels are low.
- Choose Formatting: Select colors, icons, or data bars to represent different inventory states.
⚠️ Note: Overuse of conditional formatting can slow down Excel, so use it judiciously on large datasets.
3. Data Validation to Ensure Data Integrity

Data validation helps maintain accuracy in your inventory by restricting what data users can enter into cells. This is particularly useful for:
- Category Selection: Limit entries to predefined categories.
- Units of Measure: Ensure consistency in units used across your sheet.
- Quantity Checks: Prevent negative or zero values where inventory quantities are concerned.
To set up data validation:
- Select the Range: Choose where validation rules should apply.
- Go to Data Validation: From the Data tab, select “Data Validation.”
- Define the Rule: Set criteria like whole numbers, date, list, etc., and customize the message shown when invalid data is entered.
4. PivotTables for Dynamic Inventory Analysis

PivotTables offer an interactive way to summarize, analyze, and present your inventory data without altering the original dataset:
- Create a PivotTable: Select your data and choose “PivotTable” from the Insert tab.
- Build Your Analysis: Drag fields into Rows, Columns, Values, and Filters to get different views of your data.
- Drill Down: Use the pivot to focus on specific inventory items, dates, or any relevant category to analyze trends or issues.
5. Advanced Formulas for Inventory Calculations

To manage inventory effectively, Excel’s formula capabilities can be used to automate calculations:
- Lookup Functions: Use VLOOKUP or INDEX/MATCH for product information retrieval.
- Array Formulas: For batch operations like checking if inventory levels are below par levels.
- Conditional Aggregations: Employ functions like COUNTIFS, SUMIFS to analyze inventory based on multiple criteria.
In summary, mastering these advanced Excel tips for inventory sheets can significantly improve the way you manage and analyze your business's stock. Using named ranges simplifies navigation, conditional formatting provides visual cues for inventory management, data validation ensures data integrity, PivotTables allow for dynamic analysis, and advanced formulas automate complex inventory calculations. Integrating these techniques will not only save time but also reduce errors, providing a more professional and efficient inventory management system.
Why should I use named ranges in my inventory sheet?

+
Named ranges make your inventory sheet more intuitive to navigate and formulas easier to read, reducing errors and speeding up data management tasks.
How can conditional formatting help with inventory management?

+
Conditional formatting allows you to visually identify inventory levels that require attention, such as low stock or expiring items, directly in your spreadsheet.
Can I use Excel on my phone to manage inventory?

+
Yes, Excel for mobile provides most of the core functionality, though advanced features might be less intuitive on a smaller screen. However, you can still open, edit, and update your inventory sheets on the go.


