Automatically Split Excel Data into Sheets: A Guide

Ever found yourself grappling with large datasets in Microsoft Excel? When dealing with extensive data, the need to organize it efficiently is paramount. One effective method for managing data is splitting it into different sheets within the same workbook. This guide will walk you through the process of automatically splitting data into sheets in Excel, offering you tips and tricks to streamline your work.
Understanding Why to Split Data


Before diving into the how-to, let’s first explore why you might want to split your data:
- Organization: Splitting data by categories or criteria can make information retrieval faster and more intuitive.
- Analysis: For analyses like pivot tables or financial reporting, separate sheets for different datasets can simplify the process.
- Collaboration: Working on a project with a team? Assigning separate sheets can prevent conflicts while editing.
Manual Data Splitting

If you’re dealing with a small dataset, you might choose to split data manually:
- Identify your criteria (e.g., department, date range, product type).
- Copy and paste data into new sheets for each category.
However, this becomes impractical with larger datasets.
Using Excel Formulas to Split Data

Here’s how to leverage Excel’s powerful formulas for automation:
- INDEX and MATCH: Use these to extract data for specific categories into new sheets.
- VLOOKUP or XLOOKUP: To find and move matching data to new sheets based on certain keys.
Dynamic Ranges and Tables

Excel’s dynamic named ranges or tables can make your data splitting more responsive to changes:
- Create a Table: Convert your range into a table (Ctrl+T). Excel will now automatically expand or contract the table as rows are added or removed.
- Dynamic Named Range: Use the OFFSET formula combined with COUNTA to define ranges that adjust based on data length.
Automating the Process with VBA

For more advanced users, VBA scripting can automate the entire process:
- Create a Macro: Write a VBA macro to loop through rows, check against your criteria, and paste into new sheets.
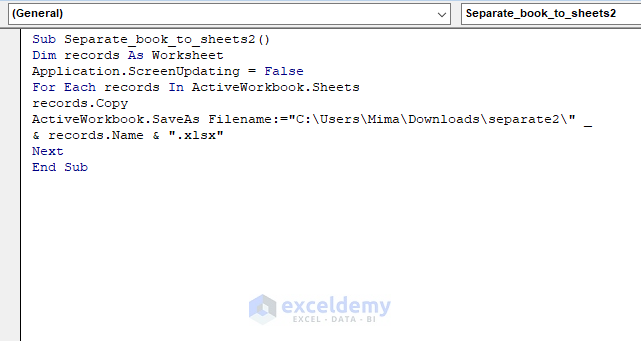
- Sample VBA Script: Here’s a basic example:
Sub SplitDataToSheets() Dim lastRow As Long, ws As Worksheet, rng As Range, cell As Range, criteria As String, sheetExists As Boolean Dim sh As Worksheet With ThisWorkbook.Sheets(“MasterData”) lastRow = .Cells(.Rows.Count, “A”).End(xlUp).Row Set rng = .Range(“A2:A” & lastRow) End WithFor Each cell In rng criteria = cell.Value sheetExists = False For Each sh In ThisWorkbook.Sheets If sh.Name = criteria Then sheetExists = True Exit For End If Next sh If Not sheetExists Then Set ws = ThisWorkbook.Sheets.Add(After:=ThisWorkbook.Sheets(ThisWorkbook.Sheets.Count)) ws.Name = criteria Else Set ws = ThisWorkbook.Sheets(criteria) End If cell.EntireRow.Copy Destination:=ws.Range("A" & ws.Rows.Count).End(xlUp).Offset(1, 0) Next cell
End Sub
💡 Note: This VBA code example assumes the first column in "MasterData" contains the criteria for splitting. Ensure your VBA environment is active before running macros.
Using Power Query to Split Data

Excel’s Power Query is another tool for dynamic data management:
- Load Data: Use Power Query to load and clean your data.
- Transform Data: Add conditional columns based on your criteria.
- Split into Sheets: Use the ‘Group By’ feature in Power Query to create separate sheets.
Important Tips for Data Splitting

- Data Validation: Ensure your splitting criteria are consistent and valid to avoid errors.
- Error Handling: Include error handling in VBA to deal with unexpected issues like duplicate sheet names.
By breaking down extensive datasets into manageable chunks, your workflow becomes more efficient. Excel offers various methods to automate this process, from simple formulas to complex VBA scripting. Each method has its place depending on the size and complexity of your data. Mastering these techniques will not only save time but also improve the accuracy of your data manipulation tasks.
Now, as you embark on organizing your data, remember:
- Use formulas for simple splitting needs.
- Tables and named ranges offer flexibility.
- VBA is your tool for complex automation.
- Power Query provides an interface for non-coders to manage data splitting dynamically.
With this knowledge, you are equipped to handle even the largest of datasets with ease, ensuring that your data is organized, accessible, and ready for analysis or reporting.
Discovering the full potential of Excel's data splitting capabilities can transform your data management experience, allowing for more insightful analysis, efficient reporting, and effective collaboration.
How can I tell if Excel’s VBA is enabled?

+
Go to File > Options > Trust Center > Trust Center Settings. Ensure “Enable all Macros” is selected.
Can I undo data splitting in Excel?

+
Yes, you can merge sheets back into one by selecting the data from the split sheets, copying, and pasting into a master sheet. Keep a backup of your original data to undo splitting.
What happens if I add data after splitting?

+
If using tables or dynamic named ranges, Excel will automatically accommodate new data. For manual splitting, you’ll need to update each sheet manually or rerun your VBA script or Power Query transformation.
Can I split data across multiple workbooks?

+
Yes, by modifying the VBA script or using Power Query, you can export data into separate workbooks. This requires adjusting your code to save and close workbooks.


