Easily Add Sheet Names to Excel Footers: Simple Guide

Introduction to Adding Sheet Names in Excel Footers

Excel, a cornerstone in the world of spreadsheet software, offers a myriad of features designed to enhance user efficiency and document management. One such useful feature is the ability to include the current sheet name dynamically in the footer of your Excel document. This simple yet powerful functionality can save time, reduce errors, and provide a professional touch to your spreadsheets, making them more navigable and easier to manage, especially in workbooks with multiple sheets. In this guide, we'll walk through the steps to set this up using Excel's built-in tools, ensuring your documents are not only organized but also informative at a glance.
Why Use Sheet Names in Excel Footers?

Before we delve into the technical steps, understanding the advantages of having sheet names in your Excel footers can underscore the value of this feature:
- Enhanced Document Navigation: When dealing with workbooks containing several sheets, identifying which sheet you're on becomes straightforward, especially if you're printing or sharing these documents.
- Professional Presentation: Adding the sheet name automatically improves the look and professionalism of your spreadsheets, making it clear what each page represents without manual input.
- Time-Saving: You eliminate the need to manually update footers each time a sheet's content or purpose changes. This feature updates the footer automatically when sheets are renamed, ensuring your documentation remains up-to-date effortlessly.
Steps to Add Sheet Names to Excel Footers

Step 1: Open Excel and Your Workbook

Begin by launching Excel and opening the workbook you wish to modify. This could be a new spreadsheet or one you've been working on.
Step 2: Access the Page Layout View

To modify the header/footer, switch to Page Layout view. Here are two ways to do this:
- Go to the ‘View’ tab and click on ‘Page Layout’.
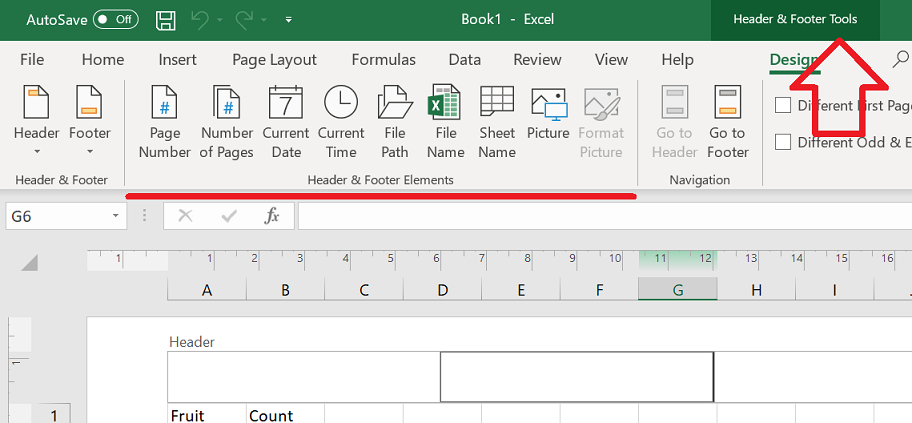
- Alternatively, you can double-click the footer section at the bottom of any sheet, which will also transition you into Page Layout view.
Step 3: Access the Page Setup Dialog

Once in Page Layout view:
- Click on the ‘Page Layout’ tab.
- Find and click on ‘Dialog Box Launcher’ in the ‘Page Setup’ group, which looks like a small arrow in the corner of the group.
- Select the ‘Header/Footer’ tab in the Page Setup dialog box that appears.
Step 4: Insert the Sheet Name in the Footer

With the Header/Footer tab open:
- Click on either ‘Custom Header’ or ‘Custom Footer’ to choose where you want the sheet name to appear.
- On the left, right, or center section, click the ‘Sheet Name’ button. This button might be symbolized by an icon or labeled ‘Sheet Name’. If you don’t see it, click on ‘Format Text’ to access more options.
- Excel will insert ‘&[Tab]’ which is the code for displaying the sheet name.
📝 Note: The sheet name will display exactly as named in the workbook. If you rename a sheet, this change will automatically reflect in the footer.
Step 5: Review and Apply Changes

After adding the sheet name code:
- Click ‘OK’ to close the dialog box. Your changes will now appear in the footer of your active sheet.
- Preview your document in Print Preview to ensure the sheet name displays as expected.
Step 6: Apply to All Sheets

If you wish to add the sheet name to all sheets in the workbook:
- Right-click on any sheet tab and select ‘Select All Sheets’.
- Repeat Steps 4 and 5. Now, each sheet will have its respective name displayed in the footer.
💡 Note: Remember to deselect 'Select All Sheets' when you're done to prevent any accidental formatting across all sheets.
Additional Tips for Excel Footer Customization

While we've focused on adding the sheet name, Excel allows for a variety of footer customizations:
- Page Numbering: Insert page numbers for multi-page sheets.
- Date and Time: Add dynamic date and time to show when the document was last printed or modified.
- Workbook Name: Include the workbook's name along with the sheet name for comprehensive file identification.
Wrapping Up

In conclusion, adding sheet names to your Excel footers is a straightforward process that significantly improves document management and readability. It's a small change that has big impacts, from enhancing navigation in large workbooks to maintaining professional document standards. By automating the display of sheet names, you save time, reduce errors, and ensure your documents are always up-to-date with minimal effort. Remember, Excel is a powerful tool with many features waiting to be explored to streamline your work further.
Why should I add sheet names to my Excel footers?

+
Adding sheet names to Excel footers helps in document navigation, especially when dealing with workbooks containing multiple sheets. It automatically updates when sheets are renamed, reducing errors and manual updates.
How do I ensure the sheet name updates automatically?

+
By using the ‘&[Tab]’ code in the footer, Excel will automatically update the displayed sheet name whenever you rename the sheet.
Can I apply this footer change to all sheets at once?

+
Yes, you can apply the sheet name in the footer to all sheets simultaneously by selecting ‘Select All Sheets’ from the sheet tab’s right-click menu before making the change.


