Add Headers in Excel Sheets: Easy Guide

Managing data in Excel can streamline your work process, making tasks like organizing, analyzing, and presenting data much simpler. Adding headers to your Excel sheets is a critical step that can enhance readability and functionality. This guide will walk you through various methods to add and customize headers in Excel efficiently.
Why Use Headers in Excel?

Headers serve multiple essential purposes in your Excel sheets:
- Data Identification: Headers help users quickly identify what each column or row represents, reducing confusion in large datasets.
- Sorting and Filtering: They allow you to sort or filter your data, making data analysis more manageable.
- Formula Efficiency: Headers can be used in formulas to reference data dynamically, enhancing the sheet's automation capabilities.
- Table Formatting: Headers are key in formatting tables, which automatically format your data for better visual organization.
Methods to Add Headers in Excel

Method 1: Basic Text Entry

The most straightforward way to add headers is by typing them directly into the first row or column:
- Click the cell where you want to insert the header.
- Type in the header name or description (e.g., “Product Name,” “Price,” “Date”).
- Use the tab key or arrow keys to move to the next cell and add the subsequent headers.
📌 Note: This method works well for small datasets but can be time-consuming for larger lists.
Method 2: Using the Table Feature

Excel’s table feature automatically adds headers and provides additional formatting options:
- Select the range of data you wish to convert into a table.
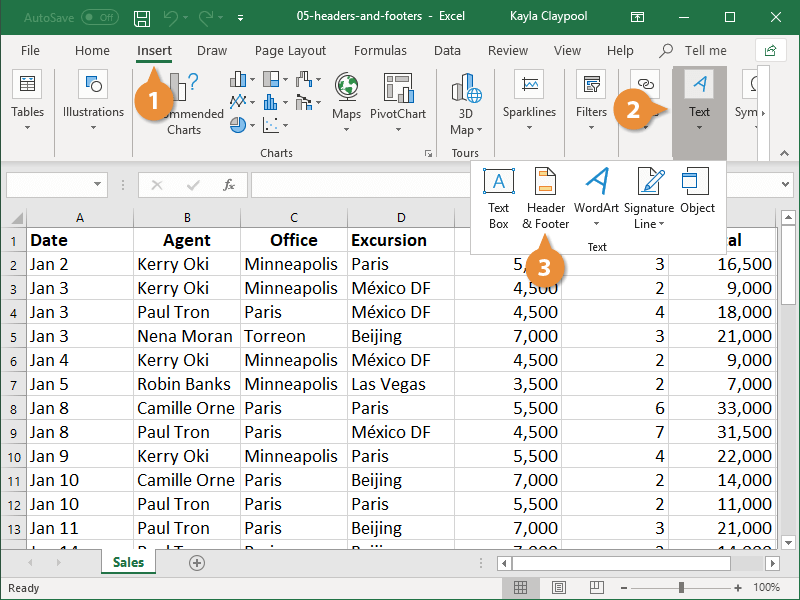
- Go to the Insert tab on the Ribbon.
- Click Table. Ensure the My table has headers checkbox is selected.
- Excel will convert your selection into a table, with the first row becoming headers.
- Customize these headers by clicking on them and editing the text.
| Before Table Conversion | After Table Conversion |
|---|---|
| Header1 | Header1 |
| Data1 | Data1 |

Method 3: Inserting Headers from Excel’s Formula Bar

If you’re working with a pre-existing dataset and need to insert headers:
- Click the row where you want to insert headers.
- Right-click, then choose Insert. This will add a new row above your selection.
- Type your headers into the newly created row.
Method 4: Dynamic Header Creation with Excel Formulas

For more advanced Excel users, you can dynamically create headers using formulas:
- Use the
IFfunction to determine header names based on conditions. - Employ
Text to Columnsfeature to split headers from data rows.
💡 Note: This method requires basic Excel formula knowledge but is useful for automating header setup in large datasets.
Customizing Headers

Once you’ve added headers, you might want to customize them for better clarity or visual appeal:
- Formatting: Change font, size, color, or apply bold/italic styles.
- Alignment: Center, left-align, or right-align your headers.
- Freeze Headers: To keep headers in view while scrolling, use the Freeze Panes feature.
- Merge Cells: If you want headers to span multiple columns, merge cells under the Home tab.
🖌 Note: Customizing headers not only improves readability but also helps users quickly grasp the structure of your spreadsheet.
Advanced Header Techniques

For users dealing with complex data sets or looking to optimize their Excel workflow, consider these advanced techniques:
- Conditional Formatting: Set up rules where headers highlight or color code data based on specific criteria.
- Dynamic Ranges: Use named ranges or table references to make your headers dynamically adapt to data changes.
- Data Validation: Create drop-down lists in headers to control data entry or sorting options.
Conclusion

Incorporating headers into your Excel sheets significantly enhances data management and analysis. By following the steps outlined in this guide, you can efficiently add, format, and customize headers, making your work more organized and your data more accessible. Remember, the key is not just to add headers but to do so in a way that improves your spreadsheet’s functionality and clarity, adapting to the size and complexity of your data.
Can I use the same header in multiple columns?

+
Yes, you can merge cells to make one header span over multiple columns. Simply select the columns you want the header to cover, right-click, choose “Format Cells,” then “Merge Cells,” and type your header.
What if I want to change my headers after they are already set?

+
Excel allows you to edit headers by simply clicking on them and typing in the new text. If your sheet is formatted as a table, make sure you’re in editing mode (the cursor should be a blinking line). Remember to update any references or formulas that might be tied to the old header names.
How can I sort data using headers?

+
Click on any cell within your table or data range. Then go to the “Data” tab, and click on “Sort.” You can choose to sort by the column you clicked, or select any column from the dropdown menu, ensuring your headers remain at the top for reference.
What’s the benefit of using dynamic headers?

+
Dynamic headers adjust automatically with changes in your data. For example, if new columns are added or existing ones are deleted, formulas or named ranges that reference headers will still work correctly, enhancing the robustness of your spreadsheet.


