Protect All Excel Sheets Simultaneously: Quick Guide

When working with Microsoft Excel, security and organization are paramount, especially if you deal with multiple sheets or workbooks filled with sensitive or critical information. Ensuring that these sheets are protected against unauthorized changes or viewing can be a daunting task, particularly if you have to do it one sheet at a time. But what if there was a way to protect all your Excel sheets simultaneously? This guide aims to demystify the process, making it quick and easy to safeguard your data.
Understanding Excel Sheet Protection

Before diving into the process of mass protection, it’s crucial to understand what sheet protection means:
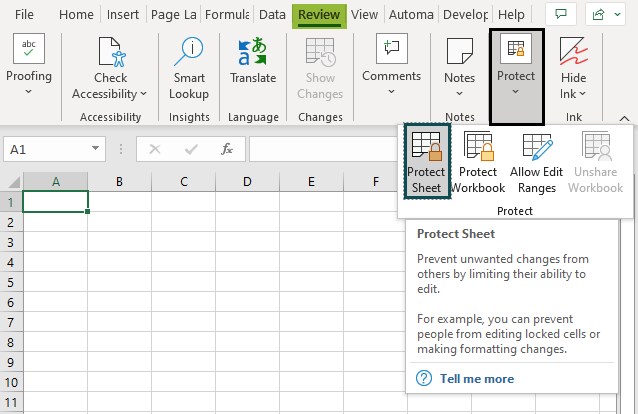
- Cell Locking: You can lock cells to prevent editing. By default, all cells are locked, but this only takes effect once the sheet is protected.
- Sheet Protection: This prevents users from inserting, deleting, or editing rows and columns, as well as altering formulas or formatting.
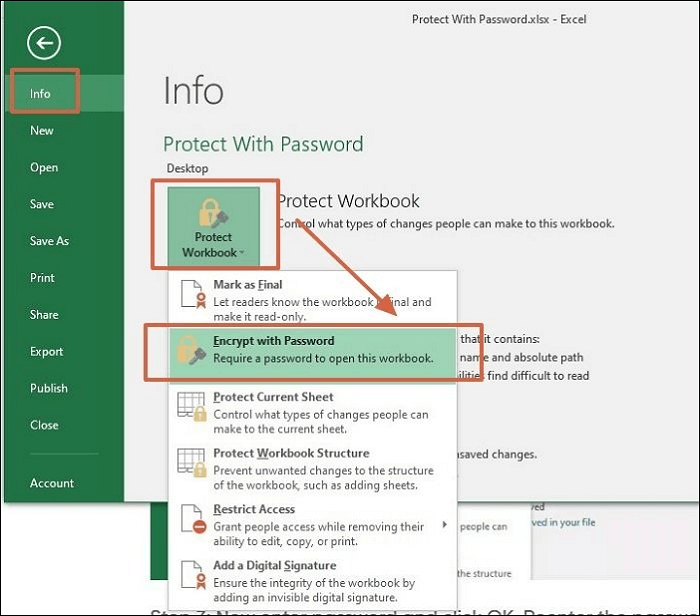
- Workbook Protection: Aims to prevent the structure of the workbook from being modified, like adding or deleting sheets.
How to Protect All Sheets at Once

Microsoft Excel does not provide a native feature to protect all sheets simultaneously, but you can utilize VBA (Visual Basic for Applications) to streamline this process:
Preparing for VBA

- Open your Excel workbook.
- Press
ALT + F11to open the VBA editor. - In the VBA editor, go to Insert > Module to create a new module.
Writing the VBA Code

Paste the following code into your new module:
Sub ProtectAllSheets()
    Dim ws As Worksheet
    Dim pwd As String

    pwd = InputBox("Enter password to protect sheets:")

    For Each ws In ThisWorkbook.Sheets
        ws.Protect Password:=pwd, DrawingObjects:=True, Contents:=True, Scenarios:=True
    Next ws

    MsgBox "All sheets have been protected.", vbInformation
End Sub
💡 Note: The above code is case-sensitive. Ensure you type everything correctly, including the `pwd` and `ws` variable names.
Running the Code

- Go back to Excel, and run the macro by pressing
ALT + F8, selecting ProtectAllSheets, and clicking Run. - Enter a password when prompted; this will be the key to unlock all protected sheets.
- A message box will confirm that all sheets are now protected.
Additional Options for Sheet Protection

Excel provides several options you might want to customize during sheet protection:
- Select Locked Cells: Allow or disallow the selection of locked cells.
- Select Unlocked Cells: Allow or disallow the selection of unlocked cells.
- Format Cells: Allow or disallow formatting.
- Insert Rows/Columns: Prevent users from inserting new rows or columns.
- Delete Rows/Columns: Prevent users from deleting rows or columns.
- Sort: Control sorting functionality.
- Use AutoFilter: Restrict the ability to use Excel’s filter functionality.
- Use PivotTable: Allow or prevent modifications to PivotTables.
Customizing these options in the VBA script allows for more tailored protection:
Sub ProtectAllSheets()
    Dim ws As Worksheet
    Dim pwd As String
    Dim ProtectOptions As Variant

    pwd = InputBox("Enter password to protect sheets:")
    ProtectOptions = Array(False, False, False, False, False, False, False)

    For Each ws In ThisWorkbook.Sheets
        ws.Protect Password:=pwd, DrawingObjects:=True, Contents:=True, Scenarios:=True, _
                    AllowSorting:=ProtectOptions(0), AllowFiltering:=ProtectOptions(1), _
                    AllowFormattingCells:=ProtectOptions(2), AllowFormattingColumns:=ProtectOptions(3), _
                    AllowFormattingRows:=ProtectOptions(4), AllowInsertingColumns:=ProtectOptions(5), _
                    AllowInsertingRows:=ProtectOptions(6)
    Next ws

    MsgBox "All sheets have been protected with custom options.", vbInformation
End Sub
Password Management

Managing passwords effectively is crucial:
- Keep the Password Secure: Store the password securely. Losing it means you will have to unprotect each sheet manually.
- Password Complexity: Use a strong password that combines upper and lower case letters, numbers, and special characters.
- Password Recovery: Excel does not provide an easy way to recover lost passwords. Consider using password management tools or secure sharing methods if you need to share protected files.
⚠️ Note: Once a sheet is password-protected, there's no straightforward way to reset the password without knowing the original one.
Unprotecting All Sheets at Once

Here’s how to remove protection from all sheets in one go:
Creating the VBA Macro

- Again, open the VBA editor with
ALT + F11. - Insert a new module and paste the following code:
Sub UnprotectAllSheets()
    Dim ws As Worksheet
    Dim pwd As String

    pwd = InputBox("Enter password to unprotect sheets:")

    For Each ws In ThisWorkbook.Sheets
        ws.Unprotect Password:=pwd
    Next ws

    MsgBox "All sheets have been unprotected.", vbInformation
End Sub
Run this macro in a similar manner to the protection macro, entering the password when prompted. If the correct password is entered, all sheets will be unprotected.
In summary, using VBA in Excel allows you to streamline the process of protecting and unprotecting sheets, providing a level of efficiency and security that is essential in today's data-driven environments. By understanding and utilizing these techniques, you can ensure your data remains secure while working with multiple sheets. Protecting your sheets doesn't just secure your data; it fosters an organized and efficient working environment, reducing the risk of accidental changes or loss of critical information.
Can I protect sheets without using VBA?

+
You can manually protect individual sheets one by one, but there’s no built-in Excel feature to do this for multiple sheets at once.
What happens if I forget the protection password?

+
If you forget the password, you’ll need to use third-party software or manually unprotect each sheet, which can be quite labor-intensive.
Can I protect specific cells instead of the entire sheet?

+
Yes, you can lock specific cells before protecting the sheet. Unlocked cells can still be edited when the sheet is protected.


