5 Easy Steps to Remove Duplicates in Excel Column

In today's data-driven world, managing datasets efficiently can significantly enhance productivity and accuracy. One common task faced by many users in industries like finance, marketing, and data analysis is removing duplicate entries in Excel. Duplicates not only clutter your data but can also lead to incorrect analysis or reporting. This blog post will guide you through 5 easy steps to remove duplicates in an Excel column, ensuring your data remains clean and your analysis accurate.
Step 1: Open Your Excel Spreadsheet

Begin by opening Microsoft Excel. Navigate to the file where you have your data. This can be from your computer, a shared drive, or any other source where your Excel workbook is stored. Ensure your Excel version is up to date for the best user experience and feature availability.
Step 2: Select the Data Range

After opening the spreadsheet:
- Click on the column header where the data you want to deduplicate is located. If your data spans multiple columns, click and drag to highlight all the relevant columns.
- You can also select non-contiguous columns by holding the Ctrl key while clicking.
Step 3: Use the ‘Remove Duplicates’ Feature

To proceed with duplicate removal:
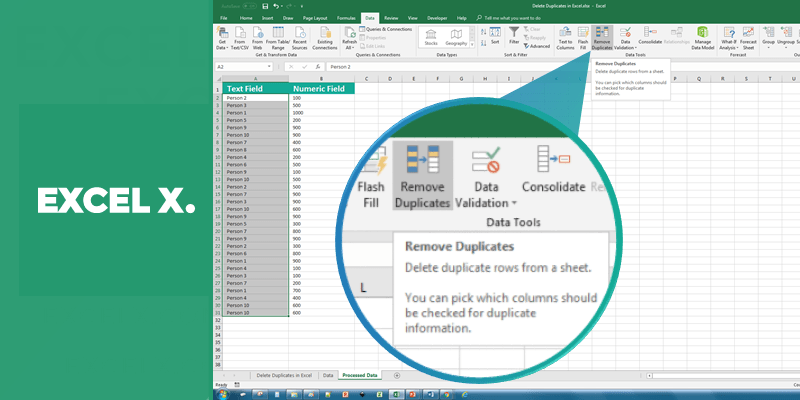
- With your data range selected, go to the Data tab on the Ribbon.
- Click on the ‘Remove Duplicates’ button in the ‘Data Tools’ group.
- The ‘Remove Duplicates’ dialog box will appear, where you can choose which columns to check for duplicates:
| Option | Action |
|---|---|
| Check All | By default, Excel checks all selected columns for duplicates. |
| Uncheck Columns | Uncheck any columns you want Excel to ignore during the deduplication process. |
| My Data Has Headers | Check this box if your data range includes headers to ensure they are not included in the duplicate removal process. |

Step 4: Confirm Removal

After setting your options:
- Click ‘OK’ to execute the removal process. Excel will then process the data, deleting the duplicate rows based on the criteria you’ve specified.
- Excel will inform you how many duplicates were found and how many unique values remain in your data.
⚠️ Note: This operation cannot be undone, so ensure you have a backup or save your work before proceeding.
Step 5: Review Your Data

Once the duplicates are removed, take the time to:
- Review the remaining data to ensure all intended duplicates are gone and no necessary data was inadvertently removed.
- If you find any discrepancies, consider revisiting the ‘Remove Duplicates’ feature with different settings or even manually checking for overlooked duplicates.
In wrapping up, maintaining clean data is vital for any data management task. By following these 5 easy steps to remove duplicates in Excel, you can ensure your datasets are optimized for analysis, reporting, or any other use. Remember, while Excel provides robust tools for data cleaning, always backup your data before performing irreversible operations like removing duplicates. Good data hygiene practices will serve you well in your data analysis endeavors.
What happens if I remove duplicates from multiple columns?

+
Removing duplicates from multiple columns means Excel will consider all selected columns for finding duplicates. Only rows where all specified columns are identical will be removed, ensuring a more comprehensive deduplication.
Can I undo the ‘Remove Duplicates’ function?

+
No, the ‘Remove Duplicates’ action is irreversible. Always ensure you have a backup of your data before executing this function.
How can I quickly check if my data has duplicates?

+
You can use conditional formatting in Excel to highlight duplicate values. Go to ‘Home’ > ‘Conditional Formatting’ > ‘Highlight Cells Rules’ > ‘Duplicate Values’. This won’t remove them but will show where they are.


