5 Easy Steps to Print Out Excel Sheets

Printing out your Excel sheets doesn't have to be a complex task, especially when you know how to do it efficiently. Whether you're preparing a report for a meeting, creating handouts for a presentation, or just need a physical copy for personal reference, following these steps will ensure you get clear, professional-looking prints every time.
Step 1: Prepare Your Excel Sheet

Before you hit the print button, preparing your Excel sheet for printing is crucial:
- Adjust the print area by selecting the cells you wish to print and setting it under Page Layout > Print Area > Set Print Area.
- Ensure all the essential data is visible by adjusting column widths and row heights. Here’s how:
- Double-click the right edge of the column header to auto-fit the column to the data.
- Use Format > AutoFit Row Height for row adjustments.
- Check for merged cells, which can complicate printing. Unmerge them if possible or ensure they fit within the page margins.
🔍 Note: If you have hidden columns or rows, they won't be printed. Make sure all necessary data is visible before printing.
Step 2: Set Print Options

To get the best printout, adjust the print settings:
- Go to File > Print to open the print settings.
- Choose the printer from the dropdown list.
- Select the correct paper size and orientation (Portrait or Landscape) to fit your data properly.
- Decide on the number of copies and whether to print in color or black & white.
- Look for Print What section:
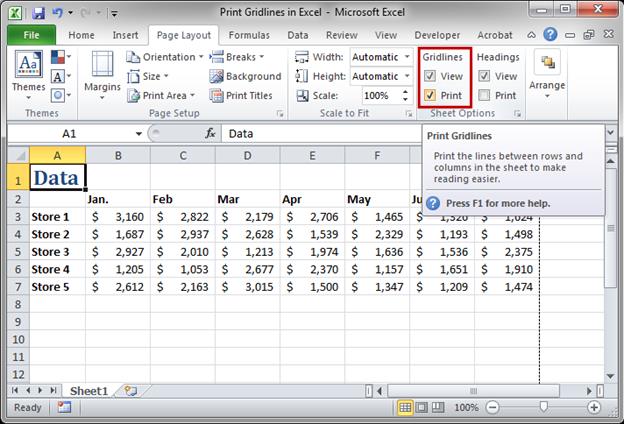
- Gridlines - Toggle on or off to display or hide gridlines in the printout.
- Row and column headings - Useful for referencing printed data.
- Comments - Choose whether to print at end of the sheet or as displayed.
📝 Note: If you're printing formulas or comments, remember to set the Print Area explicitly to avoid confusion with cell references.
Step 3: Preview Before Printing

The “Print Preview” feature is your best friend:
- Click the Print Preview button to see how your document will appear on paper.
- Check for:
- The layout and positioning of data.
- Whether page breaks appear where intended.
- If headers and footers are correct.
- Adjust page breaks:
- Drag the dotted line on the preview to move page breaks where you want them.
- Use the Zoom controls to focus on different parts of the sheet.
Step 4: Use Print to PDF Option

If you’re not ready to print to paper yet, use the Print to PDF option:
- From the printer dropdown, select Save as PDF.
- Adjust print settings as you would for a regular print.
- Click Print to generate a PDF document of your Excel sheet.
| Feature | How to Use |
|---|---|
| Save as PDF | Select "Save as PDF" from printer dropdown, adjust settings, and click Print |
| Page Numbers | Include page numbers in headers or footers for easy reference in larger documents |
| Printing Selections | Choose specific areas to print by setting the print area or selecting sheets |

Printing to PDF allows you to:
- Share the document electronically or distribute it while keeping the format intact.
- Have a backup or record of your Excel sheet without physical paper.
- Proofread or review the layout before committing to paper.
Step 5: Final Print and Review

Now that you've set everything up, it's time to print:
- Double-check your printer settings to ensure correct printer, paper size, and print quality.
- Click Print to send your document to the printer.
- Review the printout:
- Ensure no data is cut off or missing.
- Check for any formatting errors like misaligned headers or footers.
📊 Note: Large sheets might print over several pages. Check the Print Preview and adjust page breaks if needed for coherent printing.
In summary, these five steps provide a clear, step-by-step guide to print out Excel sheets efficiently. With the right preparations, you’ll get professional and readable printouts, saving both time and resources.
Can I print only specific pages of an Excel sheet?

+
Yes, you can print specific pages by selecting the range in the Page Range section in the print dialog box. Simply enter the page numbers you want to print, separated by commas or a dash for a range.
How can I print Excel sheets with formulas instead of values?

+
To print formulas, press Ctrl + ` (or Ctrl + ~) to toggle formula view, then proceed to print as usual. Remember to reset the view to normal after printing.
What if my printer prints all the pages on one sheet?

+
If your printer is set to reduce multiple pages into a single sheet, ensure to check and modify the settings under Page Layout > Print Titles > Scaling > No Scaling.


