5 Tips to Print Excel Sheets on A4 Paper

Printing Excel sheets on A4 paper can seem straightforward, but ensuring that the printout is both readable and properly formatted often requires careful preparation. Whether you're presenting data, creating reports, or simply need a hard copy of your spreadsheet, here are five essential tips to help you print your Excel sheets effectively on A4 paper.
1. Adjust Page Setup for A4

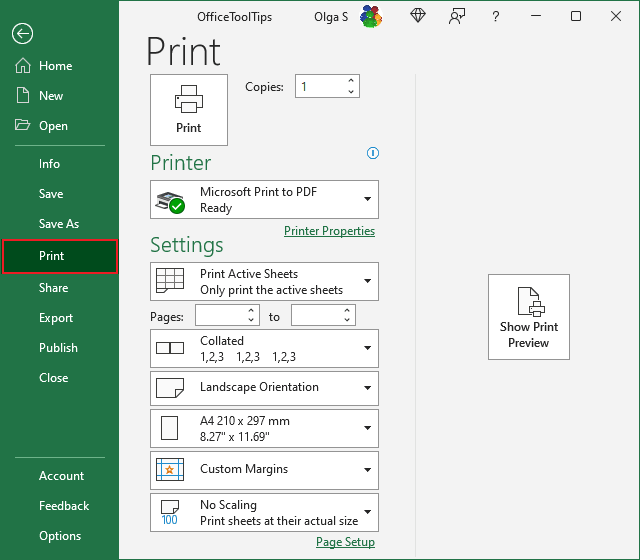
- Set the Paper Size: Start by ensuring your printer settings are aligned with A4 dimensions. In Excel, go to Page Layout > Size and select A4 from the list.
- Orientation: Decide on the orientation (portrait or landscape) that best suits your data layout. Use Page Layout > Orientation for this adjustment.
- Margins: Adjust margins to maximize your print area. Use Page Layout > Margins to set narrow margins if necessary, but ensure the printout remains readable.
2. Scale Your Sheet to Fit

Excel offers several ways to scale your sheet to fit on one page or within the constraints of A4 paper:
- Scaling: In the Page Layout tab, under Scale to Fit, you can choose to fit the width or height to one page. This can shrink your printout but keep all data visible.
- Manual Adjustment: If scaling distorts the layout too much, manually adjust row heights and column widths to ensure legibility. This method provides more control over the final look of your printout.
3. Use Print Area to Print Specific Data

Setting a print area helps focus your printout on the most important data:
- Select the range you want to print, then navigate to Page Layout > Print Area > Set Print Area.
- Verify your selection in Print Preview to ensure you’ve included all necessary information.
⚠️ Note: Printing only specific areas can save ink and paper, making your printout more efficient.
4. Optimize Column Widths and Row Heights

Excel’s automatic column and row sizing might not always be ideal for printing:
- Adjust manually by selecting columns or rows and dragging the border to resize, or right-click and select Column Width or Row Height.
- Consider using AutoFit for columns (Home > Format > AutoFit Column Width) to fit content, but this might need tweaking for print.
5. Preview Before Printing

Always review your document in Print Preview:
- Check for any data cutoff, readability, and overall layout.
- Make last-minute changes to formatting or data to ensure the printout meets your expectations.
In summary, by meticulously setting up your Excel sheet for A4 printing, you can enhance the clarity and professionalism of your printed documents. Adjust the page setup, scale your data, define print areas, optimize cell dimensions, and always preview before sending your document to print. With these practices in place, your spreadsheets will look polished and organized, reflecting well on your attention to detail.
Can I print a specific part of my Excel sheet?

+
Yes, you can set a print area in Excel by selecting the cells you wish to print, then navigating to Page Layout > Print Area > Set Print Area.
What if my Excel sheet has more columns than fit on an A4 page?

+
You can use the scaling options to fit the sheet to one page or adjust the layout by reducing column widths or splitting the data into multiple pages.
How do I change the paper size to A4 in Excel?

+
Go to Page Layout > Size and select A4 from the dropdown menu. Ensure your printer is also set to use A4 paper.
Why do my columns not fit on the page even after adjusting the page setup?

+
This might be due to automatic scaling or if the columns contain oversized content. Manual adjustment or using the AutoFit feature can help.


