How To Print An Excel Sheet To Fit The Page

Printing an Excel sheet to fit the page is a common need for many users, whether for professional reports, presentations, or personal records. Without the proper settings, you might end up with data cut off or pages with too much white space. Here's how you can ensure your Excel sheets fit perfectly on paper each time you print.
Setting Up Your Print Area

Before you dive into the actual printing setup, decide which parts of your Excel sheet you need to print. Here’s how to do it:
- Select the range of cells you want to include in the printout.
- Go to the Page Layout tab.
- Click on Print Area under the Page Setup group, then choose Set Print Area.
📝 Note: Always double-check your print area, as it will only print what you’ve set, potentially excluding important data if not set correctly.
Adjusting the Scale

One of the simplest ways to make your Excel sheet fit to page is by adjusting the scale:
- Navigate to the Page Layout tab.
- Click on Scale to Fit group.
- Adjust the Width and Height to either 1 page or automatic. This will shrink or expand your worksheet to fit the specified number of pages.
Changing Page Orientation

The orientation of your page can significantly affect how your data looks when printed. Follow these steps:
- On the Page Layout tab, click Orientation.
- Choose either Portrait or Landscape based on your data’s arrangement.
Modifying Margins

Margins can also eat up your page space. Here’s how to adjust them:
- In the Page Layout tab, click Margins.
- Select from Normal, Narrow, or Wide, or click Custom Margins for more control over the space around your data.
| Margin | Default | Narrow | Wide |
|---|---|---|---|
| Top | 1 inch | 0.5 inch | 1.25 inches |
| Bottom | 1 inch | 0.5 inch | 1.25 inches |
| Left/Right | 1.25 inches | 0.75 inch | 1.5 inches |

Printing Gridlines and Headings

To improve readability or ensure clarity in your printouts:
- In the Page Setup dialog box, choose the Sheet tab.
- Check or uncheck options like Gridlines and Row and Column Headings to print them if needed.
Preview and Adjust

Before printing, use the Print Preview feature:
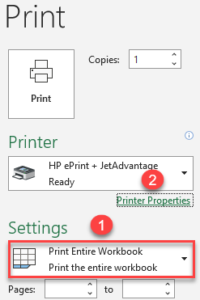
- Click File > Print to enter the print settings view.
- Here, you can adjust various settings and see how your document will look on paper.
Final Adjustments

If your data still doesn’t fit properly:
- Consider reducing the font size or adjusting column widths.
- Use the Page Layout view for visual adjustments.
By mastering these settings, you can avoid common printing issues and ensure your data is presented exactly as intended. Remember, each print job might require different settings, so it's a good practice to review and adjust before you hit the print button.
Lastly, practice makes perfect. Keep experimenting with different settings to find the best approach for your unique documents. Whether for reports, records, or any other purpose, these techniques will make your Excel sheets look professional and fit the page perfectly.
What if my Excel data still doesn’t fit after using these methods?

+
You can try decreasing the font size, reducing column widths, or splitting your data onto multiple sheets if absolutely necessary.
Can I save my custom print settings for future use?

+
While Excel doesn’t save print settings by default, you can record a macro to apply your custom settings with a single click.
How do I print only a specific table in Excel?

+
Select the cells of your table, go to the Page Layout tab, and set your print area as described above. Only the table within that area will print.
Why doesn’t my Excel print in color?

+
Check your printer settings as they might be set to print in black and white or grayscale. Additionally, ensure your printer supports color printing.


