5 Easy Steps to Print Excel Sheet Sections

Excel sheets, while excellent for data analysis and organization, can be overwhelming when it comes to printing comprehensive, well-formatted reports. Whether you need to present a project overview, financial reports, or just wish to extract meaningful sections of data for your audience, knowing how to print specific sections of an Excel sheet is a valuable skill. In this guide, we'll walk you through five easy steps to print Excel sheet sections with precision and efficiency.
Step 1: Select the Data You Want to Print

The first step in any printing endeavor is to decide what data is relevant. Follow these steps to select your data:
- Click and drag your mouse to highlight the cells you want to print.
- Use the ‘Ctrl’ key to select non-adjacent cells or ranges if necessary.
- Ensure you’ve included all headers, titles, and any labels that provide context for your printout.
🔍 Note: Remember to check for hidden rows or columns that might affect your printout’s appearance.
Step 2: Set the Print Area
After selecting your data, you can set the print area. This tells Excel exactly which sections you wish to print:
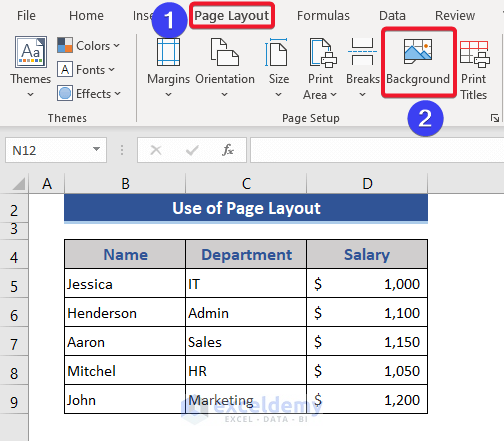
- Go to the ‘Page Layout’ tab.
- Under the ‘Page Setup’ group, click ‘Print Area’ then ‘Set Print Area’.
✅ Note: If you’ve already selected cells, Excel will use that selection as the print area automatically.
Step 3: Adjust Print Settings

Excel offers numerous options to tweak how your sheet will print. Here’s how to optimize your settings:
- Access the ‘Page Layout’ tab again.
- Set the orientation to ‘Landscape’ or ‘Portrait’ depending on your data layout.
- Adjust the ‘Page Setup’ settings like margins, scale, and fit to sheets.
📏 Note: Use ‘Fit to Sheet’ when you want your printout to fit onto one page without altering content size.
| Page Setup Option | Description |
|---|---|
| Orientation | Portrait prints vertically, Landscape horizontally. |
| Margins | Defines the white space around your printout. |
| Scaling | Adjusts the size of your content to fit the page better. |

Step 4: Preview and Adjust
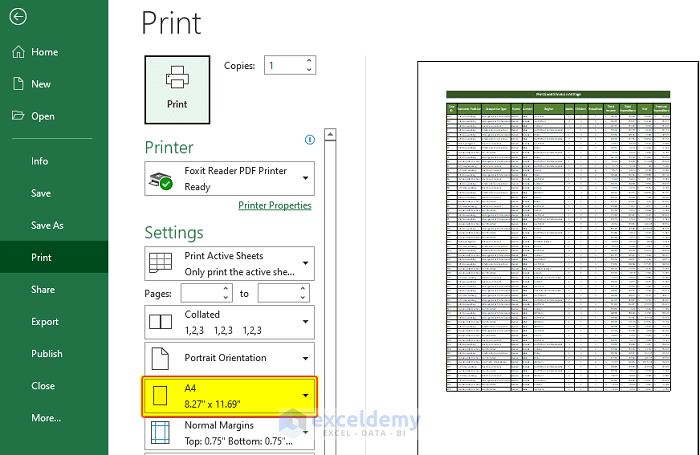
Before committing to print, it’s crucial to preview your document:
- Click on ‘File’, then ‘Print’ or use the keyboard shortcut ‘Ctrl + P’.
- Use the preview pane to examine how your selected sections will appear on paper.
- Make any final adjustments to scaling, page breaks, or column/row layout if necessary.
🖨️ Note: Utilize the ‘Show Margins’ option in the preview window to adjust margins directly.
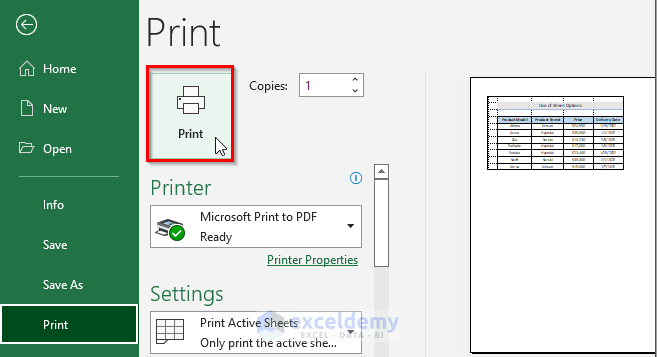
Step 5: Print Your Selected Excel Section

Once you’re satisfied with the preview, it’s time to print:
- Ensure your printer is connected and has the correct settings.
- In the ‘Print’ dialog, set the number of copies you need.
- Press ‘Print’ to start the printing process.
By following these five simple steps, you've successfully learned how to print specific sections of an Excel sheet with precision. Remember, the key to a perfect printout is careful selection, thoughtful adjustment of settings, and thorough previewing. Whether you're sharing data with colleagues, presenting to a client, or simply need a hard copy for your records, these steps ensure your Excel printouts are both effective and professional. This guide not only improves your Excel skills but also boosts your efficiency when handling data in print.
Can I print multiple non-adjacent ranges in Excel?

+
Yes, you can print non-adjacent ranges by holding down the ‘Ctrl’ key while selecting different sections, then setting them as your print area.
How do I print only specific columns or rows?
+
Highlight the desired columns or rows and then follow the steps for setting the print area as explained above.
What if my Excel sheet is too large to fit on one page?

+
Use the ‘Fit to Sheet’ option in the Page Setup dialog, or manually adjust scaling or margins to make your content fit better across multiple pages.

