5 Ways to Fit Excel Sheet on One Page

When working with Microsoft Excel, you might often find yourself dealing with large datasets that do not fit nicely onto a single printed page. Whether you're preparing reports, analyzing data, or sharing information with colleagues, knowing how to efficiently fit an Excel sheet on one page can save time and reduce the frustration of managing large printouts. Here are five practical methods to ensure your Excel spreadsheets print neatly on one page.
Adjusting Page Margins

The simplest way to get more data onto a single page is by adjusting the margins of your document:
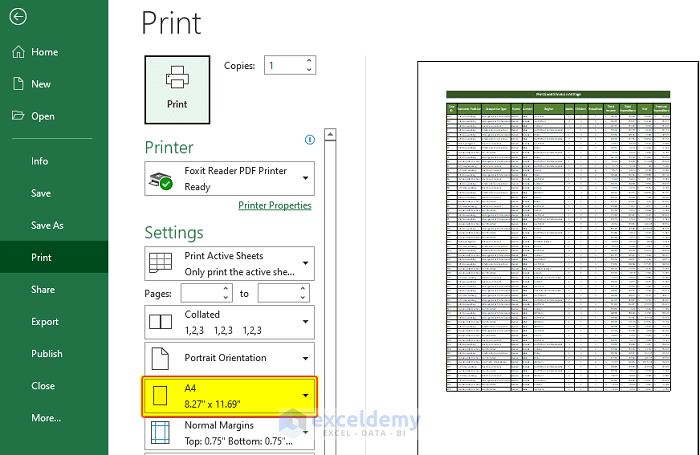
- Go to File > Print or press Ctrl + P to open the print settings.
- Click on Page Setup at the bottom right of the settings window.
- Select the Margins tab and reduce the margins as needed. Remember, printers have minimum margin limits, usually around 0.25 inches, so adjustments might be limited.
⚠️ Note: Reducing margins too much might lead to parts of your spreadsheet being cut off at the edges during printing.
Using Page Break Preview

Excel’s Page Break Preview feature lets you see where pages will break, allowing you to adjust content:
- Go to the View tab and select Page Break Preview.
- Blue lines indicate automatic page breaks. Drag these lines to manually set where the page breaks should occur.
By visually adjusting these breaks, you can minimize the number of pages your spreadsheet requires when printed.
Reducing Row Height and Column Width

Compacting the space used by rows and columns can significantly reduce the printout size:
- Select the entire worksheet with Ctrl + A.
- Right-click and choose Row Height or Column Width to adjust manually.
- Alternatively, adjust all columns to auto-fit content with Home tab > Format > AutoFit Column Width.
Remember, however, that making cells too small can compromise the readability of your data.
Scaling Print Output

Excel allows you to scale your spreadsheet before printing:
- In the Print settings, go to Page Setup.
- Under the Page tab, look for Adjust to and reduce the percentage to scale down the sheet.
Scaling can be very effective, but ensure that the content remains legible when printed.
Table with Scaling Examples

| Percentage Scale | Content Size | Effect |
|---|---|---|
| 100% | Full size | Standard printing size |
| 75% | 75% of original size | |
| 50% | 50% of original size | Might make reading difficult |

📝 Note: Keep in mind that scaling too far down might make text and numbers hard to read, especially if your audience has visual impairments.
Modifying Page Layout Orientation

Sometimes, the orientation of your page can make a difference in fitting content:
- In Page Setup, under the Page tab, choose between Portrait or Landscape orientation.
- If your data is wider than it is tall, landscape orientation can provide more horizontal space.
Changing orientation can give you extra room to work with, potentially reducing the number of pages needed for your printout.
In the end, the goal is to produce a clear, concise, and easy-to-read document when printing an Excel sheet on one page. By adjusting margins, previewing and adjusting page breaks, compacting cell sizes, scaling the output, or changing page orientation, you can significantly enhance the efficiency of your printed spreadsheets. Each method has its merits, and often, a combination of these techniques will yield the best results. Always preview your print layout before finalizing your print job to ensure that the changes made do indeed fit the data onto one page without compromising its legibility or utility.
What happens if my Excel sheet is too large for one page even after scaling?

+
If scaling doesn’t fit your Excel sheet onto one page, you can try reducing the font size, summarizing data, or breaking the sheet into separate pages manually.
Will reducing margins affect the print quality?

+
Reducing margins beyond the printer’s minimum limit can lead to parts of your spreadsheet being cut off or not printing at all.
Is there a way to preview how the sheet will look when printed?

+
Yes, you can use Excel’s “Print Preview” feature to see exactly how your sheet will appear on the printed page, helping you make final adjustments.


