5 Steps to Create a Loan Sheet in Excel

Creating a loan sheet in Microsoft Excel can be a valuable tool for both personal and business finance management. Whether you're planning to lend money or track your loans as a borrower, Excel provides a flexible and dynamic platform to monitor all aspects of your loan. Here's a detailed guide to creating an effective loan sheet:
Step 1: Gathering Necessary Data

Before you start setting up your Excel sheet, you need to gather all the relevant information. This includes:
- Loan amount
- Interest rate
- Loan term (in months or years)
- Payment frequency (monthly, bi-weekly, etc.)
- Start date of the loan
- Grace period, if any
- Principal payments, if not part of the standard payment structure
Having all this data on hand will make the subsequent steps much smoother.
Step 2: Setting Up the Excel Workbook

Open Excel and create a new workbook:
- Name your sheets: Typically, you’ll want at least two sheets - one for the Loan Amortization Schedule and another for Summary.
- Design the Layout: On the Loan Amortization Schedule sheet:
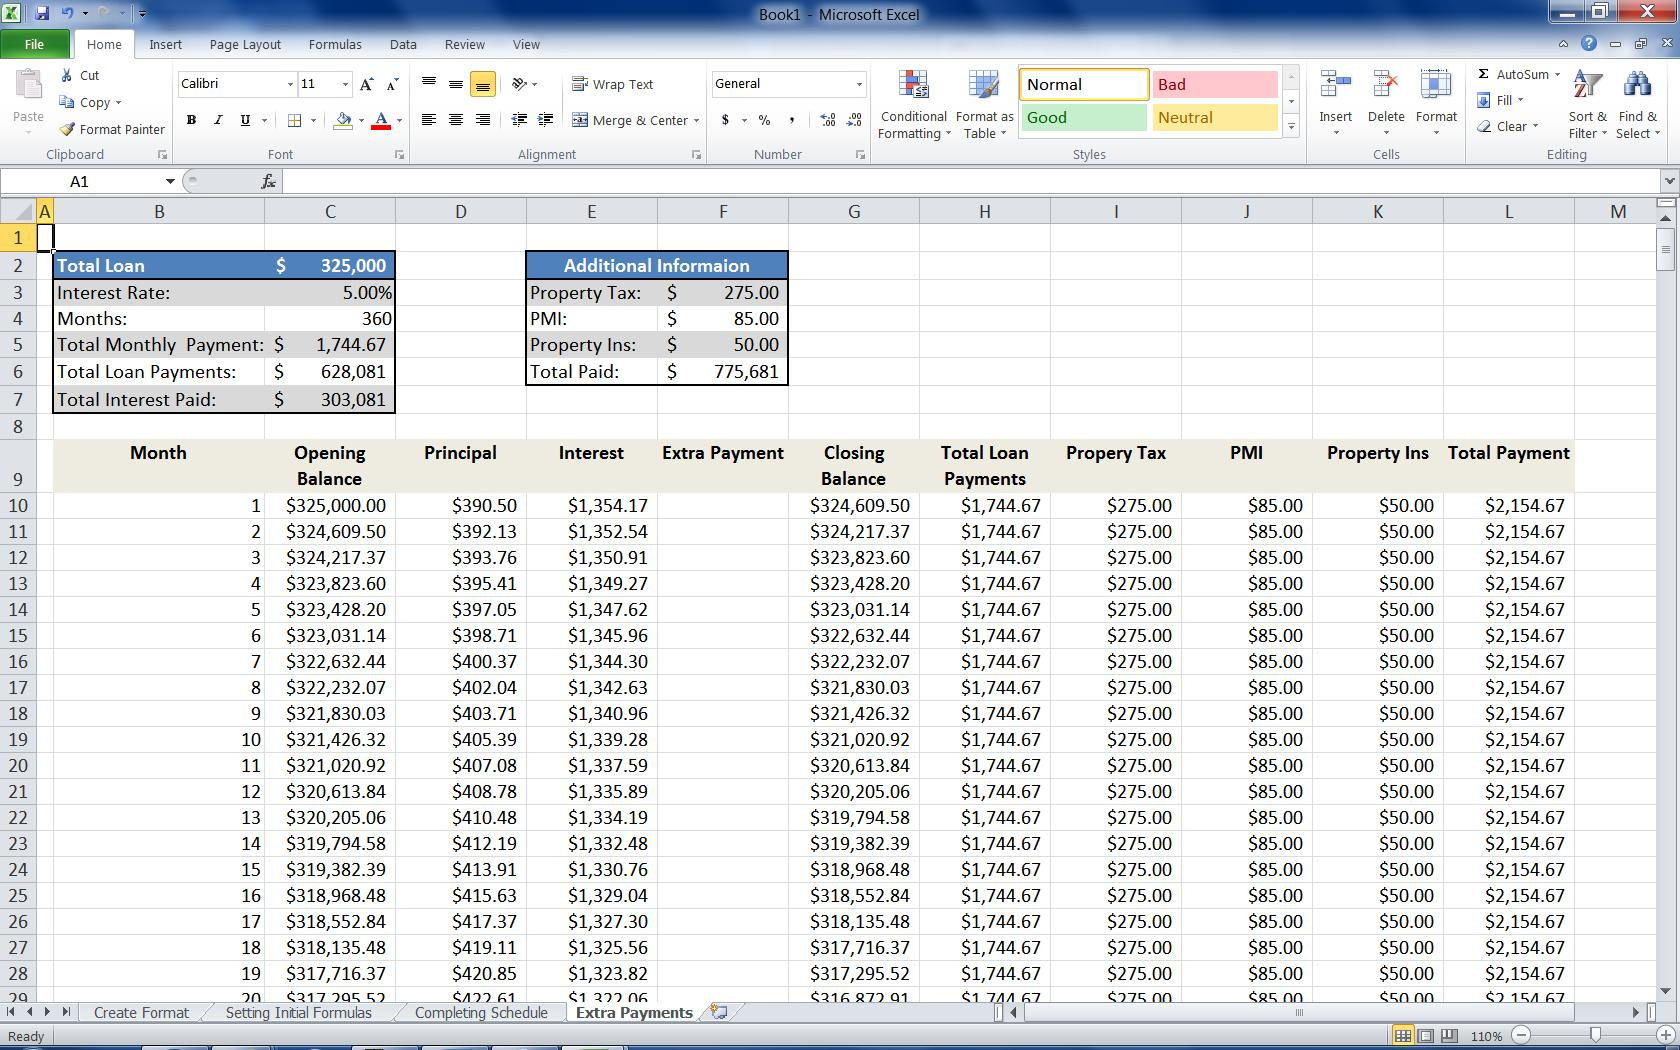
- Set column headers for Payment Date, Payment Amount, Principal, Interest, Remaining Balance, etc.
- Leave space for labels like Total Interest Paid, Total Paid, etc.
- Input Basic Information: In your Summary sheet, input the gathered loan details.
Step 3: Creating the Amortization Schedule

Here’s how to build your schedule:
| Column Header | Formula/Description |
|---|---|
| Payment Date | Start date and add periods accordingly |
| Payment Number | Start at 1 and increment by 1 for each payment |
| Payment Amount | =PMT(rate, nper, pv, [fv], [type]) |
| Principal | PPMT(rate, per, nper, pv, [fv], [type]) |
| Interest | IPMT(rate, per, nper, pv, [fv], [type]) |
| Remaining Balance | Starting Balance - Principal |

💡 Note: The PMT, PPMT, and IPMT functions are financial functions in Excel that calculate payment, principal payment, and interest payment respectively, per period for an investment based on constant-amount periodic payments and a constant interest rate.
Step 4: Formatting and Validating

- Conditional Formatting: Use colors or icons to highlight key milestones like when the principal crosses a certain threshold or when the loan is almost paid off.
- Validation: Add data validation to ensure that inputs are correct. For example, interest rate should not exceed 100% or be negative.
- Error Checking: Use Excel’s error checking tool to find any calculation errors in your formulas.
Step 5: Advanced Customization

To make your loan sheet even more useful:
- Create Macros for repetitive tasks like updating the schedule or summarizing payments.
- Set up Data Validation to control what can be entered into the cells, reducing the chance of user input errors.
- Add Graphs to visually represent the loan balance over time, principal vs. interest paid, or other insightful comparisons.
- Implement Pivot Tables for dynamic reporting on different loan aspects.
In wrapping up, this guide has provided a comprehensive walkthrough to create an effective loan sheet in Excel. We covered the necessary data collection, setting up the workbook, creating an amortization schedule with formulas, formatting for clarity and validation, and advanced customizations. By following these steps, you can manage your loans efficiently, reduce financial stress, and make informed decisions about your financial future. Remember, mastering Excel can transform your approach to personal finance management, providing clarity and control over your monetary commitments.
What if my loan terms change?

+
You can easily adjust your Excel sheet to reflect new terms by updating the relevant cells, especially the interest rate, loan term, or payment frequency. Recalculate the amortization schedule to see the new payment structure.
Can Excel handle loans with variable interest rates?

+
Yes, Excel can manage variable rates by setting up each payment period with the interest rate at that time. Use manual input or conditional formulas to update the rate for each period.
How do I account for extra payments in my loan sheet?

+
Create columns for additional payments and adjust your remaining balance calculations to account for these extra payments. Update formulas like ‘Cumulative Principal’ to reflect these additional payments correctly.


