Excel Expense Sheet Guide: Easy Tips and Tricks

Managing personal or business finances can be a daunting task, but with tools like Microsoft Excel, the process can become streamlined and much more manageable. An Excel expense sheet not only helps in tracking expenditures but also in analyzing spending patterns to make better financial decisions. Here's a comprehensive guide on creating and using an expense sheet in Excel to help you get the most out of this powerful software for managing your finances.
Why Use Excel for Expense Management?

Before diving into the how-to’s, it’s important to understand why Excel is a preferred tool for expense tracking:
- Flexibility: Excel allows you to customize sheets according to your unique needs.
- Automation: Use formulas to automatically calculate totals, differences, and other important metrics.
- Visualization: Create charts and graphs for a visual representation of your financial data.
- Accessibility: Excel is widely available, and sheets can be shared easily via cloud storage services.
- Data Analysis: Apply filters, pivot tables, and conditional formatting to analyze your expenses in depth.
Setting Up Your Excel Expense Sheet

Here’s how you can set up your basic expense sheet in Excel:
1. Open Excel and Create a New Workbook

Start by opening Microsoft Excel and creating a new workbook.
2. Define Your Columns

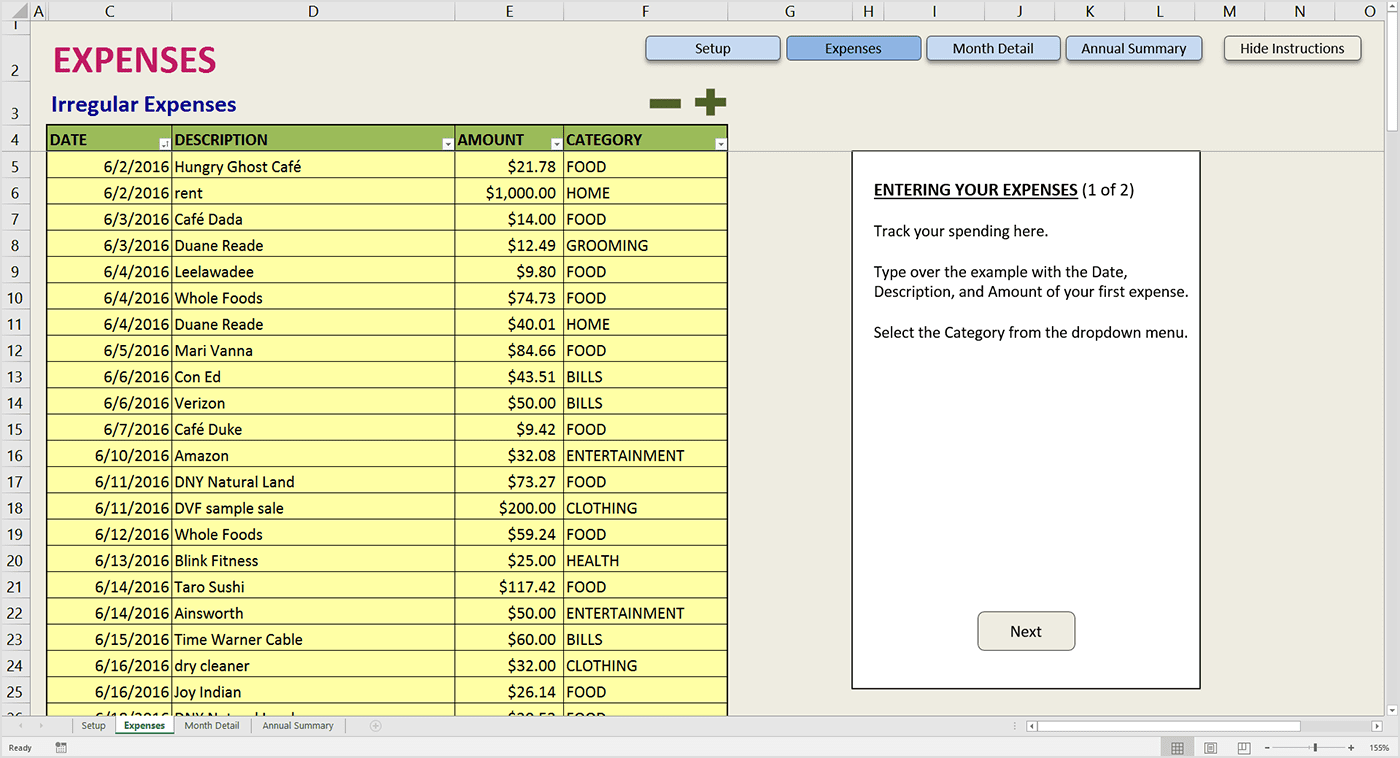
In the first row, define your columns:
| Column | Description |
|---|---|
| Date | The date of the expense |
| Category | Type of expense (e.g., Food, Travel, Utilities) |
| Description | Details of the expense |
| Amount | How much was spent |
| Payment Method | Cash, card, cheque, etc. |
| Status | Whether it’s paid or pending |

3. Enter Your Data

Below the column headers, start entering your expense data. Here are a few tips:
- Format the Date column to show dates correctly.
- Use drop-down lists in the Category column to maintain consistency. (Learn how in the “Notes” below).
- Ensure the Amount column uses the currency format.
4. Applying Formulas

Formulas are what make Excel truly powerful for financial management:
- Total Expenses: At the bottom of the Amount column, use the
=SUM(A1:A100)formula to calculate the total expense, where A1:A100 are the cells with amounts. - Average Monthly Expenses:
=AVERAGEIF(A:A, “>0”, A:A)if the date column is A, which gives you an average expense considering only positive numbers. - Category Wise Breakdown: Use a PivotTable to see expenses by category.
💡 Note: To use a drop-down list for categories, click on Data Validation in the Data tab, select List from the Allow option, and enter your categories separated by commas.
Advanced Features for Better Management

Data Filtering

Excel’s filter function allows you to view specific parts of your data:
- Click on any cell within your table and go to Data > Filter.
- Use this to filter by categories, date ranges, or payment method.
Conditional Formatting

Highlight cells automatically based on your data:
- Select your Amount column and go to Home > Conditional Formatting.
- Set rules to highlight expenses that exceed a certain amount or use color scales to visualize spending.
Charts and Graphs

Visualizing data can make trends and patterns clear:
- Select your data and insert a chart from the Insert tab. Pie charts for category breakdowns or line graphs for monthly trends can be very insightful.
Macros for Automation

If you’re comfortable with VBA, you can automate repetitive tasks:
- Record a macro for tasks like applying filters or formatting, then run it when needed.
Regular Maintenance and Review

Keep your expense sheet up-to-date:
- Regularly update your entries.
- Review monthly or weekly, making adjustments to your budget or spending habits as necessary.
- Backup your data to avoid data loss.
In summary, an Excel expense sheet is a powerful tool for financial management. By setting up your sheet with customized columns, employing automation through formulas, and utilizing advanced features like conditional formatting and macros, you can significantly simplify your financial tracking. This guide provides you with the essentials to not only track but analyze your expenses effectively, leading to better financial health and decision-making.
How often should I update my expense sheet?

+
It’s best to update your expense sheet at least weekly. This helps in maintaining accuracy and keeping your financial management process current.
Can I use Excel for both personal and business expenses?
+
Yes, Excel is versatile enough for both personal and business expense tracking. You can create separate sheets or workbooks for each.
What are some common expense categories I should include?
+Common categories might include Food, Housing (rent/mortgage), Utilities, Transportation, Travel, Entertainment, Health, and Insurance. Customizing based on your spending habits is key.
How do I handle recurring expenses?
+Set up a separate column or tab for recurring expenses. Use Excel’s date functions to automatically update and remind you about these expenses.


