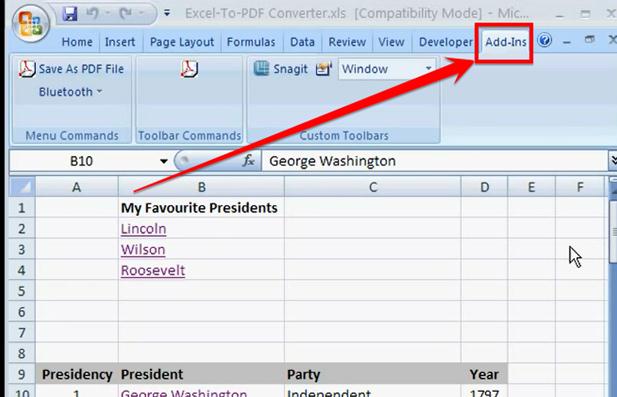
Export Excel Sheet to PDF: Simple Steps Explained

In the fast-paced world of data management, the ability to export data from Microsoft Excel to a PDF file is not just a convenience but a necessity. Whether you're sharing financial statements, project plans, or any kind of report, PDF is a universally accepted format that ensures your data is readable on any device, preserving the layout and formatting of your spreadsheets. In this comprehensive guide, we'll walk you through the simple steps to export your Excel sheet to PDF efficiently.
Why Convert Excel to PDF?

- Preserves Formatting: PDF files maintain the exact layout, fonts, and images of your Excel document.
- Security: You can password protect a PDF, which is especially useful for confidential or sensitive information.
- Universal Compatibility: PDFs can be opened on nearly all devices, reducing the issue of compatibility.
Step-by-Step Guide to Exporting Excel to PDF

Here are the straightforward steps to turn your Excel spreadsheet into a PDF:
Step 1: Open Your Excel Workbook

Begin by opening the Excel workbook containing the sheet or sheets you want to export to PDF. Ensure that your data is correctly formatted and all necessary changes have been made.
⚠️ Note: If you have multiple sheets to export, decide whether you want to export them as separate PDFs or a single PDF with all sheets.
Step 2: Select the Worksheet

Click on the specific worksheet tab at the bottom of your workbook that you wish to convert into PDF.
- For multiple sheets, you can hold down the Ctrl key (Windows) or Cmd key (Mac) and select multiple tabs.
Step 3: Access the ‘Save As’ Feature

Navigate to File > Save As in your Excel ribbon. This will open a dialog box where you can choose the format for saving your file.
Step 4: Choose PDF as the File Type

In the ‘Save As’ dialog:
- Locate the ‘Save as type’ dropdown menu.
- From this list, select ‘PDF (*.pdf)’ as the file type.
📌 Note: For better control over PDF settings, click on ‘Options…’ or ‘PDF Options’, which might appear, depending on your Excel version.
Step 5: Adjust PDF Options

A new dialog might appear allowing you to:
- Choose if you want to fit the sheet on a single page or multiple pages.
- Decide if you want to include non-printing elements like hidden rows or columns.
- Enable document properties or comments if they are part of your Excel file.
Step 6: Save the PDF

After setting your options, proceed to choose a location to save your PDF, give your file a name, and click ‘Save’ or ‘Export.’ Your Excel data will now be transformed into a PDF document.
Advanced PDF Exporting Techniques

If you’re looking to take your PDF exporting skills to the next level, here are some tips:
Exporting Multiple Sheets

Excel doesn’t have a built-in feature to export multiple sheets into one PDF file, but there are workarounds:
- Use Excel’s ‘Workbook’ option when saving to PDF to create one file with multiple sheets.
- If you need to choose specific sheets, combine them manually or use VBA to create a macro that exports selected sheets as a single PDF.
Automating with VBA

Visual Basic for Applications (VBA) can be a powerful tool to automate PDF exports:
| Action | VBA Code |
|---|---|
| Save Active Sheet as PDF | VBA<br>
ActiveWorkbook.ExportAsFixedFormat Type:=xlTypePDF, Filename:="YourFilePath\FileName.pdf", Quality:=xlQualityStandard, _<br>IncludeDocProperties:=True, IgnorePrintAreas:=False, OpenAfterPublish:=False<br>
|

💡 Note: To run VBA, enable macros in Excel and ensure your file is saved as a macro-enabled workbook (.xlsm).
Enhancing Your PDFs

While exporting to PDF preserves the layout, here are some enhancements you can consider:
- Use print titles in Excel to ensure headers are repeated on each page.
- Adjust page breaks to control how your data will span across multiple pages in PDF.
- Add hyperlinks to make your PDF interactive.
As we wrap up this guide, remember that converting Excel files to PDF is a straightforward process once you understand the steps. This conversion not only ensures your data remains intact but also allows for better document security and compatibility. By following these guidelines, you can confidently share your spreadsheets in a format that is universally accepted and easy to distribute. Whether for business, education, or personal projects, converting Excel to PDF is a skill that enhances efficiency and preserves the integrity of your data.
Can I export only a part of my Excel sheet to PDF?

+
Yes, you can define print areas in Excel to control which part of the sheet is exported to PDF. Go to Page Layout > Print Area > Set Print Area to specify your desired region.
How do I password protect my exported PDF?

+
Excel itself doesn’t offer a built-in option to password protect PDFs during export. However, after exporting, you can use PDF editing software like Adobe Acrobat to add password protection.
Can I keep formulas in the exported PDF?
+No, PDF files are designed for viewing rather than editing or calculating. Formulas will be converted to static values in the PDF to preserve the data’s appearance.
Will charts and images be included in the PDF?
+Yes, Excel will convert charts and images into static visuals in the PDF, maintaining their placement and size within the document.
How to export Excel to PDF on a Mac?
+The process on a Mac is very similar to that on Windows. Navigate to File > Save As, choose PDF as the file type, and then follow the steps as outlined in this guide.


