Copy Excel 2007 Sheet into Email: Quick Guide

Emailing Excel 2007 sheets can streamline your workflow, making it easy to share data with colleagues or clients directly from your computer. In this guide, we will delve into the various methods to copy a sheet from Excel 2007 into an email, ensuring you can effectively communicate your data. Whether you're aiming for a simple paste or need to preserve Excel's features, we've got you covered.
Method 1: Copy-Paste Data

The most straightforward method to share Excel data via email is through a simple copy-paste operation. Here’s how you can do it:
- Open your Excel 2007 workbook.
- Select the entire sheet you wish to copy by clicking the triangle icon at the top-left corner of your sheet, or manually select the range of cells you want.
- Right-click and choose Copy, or press Ctrl + C on your keyboard.
- Open your email client and start composing a new message.
- Paste the data into the body of the email using Ctrl + V or by right-clicking and selecting Paste.
🔹 Note: Be mindful that Excel formatting might not transfer perfectly, especially for complex features like data validation or conditional formatting.
Method 2: Send Sheet as an Email

This method is handy if you want to preserve Excel functionality or send larger data sets:
- With your Excel workbook open, go to the File menu and select Send To.
- Choose Mail Recipient (as Attachment).
- A new email message will open in your default email client with the selected sheet attached.
- Fill in the recipient details, subject, and any message you wish to include.
- Send the email.
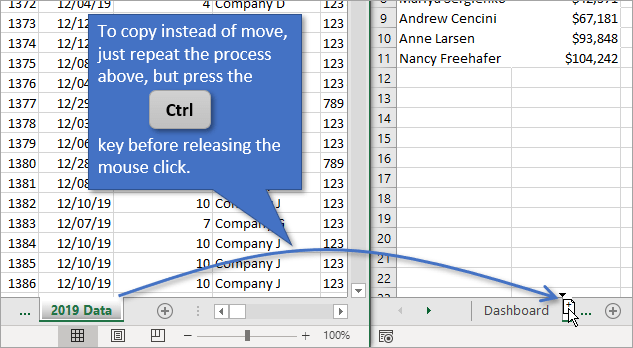
🔹 Note: If your workbook contains multiple sheets, you might need to select the specific sheet you want to send. Right-click on the sheet tab, choose Move or Copy..., and create a temporary copy before sending.
Method 3: Emailing Live Excel Data

For dynamic data, you might want to consider an Excel Web App or use SharePoint to share live data:
- Save your Excel file to OneDrive or SharePoint if not already done.
- Open the file with Excel Online.
- Click on the Share button to get a shareable link.
- Email this link to others, who can then view or edit the sheet live in their browser.
Using Excel Templates and Macros

To make the process of emailing sheets even more efficient, consider:
- Creating an Excel template for regular emails:
- Set up a workbook with predefined cells, formats, and macros for easy data entry and distribution.
- Using a VBA macro to automate the emailing process:
- Create a macro that copies the necessary sheet, prepares the email content, and automatically sends it.
🔹 Note: Macros can enhance productivity but might not work for recipients who have macros disabled for security reasons.
In this comprehensive guide, we've explored various ways to copy and email Excel 2007 sheets, ranging from simple copy-paste techniques to more advanced methods like using web apps and macros. Each method has its benefits, depending on your specific needs, whether it's preserving complex data formatting, ensuring real-time data updates, or simply sharing a static snapshot. Understanding these options empowers you to choose the best approach for different situations, enhancing productivity and communication within your work environment.
What happens to my Excel sheet’s formatting when I copy-paste it into an email?

+
When you copy and paste an Excel sheet into an email, some complex formatting features like data validation or conditional formatting might not carry over perfectly. You’ll get a good visual representation, but the functionality may be lost.
Can I send multiple sheets at once using the ‘Send To’ option in Excel?

+
Yes, you can send multiple sheets by selecting the entire workbook when choosing ‘Mail Recipient (as Attachment)’. However, if you only want to send specific sheets, you’ll need to either copy those sheets into a new workbook or use the ‘Move or Copy’ option to select and attach specific sheets.
Is it safe to share live Excel data through links?

+
While sharing live Excel data through links is efficient, it’s essential to ensure that you have appropriate permissions set up. You can use Office 365 or OneDrive’s permission settings to control who can view or edit the document, thereby maintaining security and privacy.


