Convert Excel Sheets to Word: Easy Guide

Converting data from Excel spreadsheets to a Word document is often necessary for creating reports, business presentations, and documentation, especially when you want to maintain data accuracy and eliminate manual data entry errors. This guide aims to streamline the process, making it easy and efficient for both beginners and seasoned users.
What You Need for the Conversion

Before you begin, make sure you have:
- A computer with Microsoft Office (Excel and Word installed).
- The Excel file(s) you want to convert.
- Internet access for accessing tutorials or online resources.

Step 1: Prepare Your Excel File

Start by opening your Excel workbook. Here are some tips to ensure a smoother conversion:
- Check for data consistency to prevent issues during conversion.
- Ensure that all headers, titles, and important data are formatted correctly.
- Clean up: Remove any unnecessary blank rows or columns.
- Use the Table feature to structure your data for better formatting control in Word.
💡 Note: Setting up your Excel sheet correctly can significantly impact the readability and appearance of the data in Word.
Step 2: Copy Your Data

Navigate to the Excel sheet you wish to convert:
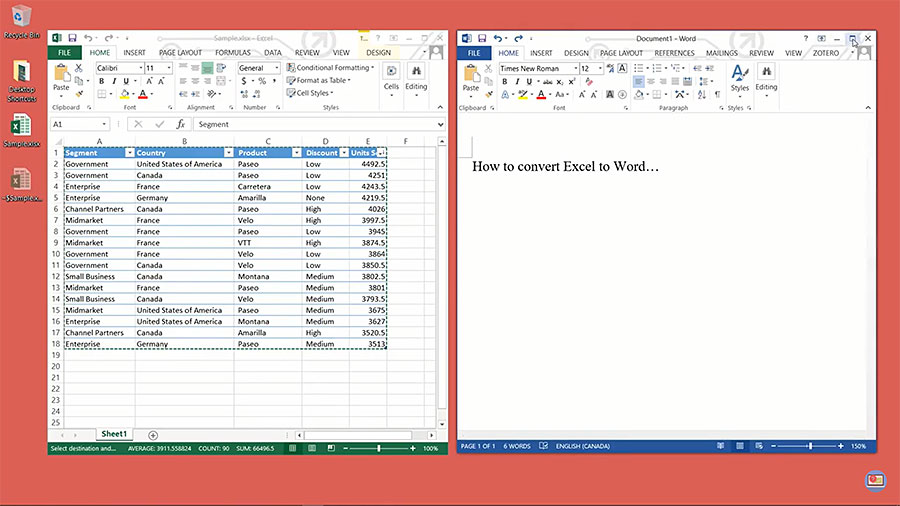
- Select the range of data you need to transfer. Use Ctrl+A for the entire sheet or drag to select a specific range.
- Right-click on the selected data and choose Copy or use Ctrl+C.

Step 3: Paste into Word

Now, open your Word document where you want to place the Excel data:
- Position your cursor where you want the data to be inserted.
- Right-click and choose Paste Options, or use Ctrl+V. Word provides several options for pasting:
- Keep Source Formatting: Retains the original Excel formatting.
- Use Destination Styles: Matches the Word document’s formatting.
- Link & Use Destination Styles: Links the data to Excel for dynamic updates while matching Word’s styles.
- Picture: Pastes data as an image.
- Keep Text Only: Pastes plain text without any formatting.
🚧 Note: Choose the paste option wisely based on how you want the data to appear and update in Word.
Step 4: Adjust the Formatting in Word

Once the data is pasted, you might need to tweak the layout:
- Adjust column widths or row heights for better readability.
- Use the Table Tools Design tab to apply or modify table styles.
- Merge cells or format text as needed for headings and subtitles.
Step 5: Saving and Final Checks

Before finalizing your document:
- Save your Word document. Regular saving prevents data loss.
- Review the inserted tables to ensure all data is displayed correctly and uniformly.
- Check for any links or dynamic updates if you opted for the Link & Use Destination Styles option.
Here’s a summary of the steps:
| Step | Description |
|---|---|
| 1 | Prepare Your Excel File |
| 2 | Copy Your Data from Excel |
| 3 | Paste into Word |
| 4 | Adjust Formatting in Word |
| 5 | Save and Check the Document |

By following these steps, you can convert Excel sheets to Word documents efficiently, ensuring data integrity and a professional presentation of your data. Remember, this process not only reduces errors but also saves time by automating data transfer between applications.
Can I paste multiple Excel sheets into a single Word document?

+
Yes, you can paste multiple Excel sheets into a Word document by repeating the copy-paste process for each sheet. Make sure to adjust the formatting for each table as needed to maintain consistency.
How do I update the data in Word if it changes in Excel?

+
If you choose the ‘Link & Use Destination Styles’ option, changes made in Excel will automatically update in Word, provided the link is intact. You can manually update by right-clicking on the table and selecting ‘Update Field’.
Can I keep the original Excel formatting in Word?

+
Yes, by choosing ‘Keep Source Formatting’ when pasting, your table in Word will retain the original formatting from Excel. Adjustments might still be necessary due to differences in application functionalities.


