5 Ways to Change Time Format in Excel Quickly

Managing time data efficiently in Excel is crucial, especially when dealing with international teams, organizing schedules, or tracking time-sensitive projects. The ability to display time in various formats not only aids in better data presentation but also in the accuracy of calculations and analyses. Here are five quick and effective ways to change the time format in Excel:
Method 1: Using Excel’s Built-in Time Formats


Excel comes with several predefined time formats which can be applied with just a few clicks:
- Select the cells containing the time data.
- Right-click and choose “Format Cells” or press Ctrl+1.
- In the “Number” tab, select “Time”.
- Choose from the list of options like “1:30 PM”, “13:30”, or “13:30:15” for different time representations.
- Click “OK” to apply.
💡 Note: If you’re dealing with time formats from different locales, make sure to adjust your system’s regional settings for consistency.
Method 2: Custom Time Formats

When the built-in formats don’t meet your needs, custom formats give you the flexibility to tailor the time display:
- Select your time data cells.
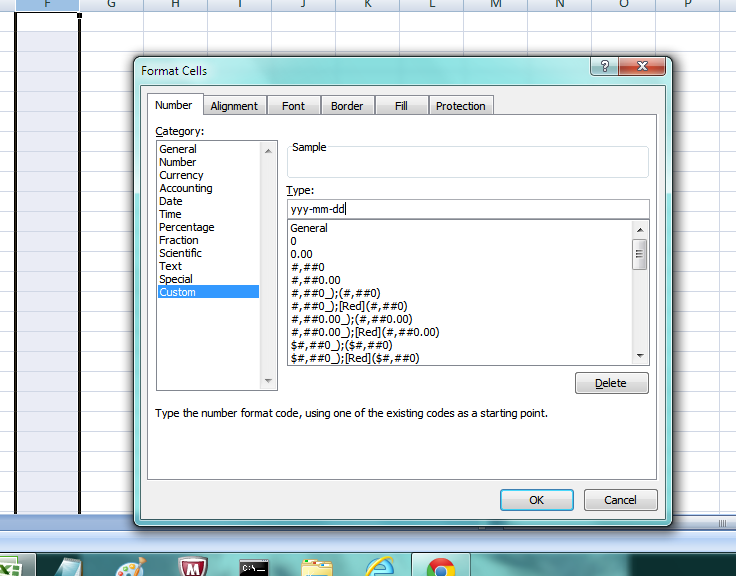
- Go to “Format Cells” then “Number” tab.
- Under “Category”, select “Custom”.
- In the “Type” box, enter your custom format like h:mm:ss AM/PM or [h]:mm:ss for 24-hour continuous time.
- Click “OK” to confirm.
Method 3: Utilizing Excel Formulas for Time Conversion

| Formula | Description |
|---|---|
=TEXT(A1, “HH:MM:SS”) |
Converts time in cell A1 to 24-hour format. |
=TEXT(A1, “hh:mm AM/PM”) |
Changes time to 12-hour format with AM/PM. |
=TIME(HOUR(A1),MINUTE(A1),SECOND(A1)) |
Extracts hours, minutes, and seconds from time in A1. |

These formulas can be used to dynamically format time based on other conditions or to standardize time formats across different data sets.
🗒 Note: Ensure that cells containing time data are formatted as time before using these formulas for accurate results.
Method 4: Changing Time Format Through VBA

For users comfortable with macros, VBA offers a powerful way to modify time formats on larger datasets or automate repetitive formatting tasks:
- Press Alt + F11 to open the VBA editor.
- Insert a new module and paste the following code:
Sub ChangeTimeFormat() With Selection.NumberFormat = “hh:mm:ss” End Sub - Run this macro to change the selected cells to a specific time format.
💡 Note: Custom macros can be saved and reused, making your time management in Excel more efficient over time.
Method 5: Conditional Formatting for Time

This method allows you to visually differentiate times based on certain criteria, although it doesn’t change the actual format:
- Select the range of time cells.
- Go to “Home” > “Conditional Formatting”.
- Choose “New Rule” and then “Use a formula to determine which cells to format”.
- Enter a formula like =MOD(A1, 1) >= TIME(12, 0, 0) to highlight times in the afternoon, then click “Format” to choose a highlight color.
- Click “OK” twice to apply.
Conditional formatting helps in quickly scanning through large datasets to identify specific time segments.
🌟 Note: While this doesn’t alter the format, it provides visual cues, enhancing data readability and analysis.
In summary, managing time data in Excel is made simpler with the above five methods. Whether you’re looking for quick format changes, custom tailoring, or advanced automation, Excel offers solutions to fit all needs. These techniques ensure your time data is not only accurately represented but also presented in a way that enhances your project’s visibility and effectiveness.
Why does Excel sometimes show time as a decimal?

+
Excel stores times as serial numbers where 1 equals 24 hours. Decimals in time cells represent fractions of a day.
Can I change the default time format for new spreadsheets?

+
Yes, through File > Options > Advanced > Editing options, you can set default time formats for new workbooks.
How do I handle international time formats in Excel?

+
Change the system’s region settings or use custom formats in Excel to align with different time zone conventions.


