5 Easy Steps to Alphabeticize Your Excel Sheet

Organizing data in Excel is a fundamental skill that can streamline your workflow, improve readability, and make data analysis more efficient. One of the most common tasks is alphabetizing your sheet, which involves sorting your data by letters in alphabetical order. Whether you're dealing with a simple list or a complex dataset, these steps will guide you through the process of alphabetizing your Excel sheet easily and effectively.
Step 1: Identify Your Range

Before you can sort, you need to know exactly what part of your spreadsheet you want to organize. Here’s how to pinpoint your range:
- Click and drag your mouse to highlight the cells you want to sort.
- Be careful not to include any extra columns or rows that you don’t want alphabetized.
Step 2: Open the Sort Dialogue Box

To initiate the sorting process:
- Navigate to the Home tab on the Excel Ribbon.
- Click on the Sort & Filter drop-down menu.
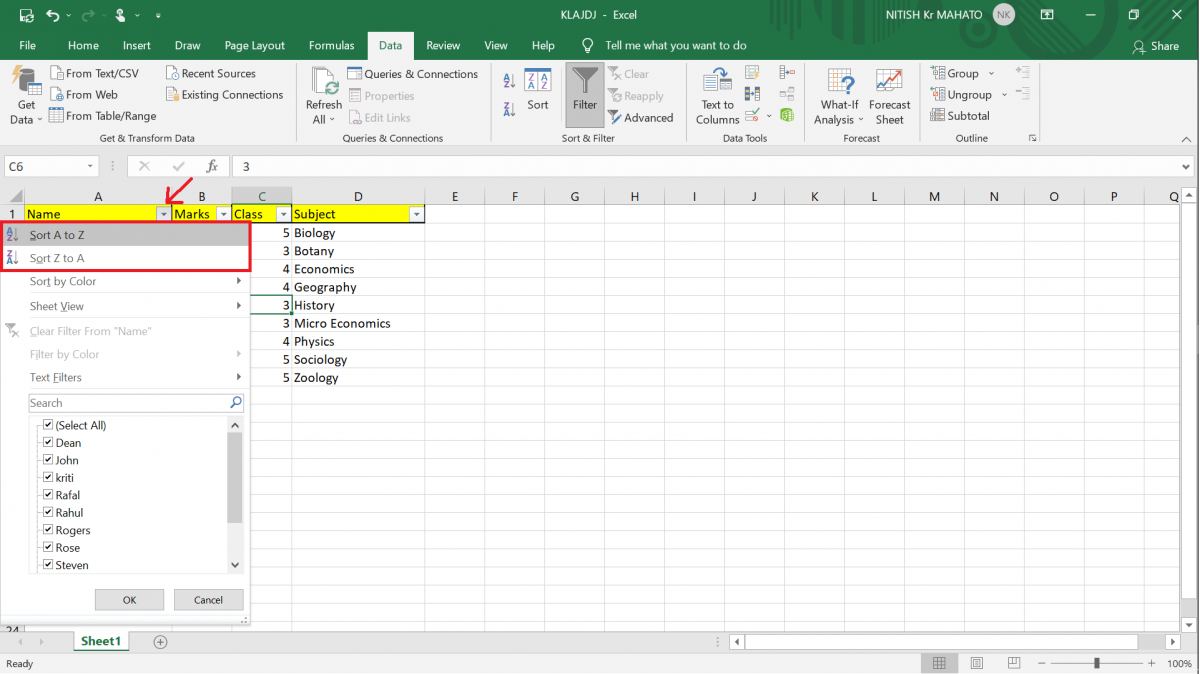
- Select Sort A to Z for an ascending alphabetical order or Sort Z to A for a descending order.
💡 Note: If you have headers in your data, make sure to tell Excel to treat them appropriately to avoid sorting them with the rest of the data.
Step 3: Sorting Multiple Columns

If your dataset includes multiple columns that you want to sort by:
- After clicking Sort & Filter, choose Custom Sort.
- In the dialogue box, add levels to sort by multiple columns, specifying the primary column first.
- Use Options to choose how to handle headers if you have any.
⚠️ Note: Sorting by multiple columns can get complex. Ensure you understand the order of importance in your data to avoid unexpected results.
Step 4: Handling Rows with Blank or Duplicated Values

Blank or duplicate values can disrupt the sorting process:
- To sort with blanks at the bottom, choose the Cell Color or Font Color option in the Sort On menu and specify the color as Automatic.
- For duplicates, Excel usually sorts them next to each other, but you can further refine your sort by using Advanced Options.
Step 5: Check Your Work

After sorting, it’s crucial to review your work:
- Ensure that all rows are still connected to their original data.
- Check for any unexpected results or mis-sorted data, especially if you had complex sorting criteria.
Now that you've followed these five steps, you should have an organized Excel sheet with data arranged in alphabetical order. Remember, mastering Excel’s sorting functions can save you considerable time and effort in managing your data. Keep in mind that sorting is not just about organizing; it’s also about making your data more accessible and easier to analyze.
Can I sort multiple columns at once in Excel?

+
Yes, Excel allows sorting by multiple columns. This feature helps organize data according to multiple criteria, providing a more comprehensive sorting capability.
What happens if my Excel sheet contains header rows?

+
When sorting data with headers, Excel offers an option to treat these as headers, so they won’t get mixed up with the sortable data.
How do I ensure that Excel keeps rows together when sorting?

+
By selecting all relevant columns before initiating the sort, Excel automatically keeps related rows connected during the sorting process.


