5 Ways to Add Footers to Every Excel Sheet Easily

Footers in Excel provide a neat way to include important information like page numbers, dates, file names, or other static content across multiple worksheets, ensuring consistency and professionalism in document presentation. Here are five straightforward methods to add footers to every Excel sheet easily, each tailored to different needs and levels of complexity.
1. Using the Excel Page Layout View

The simplest way to add footers uniformly across your Excel workbook is through the Page Layout view.
- Open your Excel workbook.
- Navigate to the View tab, then click on Page Layout.
- Scroll to the bottom of the page where you'll see header and footer placeholders.
- Click into the footer area, type your content or use the design tab options to insert date, time, or other dynamic elements.
- Any changes made here will apply to every sheet in the workbook.
⚠️ Note: When in Page Layout View, be aware that some formulas might display differently, as this view is designed for print preview.
2. Customizing Footers through VBA

For a more automated approach, Visual Basic for Applications (VBA) can be used:
- Press ALT + F11 to open the VBA editor.
- Insert a new module and paste the following script:
Sub AddFooterToAllSheets()
    Dim ws As Worksheet
    For Each ws In ThisWorkbook.Worksheets
        With ws.PageSetup
            .CenterFooter = "Page &P of &N"
        End With
    Next ws
End Sub
- Customize the footer text or elements within the script.
- Run the macro by pressing F5 or assign it to a button for user convenience.
3. Grouping Sheets for Quick Editing

If you only need to make changes to a subset of sheets, grouping can be efficient:
- Click on the first sheet you want to edit, then hold CTRL or SHIFT to select additional sheets.
- Go to Insert > Text > Header & Footer.
- Your footer edits will apply to all selected sheets simultaneously.
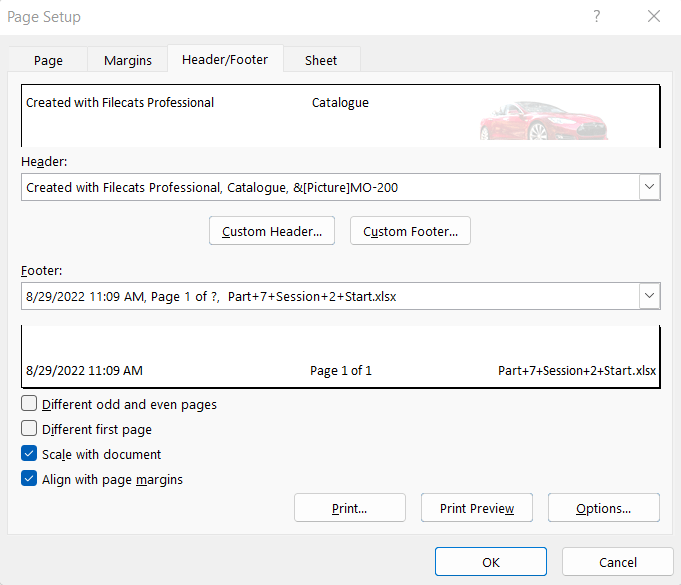
4. Using Excel’s Page Setup Dialog Box

The Page Setup dialog offers a more comprehensive approach:
- Right-click any sheet tab and choose Select All Sheets.
- Go to Page Layout > Page Setup > Header/Footer tab.
- Click on Custom Footer, and input your desired footer text or elements.
- Apply changes to all selected sheets.
5. Saving as a Template

For recurring workflows, saving your workbook as a template:
- Add footers to your workbook as described above.
- Go to File > Save As.
- Choose Excel Template (*.xltx) or Excel Macro-Enabled Template (*.xltm) and save.
- When creating new workbooks from this template, they will already have your predefined footers.
👉 Note: Remember to keep templates in the right directory if you're on a shared network, for easy access.
Each method above caters to different workflows, from simple manual addition to more sophisticated automation. By integrating these techniques, you'll not only enhance your Excel proficiency but also save time, ensuring documents are formatted consistently for both print and digital review. Through the strategic use of footers, you can convey crucial information effectively and maintain uniformity across multiple sheets, making your work not only professional but also easy to navigate.
What are the benefits of adding footers to Excel sheets?

+
Adding footers helps in identifying documents easily, tracking revisions, providing navigation aids like page numbers, and maintaining consistency across multi-sheet workbooks.
Can I customize what appears in the footer for each sheet?

+
Yes, you can customize footers for individual sheets or apply a uniform footer across all sheets as described in the methods above.
Will footers affect my worksheet data or formulas?

+
No, footers only appear in the print or print preview mode and do not affect the actual data or formulas on your worksheets.
How do I remove or change a footer once it’s added?

+
Go to the Page Layout view or the Page Setup dialog box to edit or remove footers from individual or grouped sheets.


