Set All Excel Sheets to Landscape: Easy Guide

Do you need to present your Excel data in a more suitable format for your reports or analysis? Printing or sharing your Excel workbook in portrait mode might not always be the best choice, especially when dealing with extensive datasets. By switching your Excel sheets to landscape orientation, you can better fit your content, especially wide tables, charts, or images. Here's an easy guide on how to set all Excel sheets to landscape.
Understanding Landscape and Portrait Modes

Before diving into the steps, let's clarify the difference between landscape and portrait orientations:
- Portrait Mode: The page is taller than it is wide, which is the default setting for most Excel sheets.
- Landscape Mode: The page is wider than it is tall, making it ideal for documents with a lot of columns.
Setting All Sheets to Landscape Orientation

To ensure that all your sheets in an Excel workbook are in landscape orientation, follow these steps:
- Open your Excel Workbook: Launch Excel and load your workbook.
-
Select Multiple Sheets: To apply landscape orientation to all sheets at once:
- Click on the first sheet tab.
- Hold down the Shift key and click on the last sheet tab to select all sheets between these two. You can also use Ctrl+click to select individual sheets.
- Navigate to Page Layout: Go to the 'Page Layout' tab in the Ribbon.
-
Change to Landscape:
- In the 'Page Setup' group, click on the small square icon to open the Page Setup dialog box.
- Go to the 'Page' tab.
- Under 'Orientation', select 'Landscape'.
- Click 'OK' or 'Apply to All Sheets' if available.
- Unselect Sheets: Once done, right-click any sheet tab and choose 'Ungroup Sheets' to work on individual sheets again.
⚠️ Note: Changing the orientation for multiple sheets at once will affect only the sheets you've selected. If you add a new sheet later, it will default to portrait orientation.
Setting Specific Sheets to Landscape Orientation

If you don't need all sheets in landscape but just a few specific ones, here's how you do it:
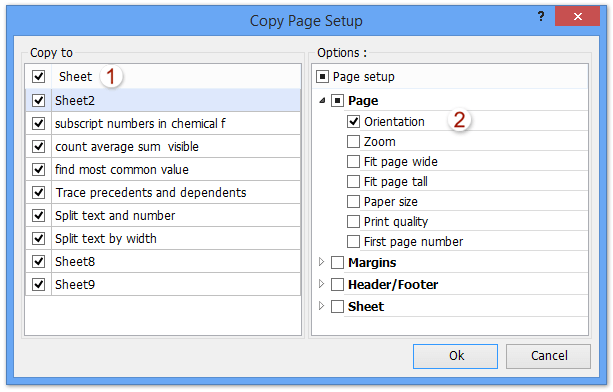
- Select Specific Sheets: Click on the tabs of the sheets you want to change to landscape. You can select multiple sheets by holding Ctrl while clicking each tab.
- Follow Steps 3-5 from Above: These steps remain the same as setting all sheets but will only apply to the sheets you've selected.
Formatting Tips for Landscape Layouts

Adjusting the orientation to landscape is just the first step. Here are some additional formatting tips to ensure your data looks its best:
- Adjust Page Margins: Landscape documents might require different margins than portrait documents. Ensure headers and footers are centered if necessary.
- Scale to Fit: In the Page Layout tab, use the 'Scale to Fit' group to scale your worksheet content to fit on a single page if it's too wide.
- Headers/Footers: Landscape orientation often requires you to adjust header/footer content to fit the new page layout.
📝 Note: Excel has default settings for landscape orientation, but you can always customize margins, headers, and footers through the Page Setup dialog box.
Common Issues and How to Resolve Them

Here are some common problems you might encounter when changing Excel sheets to landscape:
- Print Area Issues: If you have defined a print area in portrait mode, it might look different in landscape. You'll need to adjust the print area accordingly.
- Content Spillage: Landscape orientation can cause issues where content exceeds the page width. Use 'Wrap Text' or 'Autofit' column width to manage this.
- Charts and Images: Ensure charts and images adjust correctly; sometimes, they might not fit well in the new orientation. You might need to resize or reposition them.
Optimizing for Different Devices

Excel workbooks are often viewed on various devices with different screen orientations:
- Mobile Devices: Landscape orientation can be problematic on mobile devices due to limited screen width. Use mobile-friendly Excel features like 'Reflow Text' when sharing sheets.
- Computer Monitors: Most people view spreadsheets in landscape orientation naturally on a computer. Ensure content is legible at this orientation.
💡 Note: While landscape is often more suitable for Excel, consider your audience's primary viewing device when deciding on orientation.
By following this guide, you've learned how to easily change all or specific Excel sheets to landscape orientation. Whether you're preparing for a presentation, sharing data, or just organizing your work, landscape orientation can significantly enhance how your data is displayed and interpreted. Remember, while landscape orientation is great for wide datasets, always consider your audience's needs and the primary use of your workbook. Tailor your formatting choices to optimize the readability and effectiveness of your Excel documents.
Can I set landscape orientation for some sheets but not others?

+
Yes, by selecting specific sheets before changing the orientation in the Page Setup dialog, you can set landscape orientation for some sheets while leaving others in portrait.
How do I return to portrait mode?

+
Follow the same steps as setting to landscape, but in the Page Setup dialog, choose ‘Portrait’ under Orientation.
Will setting all sheets to landscape affect my workbook’s functionality?

+
No, changing the page orientation does not alter the functionality of your workbook. It only changes how the data is displayed when printed or in Page Layout View.


