Unhide Excel Rows and Columns Easily: Quick Guide

When working with Microsoft Excel, one of the essential skills is navigating through the plethora of rows and columns that can quickly become overwhelming. Whether it's for data analysis, reporting, or simply trying to find that one piece of information you need, knowing how to unhide rows and columns can save you a significant amount of time. This guide will walk you through the steps to unhide Excel rows and columns with ease, enhancing your efficiency in managing spreadsheets.
Why Rows and Columns Might Be Hidden

Before diving into the how-to, let’s understand why you might encounter hidden rows or columns:
- Formatting: To declutter the worksheet, users might hide unnecessary data.
- Data Protection: Sensitive information might be hidden to protect it from being viewed or edited accidentally.
- Purposeful Grouping: Users often group rows or columns for easier navigation or to manage a set of related data together.

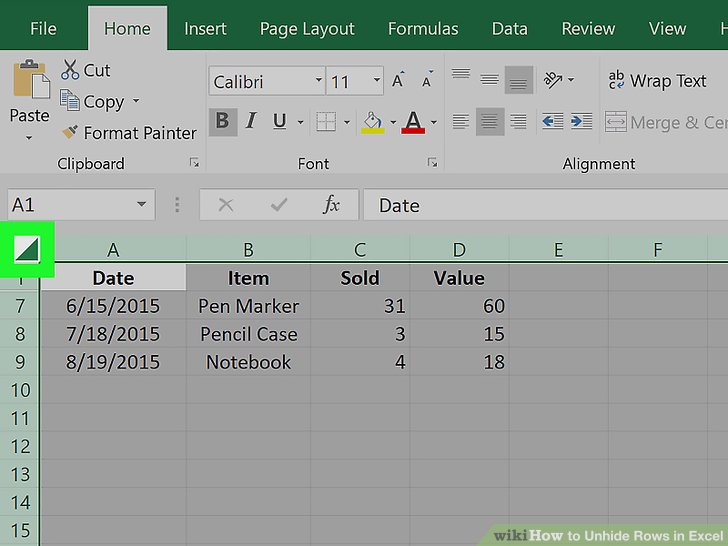
Unhide Rows in Excel

Here’s how you can unhide rows in Excel:
- Select the rows above and below the hidden row(s).
- Right-click on the selection and choose ‘Unhide’ from the context menu.
🛈 Note: If you can’t select the adjacent rows, they might be locked or grouped.
Unhide Columns in Excel

To unhide columns, follow these steps:
- Select the columns to the left and right of the hidden column(s).
- Right-click on the selection and click ‘Unhide’.
🛈 Note: Ensure you are selecting the column headers, not the cells within the columns.
Using Excel Ribbon Commands

If you prefer using the Excel ribbon for your commands:
- Select the rows or columns around the hidden ones.
- Go to the ‘Home’ tab on the ribbon.
- Find the ‘Cells’ group, click on ‘Format’, and then select ‘Hide & Unhide’ > ‘Unhide Rows’ or ‘Unhide Columns’.
Unhiding Multiple Rows or Columns

When you need to unhide a large number of rows or columns:
- Drag-select the rows or columns, including those around the hidden ones.
- Use the right-click method or the ribbon commands as mentioned above.
This approach is particularly useful when managing large datasets where hidden elements can span across many rows or columns.
Advanced Techniques for Unhiding

Keyboard Shortcuts

- Unhide Rows: Ctrl+Shift+9
- Unhide Columns: Ctrl+Shift+0
Using the Go To Special Feature

- Press Ctrl+G to open the ‘Go To’ dialog box.
- Click ‘Special’, select ‘Visible cells only’, and then click ‘OK’.
- Select the rows or columns around the hidden elements.
- Right-click and choose ‘Unhide’.
Macro for Unhiding All Rows and Columns

If you deal with spreadsheets that have hidden rows or columns frequently, creating a macro can streamline your workflow:
Sub UnhideAllRowsColumns()
    Cells.EntireRow.Hidden = False
    Cells.EntireColumn.Hidden = False
End Sub
🛈 Note: You need to enable macros in Excel to use this feature.
Wrapping Up

Managing your Excel worksheets effectively involves knowing how to manipulate your data layout for clarity and ease of use. Unhiding rows and columns is a crucial part of this. With the methods described above, from basic context menu commands to advanced macros, you’re equipped to tackle hidden data in Excel. Remember, the key to becoming proficient with Excel is practice; the more you use these techniques, the more intuitive they become. Keep exploring, and soon, managing Excel will feel like second nature.
What if I can’t unhide rows or columns?

+
Ensure that the worksheet is not protected or that rows or columns are not locked. Sometimes, hidden elements are locked, and you’ll need to unlock them first before unhiding.
Can I unhide rows and columns in Excel Online?

+
Yes, Excel Online supports unhide functionality. You can use similar methods as in the desktop version to manage hidden elements.
How do I prevent rows or columns from being hidden accidentally?

+
You can protect the worksheet by going to ‘Review’ > ‘Protect Sheet’ and setting permissions so that hiding or unhiding cannot be done by other users.


