5 Simple Steps to Move Excel Data to Word

In today's digital workspace, seamless data integration between various applications can significantly boost productivity. One common need is moving data from Microsoft Excel to Microsoft Word. Whether you need to include tables, charts, or simple text for reports, presentations, or documentation, this task can seem daunting if you're not familiar with the right techniques. Here are 5 simple steps to make this transition smoothly.
Step 1: Prepare Your Excel Data
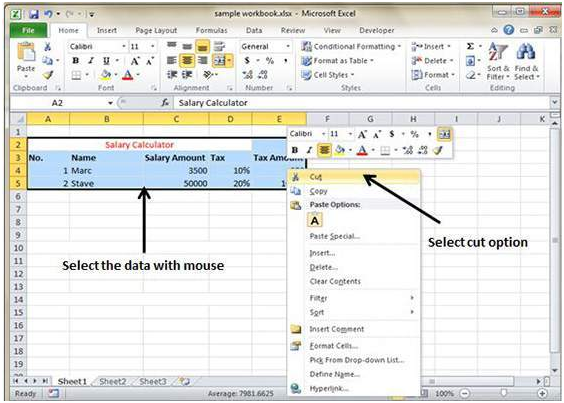
Before you can import your data into a Word document, ensure your Excel file is:
- Organized: Make sure the data is well-structured. This means each column should have a clear header, and rows should be consistent.
- Formated: Formatting like cell alignment, font size, color, and background can be lost or altered during transfer. Adjust or remove these to ensure a clean transition.
- Consolidated: Remove any unnecessary columns or rows that won't be used in the Word document.
Step 2: Copy the Data

Once your data is ready:
- Select the entire range of data you wish to move. Use Ctrl + A (Cmd + A on Mac) to select all if you're copying the whole sheet.
- Right-click and choose 'Copy' or simply press Ctrl + C (Cmd + C on Mac).
Step 3: Paste Into Word

Now, open your Word document:
- Place the cursor where you want the data to appear.
- Right-click and choose 'Paste' or press Ctrl + V (Cmd + V on Mac).
- From the dropdown options, select either:
- Keep Source Formatting: To retain Excel's formatting in Word.
- Use Destination Styles: To use Word's default table formatting.
- Link & Use Destination Styles: To create a link back to Excel where changes in Excel automatically update in Word.
⚠️ Note: Choosing the 'Link' option ensures that any changes made in the Excel file will reflect in the Word document, but it requires the Excel file to be accessible.
Step 4: Adjust and Format in Word

After pasting the data, you might need to make some adjustments:
- Adjust column widths to ensure visibility of all data.
- Check for any merged cells that could affect the layout in Word.
- Consider using Table AutoFormat in Word to apply a consistent look.
💡 Note: For graphs or charts, right-click the chart in Excel, select 'Copy,' then in Word, right-click and choose 'Paste Special' to insert as an object or a picture for optimal placement.
Step 5: Review and Finalize

Before considering the process complete:
- Proofread the data for any potential errors or formatting issues.
- Check if the data fits well within the document or if further adjustment is needed.
By following these five steps, you can efficiently move data from Excel to Word, ensuring that your documents look professional and your workflow remains efficient. The key here is preparation and understanding the paste options available in Word to ensure the data not only transfers accurately but also integrates smoothly with your document's style.
Can I update data in Excel after pasting it into Word?

+
Yes, by choosing ‘Link & Use Destination Styles’ when pasting, any changes made in Excel will automatically update in Word, as long as both documents are on the same network.
What happens if I don’t format my Excel data before copying?

+
Unorganized data might not transfer cleanly, potentially leading to formatting issues or loss of readability in Word. Preparing your data ensures a smooth transition.
How can I move Excel charts into Word without losing detail?

+
Use ‘Paste Special’ in Word and choose to paste as an Excel chart object. This option preserves formatting and allows for easy updating from Excel.
