5 Ways to Split Rows into Different Sheets in Excel

Microsoft Excel is a powerful tool used widely in various sectors for data analysis, accounting, project management, and numerous other applications. One common task users face is managing and organizing large datasets, which can become unwieldy over time. A practical solution often involves splitting rows or specific data sets into different sheets within the same workbook. This article will walk you through five efficient methods to achieve this in Excel, providing you with the tools to streamline your data management process.
Method 1: Using Microsoft Query

Microsoft Query is an advanced tool that allows you to extract, transform, and load data into Excel from various sources. Here’s how you can use it to split rows:
- Open your Excel workbook and go to the ‘Data’ tab.
- Click on ‘From Other Sources’ and then select ‘Microsoft Query.’
- In the Query Wizard, choose the Excel file as your data source and select the data range or table you want to work with.
- Once you’ve set up your query, you can use SQL to filter and distribute rows. For example, you could use:
SELECT * FROM [YourRange$] WHERE [Column] = ‘Value’
⚠️ Note: Microsoft Query requires some SQL knowledge; for basic users, learning this might take some time.
Method 2: VBA Macro

VBA (Visual Basic for Applications) macros are excellent for automating repetitive tasks. Here’s how to split rows into separate sheets using a macro:
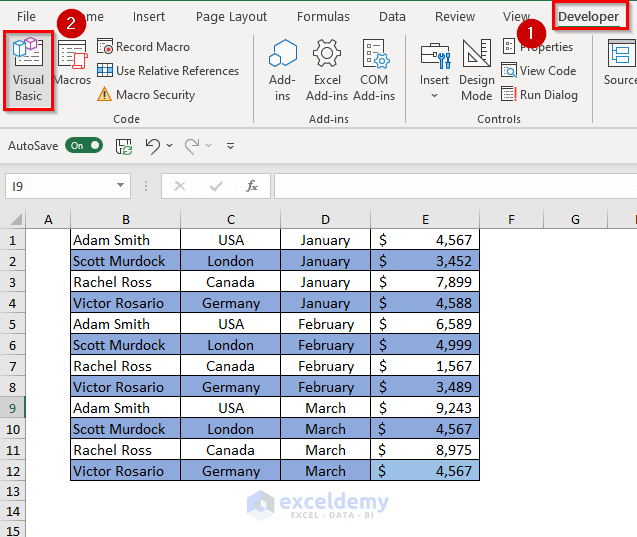
- Open the Visual Basic Editor with ‘Alt + F11’ or through the ‘Developer’ tab.
- Insert a new module and paste the following code:
Sub SplitRowsIntoSheets()
    Dim ws As Worksheet
    Dim wsData As Worksheet
    Set ws = ThisWorkbook.Sheets(“Sheet1”) ‘ Change to your sheet name
    Set wsData = ThisWorkbook.Sheets.Add(After:=ThisWorkbook.Sheets(1))

wsData.Name = "Split Data"
Dim lastRow As Long, i As Long, keyCell As String
lastRow = ws.Cells(ws.Rows.Count, 1).End(xlUp).Row
keyCell = "A1" ' Adjust if your key column is different

For i = 2 To lastRow
    Dim newSheetName As String
    newSheetName = ws.Range(keyCell).Offset(i - 1, 0).Value
    If WorksheetExists(newSheetName) Then
        Set wsNew = ThisWorkbook.Worksheets(newSheetName)
    Else
        Set wsNew = ThisWorkbook.Sheets.Add(After:=ThisWorkbook.Sheets(1))
        wsNew.Name = newSheetName
    End If
    ws.Rows(i).Copy wsNew.Rows(1)
Next i


End Sub

Function WorksheetExists(sName As String) As Boolean
    Dim ws As Worksheet
    On Error Resume Next
    Set ws = ThisWorkbook.Sheets(sName)
    If Not ws Is Nothing Then WorksheetExists = True
End Function
Method 3: Power Query

Power Query, now integrated into Excel, allows you to transform and clean data with ease. Here’s how you can use it:
- Go to the ‘Data’ tab and click ‘From Table/Range’ to open Power Query Editor.
- Group your data by the column you want to split by, using ‘Group By’ from the ‘Home’ tab.
- After grouping, expand the new table column to create separate tables, each representing a unique value from your key column.
- Load each of these tables into new sheets in your workbook.
Method 4: Manual Sorting and Copying

Sometimes, the simplest solutions are still effective:
- Sort your data by the column you want to split by.
- Use ‘Ctrl + G’ to open the Go To dialog box, then select ‘Special’ and ‘Visible Cells Only’ to highlight the visible cells after filtering.
- Copy these cells and paste them into new sheets for each category.
Method 5: Using Advanced Filter

The Advanced Filter in Excel provides a robust way to split data:
- Set up criteria on a separate sheet or range within your current sheet to filter your data.
- Select your data range, go to ‘Data’> ‘Filter’> ‘Advanced.’
- Choose your List Range, Criteria Range, and where to copy the results (like a new worksheet).
- Excel will filter and distribute the rows into new sheets based on your criteria.
🔔 Note: Advanced Filter requires precise range selection; incorrect ranges can lead to data mismanagement.
Having explored these five methods, you're now equipped with a variety of techniques to split rows in Excel efficiently. Each approach has its merits, tailored for different levels of user expertise and specific data handling needs. From leveraging built-in features like Microsoft Query and Power Query to programming with VBA or manually managing your data, Excel offers numerous ways to organize and streamline your data management tasks. Whether you're an Excel beginner or a power user, understanding these methods will boost your productivity and data manipulation capabilities.
What is the easiest method to split rows into different sheets for a beginner?

+
For beginners, the most straightforward method would be using the manual sorting and copying approach. It requires minimal setup, and once you’ve sorted your data, copying visible cells into new sheets is intuitive.
Can I automate the process of splitting rows?

+
Yes, VBA macros provide an excellent way to automate the process. Once you’ve written or obtained the macro code, you can run it whenever needed to split rows automatically.
Is it possible to split rows based on multiple criteria?

+
Yes, you can use both the Advanced Filter and Power Query to split rows based on multiple criteria. This allows for complex data distribution scenarios.


