5 Simple Steps to Set Up an Excel Inventory Sheet

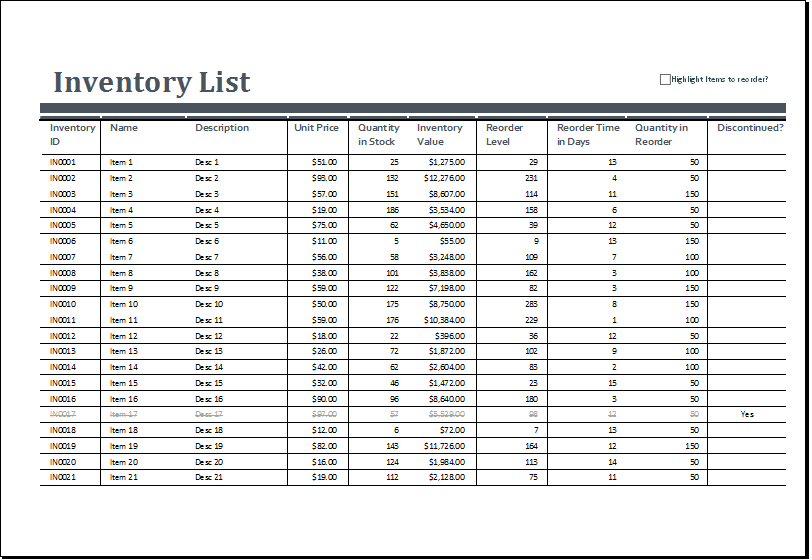
In the age of data management, having a well-organized inventory sheet can streamline business operations significantly. Excel, Microsoft's powerful spreadsheet software, is an excellent tool for this task. Here's how to set up an Excel inventory sheet in five simple steps, ensuring your records are accurate, accessible, and easy to manage.
1. Define Your Inventory Categories

Begin by determining what information you need to track:
- Product Name or SKU - A unique identifier for each item.
- Description - A brief explanation of what the item is.
- Quantity - The number of items in stock.
- Price - Both cost price and selling price.
- Category - To group similar items.
- Location - Where the item is stored in your warehouse or store.
2. Set Up Your Excel Workbook

Now that you have defined your categories:
- Open Excel and create a new workbook.
- Enter headers in the first row. For example, “Product Name,” “Description,” “Quantity,” “Cost Price,” “Selling Price,” “Category,” and “Location.”
- Format your headers:
- Bold the text for clarity.
- Use different font colors or backgrounds to differentiate columns if needed.
- Auto-fit columns by double-clicking the line between column letters to adjust width.
3. Input Inventory Data

With your headers in place:
- Enter the data for each item under its corresponding category.
- Use cell validation:
- For quantity, set up to accept only whole numbers.
- For price, ensure it accepts only numeric values with two decimal places.
- Keep your data clean and consistent by avoiding duplicates or misspellings.
4. Apply Formulas for Dynamic Management

Excel’s formula feature can automate calculations:
- Total Inventory Cost - To calculate, use a formula like: =SUM((Cost Price column)*(Quantity column)).
- Reorder Alert - Create conditional formatting rules to highlight items when their quantity is below the reorder point.
- Profit Margin - Calculate using (Selling Price - Cost Price) / Cost Price.
5. Implement Data Validation and Formatting

The final step is to ensure data consistency:
- Use Excel’s data validation:
- Set up lists to drop down for categories.
- Ensure dates, numbers, and text follow a specific format.
- Enhance the usability of your sheet:
- Freeze panes for headers to always be visible when scrolling.
- Create named ranges or tables for easy reference.
🛈 Note: Keeping your inventory sheet up to date is crucial for accuracy. Remember to update quantities and prices regularly to reflect real-time data.
By following these five simple steps, you've now created an Excel inventory sheet that can help streamline your business's stock management process. Excel's versatile features allow for real-time updates, quick calculations, and easy navigation through your inventory data. With an organized approach to tracking inventory, you'll reduce errors, optimize stock levels, and have a clearer view of your financials at any given time.
Why is an Excel inventory sheet useful for my business?

+
An Excel inventory sheet helps track stock levels, manage sales, purchases, and restocking efficiently, providing clear insights into your inventory management and financial health.
How often should I update my inventory sheet?

+
Updating your inventory sheet regularly, ideally in real-time or daily, ensures the data is current and reflects the actual stock situation, reducing the risk of errors or overstocking.
Can I share my inventory sheet with my team?

+
Yes, you can share your Excel inventory sheet with your team by using features like “Share Workbook” or by saving it to a shared location like OneDrive, allowing multiple users to view and edit simultaneously.


