5 Easy Steps to Email from Excel

If you’re looking to streamline your workflow and enhance productivity, learning how to send emails from Excel is a game-changer. Whether you're sending personalized marketing emails, customer updates, or internal communications, integrating Excel with email can automate your communications, saving you time and reducing human error. In this guide, we'll walk you through five simple steps to set up Excel to send emails directly, optimizing your email marketing strategy with ease.
Understanding the Basics

Before diving into the steps, it's worth understanding why sending emails from Excel is so beneficial:
- Efficiency: Automate repetitive tasks.
- Accuracy: Reduce mistakes with templates and automation.
- Personalization: Customize emails to recipient data within Excel.
🔧 Note: This tutorial assumes you have basic familiarity with Excel and email clients like Outlook or Gmail.
Step 1: Prepare Your Excel Sheet

The first step involves setting up your Excel file with all the necessary data:
- Recipient Details: Include columns for email addresses, names, and other personalization data.
- Email Content: Decide on the content you want to send, including subject lines and body text.
To make your email more personalized:
| Column | Description |
|---|---|
| Name | The recipient's first name or full name |
| The recipient's email address | |
| Subject | A dynamic subject line or a static one |
| Body | The email content, which can include placeholders for personalization |

Ensure all data is correctly formatted and free of typographical errors to prevent email bounces or miscommunications.
Step 2: Use VBA for Email Automation

Visual Basic for Applications (VBA) is Excel's programming language that allows you to automate processes, including sending emails. Here's what you'll need to do:
- Open the VBA Editor: Press Alt + F11 in Excel.
- Insert a New Module: Right-click on any of the items in the "Project Window", select 'Insert' > 'Module'.
- Paste Your Code: Here's a basic example for Outlook:
Sub SendEmails()
    Dim olApp As Object, olMailItm As Object
    Dim ws As Worksheet, rng As Range, cell As Range
    Set olApp = CreateObject("Outlook.Application")
    Set ws = ThisWorkbook.Sheets("Sheet1") 'Change sheet name as needed

    For Each cell In ws.Range("A2:A" & ws.Cells(ws.Rows.Count, "A").End(xlUp).Row)
        Set olMailItm = olApp.CreateItem(0)
        With olMailItm
            .To = cell.Offset(0, 1).Value
            .Subject = cell.Offset(0, 2).Value
            .Body = cell.Offset(0, 3).Value
            .Send
        End With
    Next cell

    Set olMailItm = Nothing
    Set olApp = Nothing
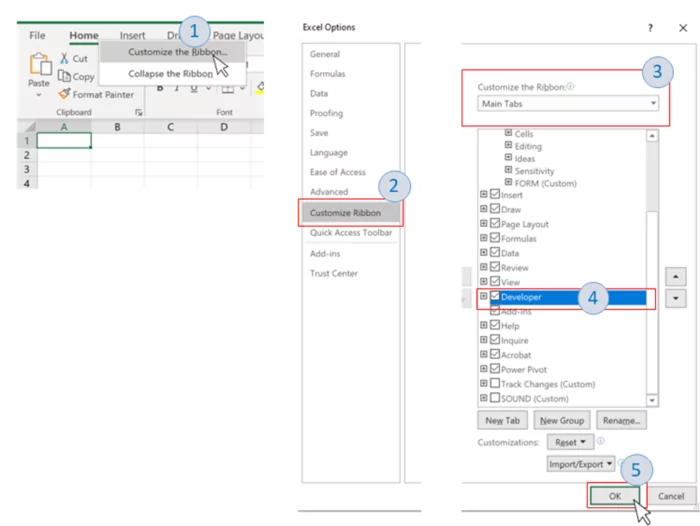
🔧 Note: Ensure your Excel is set up with the necessary permissions to execute macros. You'll also need to trust access to the VBA project object model in Trust Center settings.
Step 3: Personalize Your Emails

Personalizing emails can significantly increase engagement rates. Use placeholders in your email body to dynamically insert data from Excel:
- Placeholders: Use Excel formulas or VBA string replacement to dynamically insert names, promotions, or other specific details.
Here's an example of how to create placeholders:
    .Body = "Hi " & cell.Offset(0, 0).Value & "," & vbNewLine & _
            "Here's your personalized message."
Step 4: Test and Debug Your Email Sending

Testing is crucial to ensure that your emails are sent correctly and without errors:
- Small Batch: Start with a small batch of emails to test the process.
- Check Email Delivery: Confirm that emails are being received by checking the recipients' inboxes or sending to test accounts.
- Error Handling: Use VBA error handling to manage common issues like invalid email addresses.
Step 5: Implement and Scale

Once your system is tested and refined, you can scale the email sending:
- Schedule Sends: You can automate the timing of emails to be sent at specific times.
- Email Lists: Expand your recipient list or use multiple sheets in Excel for different purposes.
- Customization: Enhance your VBA code to allow for different email types or triggers.
The key to successfully sending emails from Excel lies in the preparation of your data, the precision of your VBA code, and the testing of your setup. By following these steps, you'll have an automated, accurate, and efficient email marketing system that can easily be integrated into various business processes. Remember, this automation reduces the likelihood of human error and increases the personalization of your communications, which is crucial in today's market.
What are the requirements for sending emails from Excel?

+
You need a version of Excel that supports VBA macros, an email client like Outlook installed, and the necessary permissions to execute macros.
Can I send emails through Gmail from Excel?

+
Yes, you can configure Excel to work with Gmail using SMTP settings, but it requires more complex setup compared to using Outlook directly.
How can I handle errors when sending emails?

+
Use VBA error handling routines to catch and manage errors like invalid email addresses or connection issues.


