5 Easy Steps to Remove Text from Excel Sheets Fast

When dealing with large datasets in Microsoft Excel, you often encounter extraneous text that clutters your spreadsheet, making data analysis and presentation cumbersome. Whether you're cleaning up data from an external source, preparing for a presentation, or simply trying to streamline your worksheet, removing unwanted text quickly is a crucial skill for any Excel user. In this article, we'll guide you through five easy steps to remove text from Excel sheets fast, ensuring your workflow becomes more efficient and your data cleaner.
Step 1: Identify the Text to Remove

Before diving into the process of text removal, it's critical to first identify the text you want to eliminate:
- Determine what text needs to be removed. This could be prefixes, suffixes, or any specific characters or words.
- Select the range of cells containing this text. This could be an entire column, a row, or a specific group of cells.

🔍 Note: Precision in identifying the text will save time and prevent errors.
Step 2: Use Excel's Find and Replace Feature

Excel’s Find and Replace feature is a powerhouse for quick text removal:
- Press Ctrl + H or go to Home > Editing > Find & Select > Replace.
- In the Find what field, enter the exact text you want to remove.
- Leave the Replace with field blank to effectively delete the text.
- Choose options like Match case or Match entire cell contents for precision.
- Click Replace All to remove the text from all selected cells at once.
| Option | When to Use |
|---|---|
| Match case | When you only want to remove text with a specific case sensitivity. |
| Match entire cell contents | To replace the entire cell content when it exactly matches the search criteria. |

📌 Note: Ensure 'Within' is set to 'Sheet' to apply the removal to the entire worksheet if needed.
Step 3: Utilize Text-to-Columns for Data Segmentation

Text-to-Columns can be used not just for separating data but also for removing unwanted parts:
- Select the column with the text to be split or modified.
- Go to Data > Text to Columns.
- Choose either Delimited or Fixed width depending on your data structure.
- If using delimiters, select those that will split the text correctly, or define fixed-width break lines.
- Uncheck columns you don't want to retain in the final output.

✏️ Note: This method is particularly useful for removing leading, trailing, or mid-data text.
Step 4: Leverage Excel Formulas for Complex Text Removal

For more complex scenarios, Excel formulas can be your best tool:
- Use LEFT, RIGHT, or MID to extract parts of the text excluding unwanted characters.
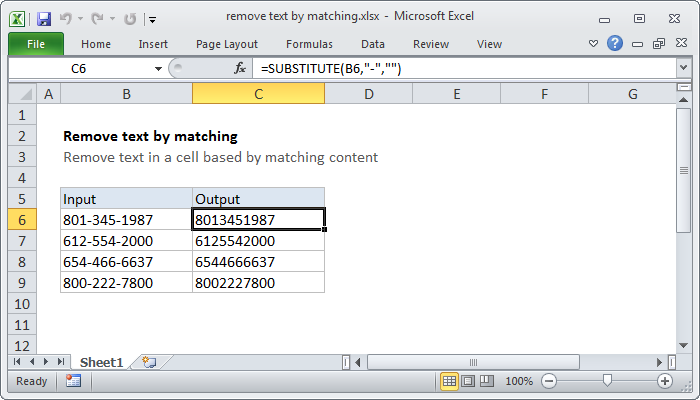
- REPLACE or SUBSTITUTE functions can directly replace or remove specific text patterns.
- Combine these with IF statements for conditional text removal.
Here's an example:
=LEFT(A2, FIND(" ", A2) - 1)
This formula would extract everything before the first space, effectively removing any trailing text.
👨💻 Note: While powerful, ensure formulas are error-free to avoid unexpected results.
Step 5: Clean Data with Flash Fill

Introduced in Excel 2013, Flash Fill can quickly perform data manipulation:
- Enter the desired result in the cell next to the original data.
- Type the pattern for one or two cells.
- Excel will recognize the pattern and suggest the rest of the column. Press Ctrl + E to apply.

🎉 Note: Flash Fill might not always catch your intent. Double-check the results for consistency.
These steps, when followed in order, provide a structured approach to clean up your Excel data swiftly. Remember that each method has its advantages and choosing the right one depends on the complexity of the text to be removed and the frequency of such tasks. Regular use of these techniques will not only speed up your data cleaning process but also enhance the accuracy and presentation of your spreadsheets.
What should I do if Find and Replace doesn’t remove all text?

+
Double-check the text you are trying to remove, including spaces and punctuation. Use the Replace option with wildcard characters if necessary, or check for hidden characters.
Can Flash Fill work on any data?

+
Flash Fill can work on most data but excels with data where there’s a clear, repetitive pattern. If the pattern isn’t consistent, Flash Fill might not suggest the correct transformation.
What if I accidentally remove important text?

+
Use Excel’s Undo feature immediately, or if Undo is not an option, you can re-enter or restore from a backup if you have one. Always backup before making significant changes.


