5 Easy Steps to Remove Duplicates in Excel

Working with data in Microsoft Excel often involves dealing with large sets of information, where duplicate entries can lead to inaccuracies or inefficiency in analysis. In this comprehensive guide, we'll explore five easy steps to remove duplicates from your Excel spreadsheets, helping you streamline your data management and analysis tasks.
Step 1: Understand Your Data

Before diving into the process of removing duplicates, it’s crucial to have a clear understanding of your dataset:
- Data Structure: Know the arrangement of your data, including column headers, data types, and any relationships between columns.
- Identify Duplicates: Decide what constitutes a duplicate in your dataset. Is it a single cell value or a combination of values?
- Data Importance: Determine which data is critical to keep or which you can safely remove.
This preliminary analysis ensures that you approach the deduplication process with precision.
Step 2: Sort Your Data

Sorting your data can make the duplicate removal process more straightforward:
- Select the data range or columns you want to work with.
- Go to the ‘Data’ tab and click on ‘Sort & Filter’, then choose ‘Sort A to Z’ or ‘Sort Z to A’ to sort your data based on the key column where duplicates might occur.
By sorting, you bring similar entries close together, making it easier to spot duplicates visually and for Excel to process them efficiently.
Step 3: Use Excel’s Built-in ‘Remove Duplicates’ Feature

Excel offers a straightforward way to remove duplicates:
- With your data sorted, select the range or table containing the duplicates.
- Navigate to the ‘Data’ tab on the Ribbon.
- Click on ‘Remove Duplicates’ from the ‘Data Tools’ group.
- In the dialog box that appears, choose which columns to check for duplicates. By default, all columns are selected, but you can uncheck those you don’t want to compare.
- Click ‘OK’ to remove duplicates.
Excel will inform you how many duplicates were found and removed, leaving you with a cleaned dataset.
Step 4: Advanced Techniques for Unique Rows

For more complex scenarios where you need to keep only unique rows based on combinations of columns, you might need to:
- Use conditional formatting to highlight duplicates.
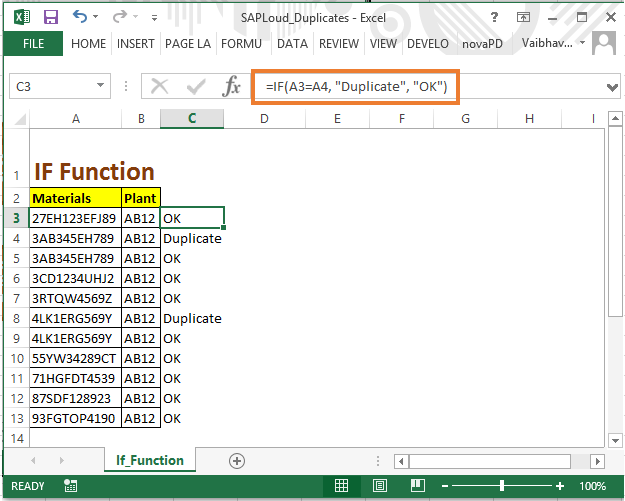
- Create helper columns to combine multiple columns’ values to check for uniqueness.
- Utilize Excel functions like COUNTIF, VLOOKUP, or MATCH to filter for unique records.
Here’s how you can do it:
=IF(COUNTIF(A$2:A2,A2)=1, “Unique”, “Duplicate”)
This formula, when placed in a new column, will help you identify unique entries across your dataset.
📌 Note: Be cautious when using complex formulas or advanced techniques, as they might change the structure or interpretation of your data.
Step 5: Verify and Finalize

After removing duplicates:
- Double-check your data to ensure no important information was inadvertently removed.
- Review the dataset to confirm that all duplicates have been addressed.
- If needed, manually adjust any entries where Excel’s automatic detection might have missed nuances or special cases.
Once you've gone through these steps, your dataset should be free of duplicates, making your data cleaner, more reliable, and easier to analyze. Remember, removing duplicates is not just about keeping your data tidy; it’s about ensuring the integrity and accuracy of your analysis.
In summary, by understanding your data, sorting it, using Excel's 'Remove Duplicates' tool, employing advanced techniques for more complex scenarios, and then verifying your work, you ensure that your Excel workbooks are streamlined and accurate. These five steps help in maintaining data integrity, which is fundamental in any data-driven decision-making process.
How do I know if my data contains duplicates?

+
Duplicates can be identified by visually inspecting your data or by using tools like conditional formatting or Excel’s ‘Remove Duplicates’ feature, which will show how many duplicates are found before removal.
Can I remove duplicates based on certain columns only?

+
Yes, during the ‘Remove Duplicates’ process, you can select which columns to compare. Only the selected columns will be checked for duplicates, allowing you to retain other unique data in unrelated columns.
What if I need to keep the first occurrence of duplicates?

+
By default, Excel keeps the first occurrence of a duplicate row and removes subsequent entries. You can sort your data in the desired order before removing duplicates to control which entry is retained.


