Protect Your Excel Sheet in Office 2007 Easily

Microsoft Excel 2007 introduced a range of new features and user interface enhancements designed to make data management more accessible and efficient. Among these features is the ability to protect spreadsheets to prevent unauthorized edits or viewings. Protecting your Excel sheet can be crucial for maintaining data integrity, especially in a shared work environment or when handling sensitive information. In this guide, we'll delve into how you can easily protect your Excel sheet in Office 2007, providing steps for both basic and advanced protection methods.
Why Protect Your Excel Sheet?

Before we dive into the protection process, understanding why it’s important can motivate its implementation:
- Data Security: Prevent unauthorized access or changes to sensitive information.
- Data Integrity: Keep your data unchanged, ensuring that calculations and formulas remain accurate.
- Collaboration: Allow multiple users to work on a document without interfering with each other’s work.
Basic Sheet Protection

Protecting your sheet with a password is one of the easiest ways to safeguard your Excel data:
- Open your Excel document: Navigate to the Excel file you wish to protect.
- Select the sheet: Choose the tab at the bottom of the Excel window.
- Access the protection options: Click on the Review tab in the Ribbon, then find the Changes group.
- Protect Sheet: Click on the Protect Sheet button.
- Set Password: A dialog box will appear where you can:
- Check or uncheck options for what users can do with the sheet.
- Enter and confirm your password.
- Save and Close: Click OK to set the protection.
🔑 Note: Remember your password. If you forget it, there's no straightforward way to recover or remove the protection.
Advanced Protection Options

For more robust protection, Excel 2007 offers additional tools:
Protecting Specific Cells

Sometimes, you might want to allow editing in certain cells while locking others:
- Select cells: Choose the cells you want to allow editing on.
- Lock or unlock cells: Right-click, select Format Cells, go to the Protection tab, and ensure Locked is unchecked.
- Follow steps for basic protection: Now, when you protect the sheet, these selected cells will remain editable.
Using Worksheet and Workbook Protection

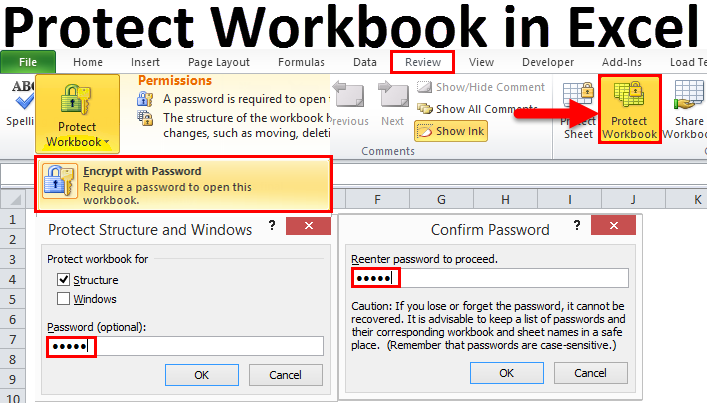
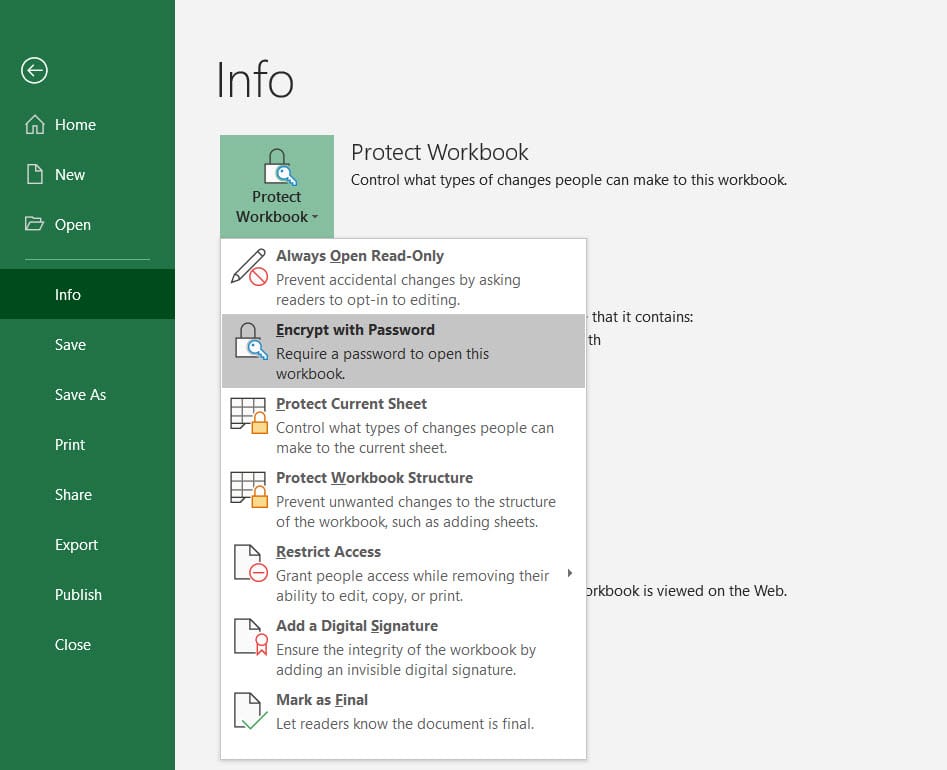
You can also protect entire workbooks to prevent the addition, deletion, or hiding of sheets:
- Go to File > Save As, then choose Tools > General Options.
- Set passwords to open and modify the workbook.
- Click OK and save the file.
Creating a Table for Protection Settings

| Protection Type | Function | Steps |
|---|---|---|
| Sheet Protection | Prevent editing | Review > Changes > Protect Sheet |
| Cell Protection | Allow editing specific cells | Format Cells > Protection > Uncheck Locked |
| Workbook Protection | Prevent structural changes | Save As > Tools > General Options |

Recap

Protecting your Excel sheet in Office 2007 is not just about securing your data but also about ensuring its integrity and facilitating effective collaboration. With basic password protection to more advanced options like cell-specific locks, Excel 2007 offers versatile ways to secure your data. We’ve explored various methods:
- Basic sheet protection to prevent unauthorized edits.
- Advanced techniques for selective cell editing.
- Workbook protection to manage overall structure modifications.
Keep in mind the importance of passwords, and consider the different levels of protection needed based on your specific work environment or data sensitivity.
What should I do if I forget my Excel password?

+
If you forget your password, there’s no in-built way to recover it in Excel 2007. You might need to use third-party tools or recover from a backup.
Can I protect only certain parts of a sheet?

+
Yes, you can selectively protect parts of a sheet by locking specific cells while keeping others editable when the sheet is protected.
How do I remove sheet protection?

+
Go to the Review tab, select Unprotect Sheet, and enter the password if one was set. If no password was set, you can unprotect without a password.


