5 Easy Steps to Print Excel Sheets Perfectly

When it comes to printing Excel sheets, it's not just about sending a document to the printer. To achieve perfect printouts, you need to ensure your data is displayed optimally for print. Whether you're preparing financial reports, business presentations, or personal budgets, a well-formatted Excel sheet can make a significant difference in readability and professional presentation. Here are 5 easy steps to print Excel sheets perfectly.
1. Set Your Page Layout

Begin by adjusting your page layout. This is crucial for ensuring your data fits neatly on each page.
- Page Orientation: Decide if your document should be in portrait or landscape. Landscape often works better for wide spreadsheets.
- Margins: Set your margins to fit your content. Normal margins are usually fine, but you might want to adjust them for more data visibility.
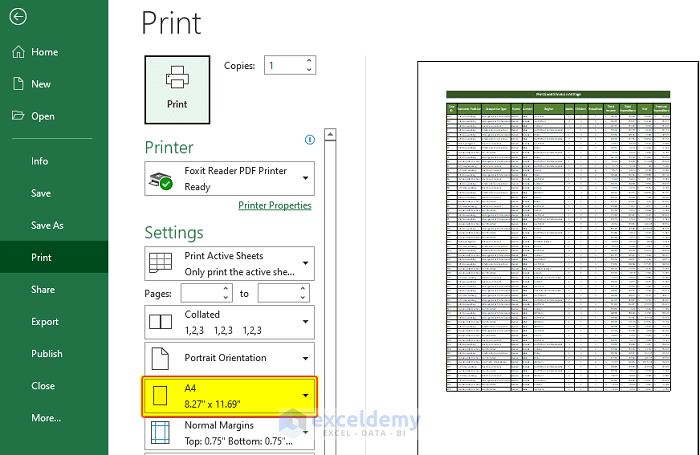
- Paper Size: Choose the correct paper size from the Page Layout tab in Excel.
- Print Area: Define your print area to include only the necessary cells to avoid printing blank spaces or unnecessary data.
- Headers and Footers: Insert headers and footers if needed for pagination, titles, or to add date and time stamps.
⚠️ Note: Remember to check your page breaks by going to File > Print and ensure they don’t cut through critical data.
2. Scaling Your Sheet

Not all spreadsheets fit neatly on one page. Here’s how to scale them:
- Scale to Fit: Use the ‘Scale to Fit’ option under Page Layout to shrink or expand your printout to fit on one page width-wise or height-wise.
- Fit to Pages: If fitting to a single page isn’t possible, choose how many pages wide and tall you want your print to be.
3. Review Print Preview

Before you print, always:
- Check the print preview by going to File > Print. This will show you exactly how your spreadsheet will look when printed.
- Look for any misalignments, empty pages, or cut-off data.
- Adjust settings as needed, especially for headers, footers, or any repeated data on multiple pages.
4. Print Formatting Tips

Formatting can greatly enhance the printed version of your Excel sheet:
- Gridlines: Add gridlines to make data easier to read.
- Row and Column Headings: If applicable, include row numbers and column letters.
- Font Size and Style: Ensure text is large enough to read and clear, adjusting for color visibility if needed.
- Use Print Titles: If your document spans multiple pages, use print titles to repeat column headers or row labels.
- Page Order: Set the page order to ensure logical flow when the pages are printed.
📚 Note: If your sheet contains merged cells or large images, ensure they’re set to print as intended.
5. Use Advanced Printing Features

Excel offers advanced features that can improve print quality:
- Print Selected Charts and Tables: Print only charts or tables without the rest of the data if that’s what you need.
- Print Comments: Choose to print comments either as displayed or at the end of the sheet.
- Ignore Print Area: If you’ve set a print area but wish to print all data, you can ignore the print area setting temporarily.
- Adjust Print Quality: Depending on your printer, you might have the option to adjust DPI for better quality.
In summary, achieving perfect printouts from Excel requires attention to detail from page setup to advanced printing options. By following these five steps, you can ensure your Excel sheets print correctly, making your documents appear professional and readable. Whether for personal or business use, these tips will save you time and reduce paper waste, ensuring your printed documents look as good as your digital ones.
Why does my Excel print with empty pages?

+
Empty pages might occur if your print area extends beyond your data, or if page breaks are set incorrectly. Check your print area and adjust page breaks in the Page Layout view.
How can I print specific ranges in Excel?

+
To print a specific range, select the range of cells you want to print, then go to Page Layout > Print Area > Set Print Area. This range will now be your active print area.
Can I change the orientation of just one page in Excel?

+
Excel doesn’t allow changing orientation for just one page directly. However, you can copy the data to another worksheet, set a different orientation, and then print that sheet.


