5 Steps to Crafting a Balance Sheet in Excel 2010

The balance sheet is one of the most fundamental tools for assessing a company's financial health. For small business owners, accountants, and financial analysts, knowing how to create a balance sheet in Excel 2010 can be immensely useful. This guide will walk you through the steps to craft a balance sheet effectively.
Step 1: Setting Up Your Excel Workbook


Before diving into the creation of the balance sheet, you need to set up your Excel environment:
- Open Excel 2010 and start with a new workbook.
- Save your workbook with a name like “Company Balance Sheet 2023” to keep it organized.
- Adjust the worksheet to a landscape orientation for better readability, by going to Page Layout > Orientation > Landscape.
- Increase the zoom for better visibility during setup.
💡 Note: Ensure your Excel version is updated to avoid any compatibility issues.
Step 2: Header and Titles Setup


Creating a clear and structured header is crucial:
- In cell A1, type “Company Name Balance Sheet”, adjusting the font size and style for emphasis.
- Format the cells below for dates. Use Merge & Center from the Alignment group to center the titles.
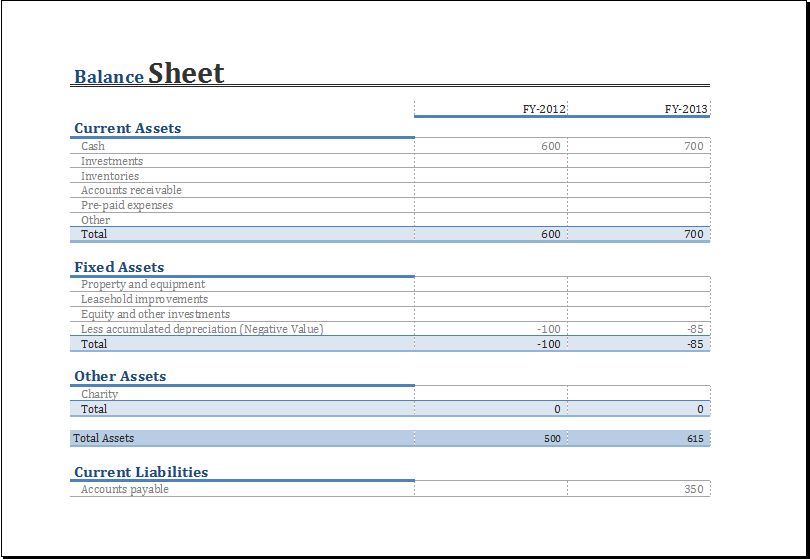
- Include titles for sections like Assets, Liabilities, and Owner’s Equity.
Step 3: Inputting Data


Once your layout is set, it’s time to input your financial data:
- List all your Assets: Current Assets (like Cash, Accounts Receivable), Fixed Assets, and other investments.
- Detail your Liabilities: Current Liabilities (Accounts Payable, Accrued Expenses), Long-Term Liabilities.
- Calculate and enter Owner’s Equity, which equals Assets minus Liabilities.
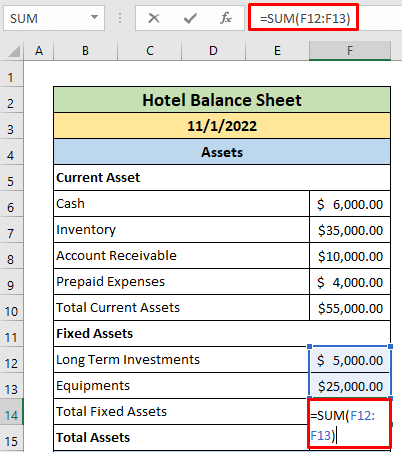
- Use formulas for calculations to ensure accuracy. For instance, Total Assets = SUM(C5:C10).
Step 4: Formatting and Final Touches


The presentation of your balance sheet is crucial for clarity:
- Apply cell borders for visual separation using the Format Cells dialog.
- Use different fill colors to distinguish between Asset, Liabilities, and Equity sections.
- Right-align numbers for consistency and better readability.
- Utilize conditional formatting to highlight totals or any figures that exceed certain thresholds.
Step 5: Verifying and Saving


Before finalizing your balance sheet:
- Double-check all formulas to ensure they accurately reflect the data.
- Ensure the accounting equation balances (Assets = Liabilities + Owner’s Equity).
- Adjust the print area and preview the document to see how it will look when printed.
- Save your work as both an Excel file (.xlsx) and a PDF for portability and security.
💡 Note: Regularly back up your financial spreadsheets to prevent data loss.
In summary, crafting a balance sheet in Excel 2010 involves setting up your workbook, organizing data with proper formatting, and ensuring the accuracy of your financial records. By following these steps, you'll have a well-organized balance sheet that reflects your business's financial standing. Remember to maintain precision and update your balance sheet regularly for an up-to-date snapshot of your company's financial health.
Can I create a balance sheet for multiple periods within one worksheet?

+
Yes, you can include multiple periods on the same balance sheet. Simply create columns for each period and adjust your formulas accordingly to reference data from these columns.
What’s the best way to protect sensitive data in Excel?

+
You can use Excel’s password protection feature found under File > Info > Protect Workbook. Additionally, consider encrypting the file or using a secure cloud storage service for backups.
How often should I update my balance sheet?

+
For most businesses, updating the balance sheet monthly or quarterly ensures it remains an accurate tool for financial analysis. However, depending on your business’s size and industry, more frequent updates might be beneficial.
Can Excel handle complex financial calculations needed for a balance sheet?

+
Yes, Excel can handle most financial calculations with the right formulas and functions. Advanced users can also use macros or incorporate VBA for custom calculations.


