Password-Protect Multiple Excel Sheets Quickly and Easily

When working with sensitive data in Microsoft Excel, safeguarding that data is paramount. Excel offers various security features, one of which includes the ability to password-protect individual worksheets within a workbook. This functionality is critical for businesses, financial analysts, researchers, or anyone who needs to control access to confidential information.
Why Password-Protect Excel Sheets?

Password protection in Excel sheets serves several purposes:
- Confidentiality: Protecting proprietary data from unauthorized access.
- Data Integrity: Preventing accidental or unauthorized changes to important data.
- Compliance: Ensuring compliance with data protection regulations like GDPR or HIPAA.
How to Password-Protect a Single Sheet

Here are the straightforward steps to password-protect a single worksheet in Excel:
- Open your Excel workbook and select the sheet you want to protect.
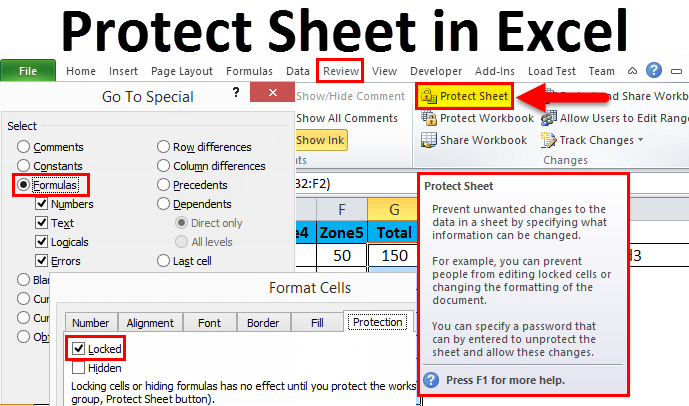
- Navigate to the Review tab on the Ribbon.
- Click on the Protect Sheet button.
- In the "Protect Sheet" dialog box, enter a password in the provided field.
- Confirm the password when prompted.
- Optionally, customize the protection settings for what users can or cannot do on the sheet.
Embedding an image might be useful for visual learners:

🔐 Note: Password protection in Excel is not meant for high-level security but to prevent casual users from making unintended or unauthorized changes. Use strong passwords and consider additional security measures for sensitive data.
Protecting Multiple Sheets

Protecting multiple sheets at once can save time, especially in workbooks with many worksheets:
- Use Sheet Protection Code:
- Open the VBA editor by pressing Alt + F11.
- Insert a new module by right-clicking on any VBA Project in the Project Explorer, selecting "Insert," then "Module."
- Copy and paste the following VBA code to protect multiple sheets:
<pre><code>
Sub ProtectAllSheets()
    Dim ws As Worksheet
    Dim pwd As String

    pwd = InputBox("Enter password to protect sheets", "Enter Password")

    For Each ws In ThisWorkbook.Worksheets
        ws.Protect Password:=pwd, DrawingObjects:=True, Contents:=True, Scenarios:=True
    Next ws

    MsgBox "All sheets have been protected!"
End Sub
</code></pre>

<ol start="4" type="a">
    <li>Run the macro by pressing <kbd>F5</kbd> or assigning a button to the macro for ease of use.</li>
</ol>
</li>
Managing Passwords

When managing password-protected sheets:
- Keep track of all passwords in a secure location, but not within the workbook itself.
- Use unique passwords for different sheets if necessary, especially if they contain different levels of sensitive information.
- Consider using password managers for generating and storing complex passwords.
Summary of Excel Sheet Protection

Password-protecting Excel sheets is a simple yet effective way to control access to your data. Here are some key takeaways:
- You can protect individual sheets or use VBA to protect all sheets at once.
- Always use strong, unique passwords and manage them securely.
- Remember that Excel’s protection is not foolproof and should be part of a broader security strategy.
What happens if I forget the password to an Excel sheet?

+
If you forget the password to an Excel sheet, there’s no direct method to recover it. You might need to revert to a backup or contact a professional Excel recovery service. Prevention is key, so always store your passwords securely.
Can Excel sheet protection be bypassed?

+
While Excel’s sheet protection is good for basic security, it can be bypassed using various methods, including VBA scripts or third-party tools. It’s crucial to understand that this protection is mainly for preventing unintended or unauthorized changes, not for safeguarding extremely sensitive data.
How do I change or remove the password on an Excel sheet?

+
To change or remove the password on a protected sheet, you must first unprotect it with the existing password. Once unprotected, you can re-protect it with a new password or leave it unprotected by not setting a new password.


