3 Simple Steps to Merge Excel Sheets on Mac

Combining data from multiple Excel sheets can be an overwhelming task, especially when you're dealing with Mac-specific functionalities. Whether you're merging financial reports, consolidating inventory records, or combining customer data, the process should be seamless to save time and reduce errors. In this post, we will walk you through 3 simple steps to merge Excel sheets on Mac, making your life a lot easier.
Step 1: Ensure You Have the Necessary Tools

Before diving into the merging process, ensure that your Mac has the necessary software and tools. Here’s what you’ll need:
- Microsoft Excel: Excel for Mac should be installed. If you’re using the Microsoft 365 suite, ensure your subscription includes access to Excel.
- macOS compatibility: Ensure your Mac’s operating system is compatible with your version of Excel. Excel 2019 and later versions require macOS High Sierra (10.13) or later.
- VBA (Optional): If you’re comfortable with macros, Visual Basic for Applications (VBA) can automate repetitive tasks.
⚠️ Note: While most of the steps can be performed without VBA, having basic knowledge can significantly speed up the process.
Step 2: Opening and Arranging Your Sheets

With your tools in place, follow these steps to set up your Excel sheets for merging:
- Open Microsoft Excel.
- Go to File > Open to open all the Excel files you wish to merge.
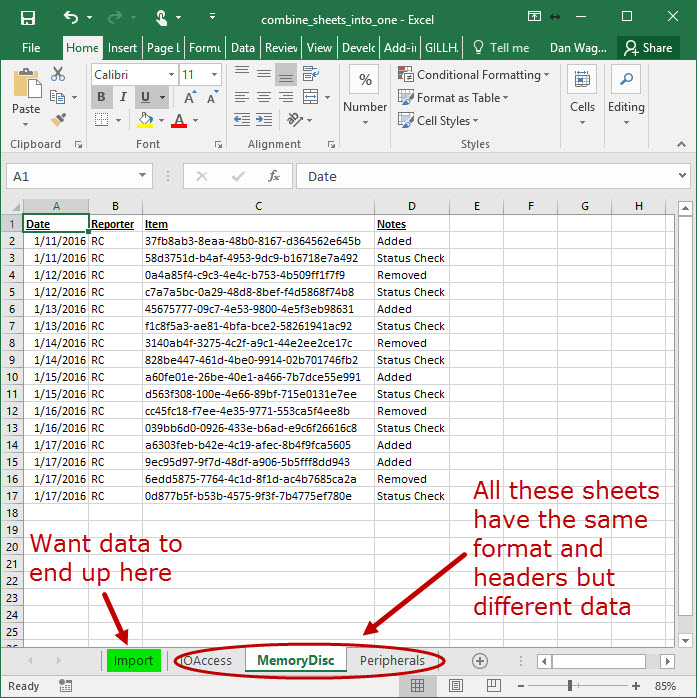
- Once open, arrange the windows of all sheets side by side or in a cascading pattern for easy navigation.
- Check if the sheets have a common header row or column that you can use for merging.
Having your data visually organized will make the merging process more intuitive. Remember:
- Ensure that the data is consistent; for instance, dates should all be formatted the same way.
- If possible, align headers to make merging straightforward.
Step 3: Merging the Sheets

Now that your sheets are set up, you can proceed with the actual merging:
Manual Merging

If your sheets are small or you prefer a more hands-on approach:
- Select the first row or column from one sheet you want to merge.
- Copy (CMD + C) and paste (CMD + V) into a new or existing master sheet.
- Repeat for all rows or columns from all sheets.
- Manually sort or filter the data to ensure consistency.
Using VLOOKUP or INDEX-MATCH

For a more dynamic approach:
- Use VLOOKUP or INDEX-MATCH functions to pull data from one sheet into another based on a common identifier.
- Ensure that your master sheet has a header row that matches the sheets you are merging.
🔎 Note: The use of VLOOKUP or INDEX-MATCH requires exact matches in key fields across sheets.
Utilizing Excel’s Built-in Tools

If you have Office 365 or Excel 2019:
- Go to the Data tab and use Consolidate to sum up values from multiple ranges into one.
- For a more automated approach, use Power Query to combine sheets or workbooks.
Frequently Asked Questions

Can I merge sheets if they have different column headers?

+
Yes, you can, but you’ll need to manually align or adjust the headers or use Excel’s conditional logic to make sense of the data.
Is it possible to automate this merging process?

+
Yes, with VBA or Power Query, you can automate merging sheets, especially if the merging logic is consistent across datasets.
What should I do if there are duplicate rows in the sheets I’m merging?

+
You can use Excel’s Remove Duplicates feature or manually review and decide how to handle duplicates after merging.
Will merging sheets alter the original data?

+
No, merging data into a new sheet or consolidating data into a master sheet won’t alter the original sheets, but always ensure you’re working with copies if you’re unsure.
In summary, merging Excel sheets on a Mac can be accomplished with ease using the right approach. From manual copy-pasting to leveraging Excel’s powerful functions like VLOOKUP or Power Query, the steps are straightforward. Remember to ensure data consistency, align headers, and possibly automate repetitive tasks to enhance productivity. Whether you’re dealing with financial data, customer lists, or inventory, these steps will streamline your workflow, making data management on a Mac both efficient and error-free.


