How to Make Rows in Excel Sheets Larger Easily

When you work with Microsoft Excel, chances are, you'll encounter data that doesn't fit neatly into the default row heights. Whether it's financial analysis, project management, or a personal budget, adjusting row heights can make your spreadsheets more readable and organized. Here's a guide on how you can make rows in Excel sheets larger, effortlessly.
Manually Adjusting Row Heights


Manual adjustment is the most straightforward approach. Here’s how you do it:
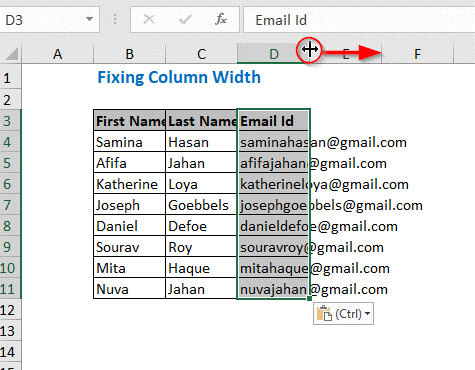
- Move your cursor to the row’s bottom border line in the row number section.
- When the cursor changes to a double-sided arrow, click and drag the border up or down to increase or decrease the row height.
- Release the mouse button to set the new height.
Using the Format Menu

If you prefer a more precise approach or need to adjust multiple rows:
- Select the rows you want to resize by clicking on the row numbers while holding down the Ctrl key for non-contiguous rows or simply drag through for contiguous rows.
- Right-click to bring up the context menu, then select Row Height… from the Format submenu.
- Enter the desired height in the dialog box that appears and click OK.
Default vs. Custom Row Height

Excel has a default row height, but you can customize this for readability or design:
- The default row height is 15 points (approximately 20 pixels).
- You can specify any size you want, even up to 409 points if needed.
AutoFit: Excel’s Smart Way to Adjust Rows


Excel provides an intelligent feature known as AutoFit, which can automatically adjust row heights to fit content:
- Select the rows you want to AutoFit.
- On the Home tab, go to the Cells group and click on Format.
- Under Cell Size, choose AutoFit Row Height.
- Excel will automatically resize the selected rows to fit the tallest cell content.
Adjusting Multiple Rows at Once

To save time, especially with a large dataset, you can adjust several rows simultaneously:
- Hold down Shift or Ctrl to select multiple rows.
- Apply the method of resizing described above to the selected rows.
Using Keyboard Shortcuts

For quick adjustments, these keyboard shortcuts can come in handy:
| Shortcut | Action |
|---|---|
| Alt + H + O + H | Opens the Row Height dialog |
| Alt + H + O + A | AutoFit Row Height |

💡 Note: Using keyboard shortcuts can drastically speed up your workflow, especially when formatting large spreadsheets.
Once you’ve adjusted your row heights, you might want to ensure that your changes are consistent across your workbook. Here’s how:
- If you want to apply the same row height to multiple sheets, group the sheets by holding Ctrl and clicking on the sheet tabs. Changes will affect all selected sheets.
When working with Excel, you'll sometimes need to revert row heights to their original settings. This can be done through:
- Selecting the rows and going to the Home tab, then Format > Row Height, and entering the default height (15 points).
🖱️ Note: The 'Reset' option to revert row heights is not available in Excel, but you can manually set the default height for selected rows.
Understanding how to manipulate row heights not only improves the aesthetic appeal of your spreadsheets but also ensures that all your data is visible and accessible. You can optimize your workflow by utilizing these resizing techniques to suit your needs:
- Clarity: Adjusting row heights helps keep your spreadsheet organized and prevents data from being cut off.
- Readability: Larger row heights can improve readability, especially for large amounts of text or numbers.
- Professionalism: Properly formatted spreadsheets reflect well on your work, showing attention to detail.
This guide has walked you through multiple methods to resize rows in Excel, from simple manual adjustments to using Excel’s smart features like AutoFit. Whether you’re preparing a financial report or organizing personal data, ensuring your spreadsheets are not just functional but visually pleasing can significantly enhance your data presentation. The key takeaways are:
- Manually dragging borders or using the Format menu for precise control.
- AutoFit for automatically adjusting rows to fit content.
- Keyboard shortcuts for quick formatting.
- Consistency and reverting to default heights when necessary.
Why is AutoFit important for Excel users?

+
AutoFit ensures that all content is visible without manual resizing, saving time and preventing data misrepresentation.
How can I make sure the row heights are uniform?

+
Select multiple rows and adjust the height of one; Excel will apply the change to all selected rows. For uniform sheets, group the sheets before adjusting.
Can I set a custom default row height for all new workbooks?

+
Yes, this can be set through Excel Options under Advanced settings. Choose a ‘Standard font’ and size that suits your workflow.
What if my data is too large for a single cell?

+
Consider using Wrap Text to allow text to wrap within the cell or merge cells to accommodate larger text.


