Split Excel Data into Multiple Sheets Easily

In the world of data management, Microsoft Excel remains a powerhouse, widely used for storing, analyzing, and visualizing vast amounts of information. For businesses, researchers, or individuals dealing with extensive datasets, organizing this data efficiently is crucial. One effective way to manage large Excel files is by splitting the data into multiple sheets. This practice not only helps in organizing your data but also speeds up processing times and reduces file size for better performance. In this comprehensive guide, we'll explore various methods to split your Excel data into multiple sheets, ensuring you have the tools needed to enhance your data handling capabilities.
Understanding the Need for Splitting Data

Before diving into the technicalities, it's essential to understand why splitting your data might be necessary:
- Better Organization: Segmenting data into sheets based on categories, dates, or other criteria makes it easier to navigate and manage your datasets.
- Enhanced Performance: Smaller worksheets are less resource-intensive, leading to faster load times and smoother operation, especially in older systems or when working with very large datasets.
- Easier Collaboration: When data is split, team members can work on different parts of the data concurrently without interfering with each other's work.
- Improved Data Analysis: By isolating data into separate sheets, you can analyze individual segments more effectively, apply different formulas or pivot tables tailored to specific datasets, or create dynamic charts and reports.
Method 1: Using Excel VBA for Automated Splitting

Visual Basic for Applications (VBA) in Excel provides an excellent way to automate repetitive tasks. Here's how you can use VBA to split your data into multiple sheets:
Prerequisites:

- Basic knowledge of VBA scripting
- Access to the Developer Tab in Excel
Step-by-Step Guide:

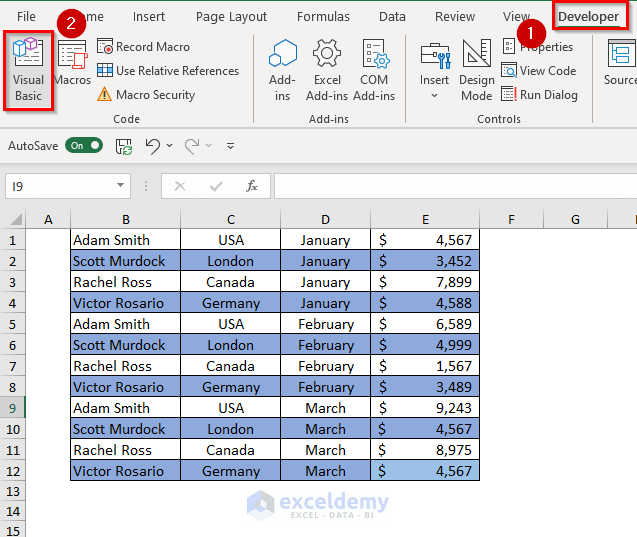
- Open the VBA Editor: Press Alt + F11 or go to Developer > Visual Basic.
- Insert a New Module: Click on Insert > Module to create a new module for your code.
- Input the Following Code:
Sub SplitDataIntoSheets() Dim wsSource As Worksheet Dim wsNew As Worksheet Dim rngSource As Range Dim cell As Range Dim uniqueVals As Object Dim key As Variant Dim lastRow As Long'Set the source worksheet Set wsSource = ThisWorkbook.Sheets("SourceData") Set rngSource = wsSource.Range("A1").CurrentRegion 'Create a dictionary to hold unique values Set uniqueVals = CreateObject("Scripting.Dictionary") 'Collect unique values from the column you want to split by For Each cell In rngSource.Columns(1).Cells If Not IsEmpty(cell) Then If Not uniqueVals.exists(cell.Value) Then uniqueVals.Add cell.Value, 1 End If End If Next cell ' Loop through each unique value and create a new sheet For Each key In uniqueVals.keys Set wsNew = ThisWorkbook.Sheets.Add(After:=Sheets(Sheets.Count)) wsNew.Name = key rngSource.AutoFilter Field:=1, Criteria1:=key rngSource.SpecialCells(xlCellTypeVisible).Copy wsNew.Range("A1").PasteSpecial xlPasteAll rngSource.AutoFilter Next key 'Cleanup Application.CutCopyMode = False wsSource.AutoFilterMode = FalseEnd Sub
- Customize the Code: Adjust the column in the
Field:=1parameter if you’re not splitting based on the first column, and modify the sheet name"SourceData"to match your actual source sheet’s name. - Run the Code: Click on Run > Run Sub/UserForm or press F5 to execute the macro.
Once executed, Excel will create new sheets for each unique value in the specified column. Remember to save your workbook as a Macro-Enabled Workbook (.xlsm) to retain the VBA code.
💡 Note: Always backup your original data before running VBA macros that alter your spreadsheet to prevent data loss.
Method 2: Using Power Query

Power Query, introduced in Excel 2010, offers a user-friendly way to perform data transformations. Here’s how to use Power Query for splitting data:
Steps:

- Load Data: Select your data range and go to Data > From Table/Range to import your data into Power Query.
- Group Data: In the Power Query Editor, go to Home > Group By. Choose the column by which you want to split the data and click OK.
- Create Reference Queries: After grouping, you’ll have aggregated data. Right-click on the query in the left panel and select Reference to create a query for each group.
- Export Sheets: For each reference query, choose Close & Load To… under File, and select Only Create Connection. Then, from the Workbook Queries panel, right-click on each query and select Load To…. Opt for Table, specifying where in your workbook you want the new sheet to be created.
Using Power Query provides a graphical interface for data transformations, making it accessible for users who are not comfortable with coding.
Method 3: Manual Splitting with Excel Functions

If you prefer a more hands-on approach or have smaller datasets, you can split data manually using Excel functions. Here are the steps:
Steps:

- Sort Data: Sort your data by the column you intend to split on. This can be done by selecting the column header and clicking on Data > Sort A to Z.
- Identify Unique Values: Use the Advanced Filter (Data > Advanced) to extract unique values into a separate range.
- Create Sheets: Manually insert new sheets or use a macro to automate this process.
- Copy-Paste: For each unique value, filter the source data, select the filtered results, and paste into the corresponding new sheet. You can automate this with VBA or use Excel’s drag-and-drop functionality.
🔗 Note: Manual splitting works well for smaller datasets but can become time-consuming for larger datasets.
Comparing Methods

| Method | Complexity | Speed | Flexibility | Code Knowledge Required |
|---|---|---|---|---|
| VBA Scripting | High | Fast | Very High | Yes |
| Power Query | Medium | Moderate | High | No |
| Manual with Functions | Low | Slow | Medium | No |

The choice of method depends on your comfort with Excel, the size of your data, and your specific needs:
- VBA Scripting: Ideal for large datasets and when automation is key.
- Power Query: Suitable for users new to scripting but comfortable with data transformation interfaces.
- Manual Splitting: Best for smaller datasets or when you need to control every aspect of the splitting process.
In today's dynamic work environments where efficiency is paramount, splitting Excel data into multiple sheets not only organizes your information but also improves workflow efficiency. By understanding and utilizing the methods outlined above, you'll be well-equipped to handle even the most extensive datasets with ease. Whether you choose automation with VBA, the visual approach of Power Query, or a manual method, each technique offers its own set of benefits tailored to different user preferences and data management scenarios.
Can I undo splitting data into sheets?

+
Yes, you can undo the split by manually consolidating the data back into one sheet or by using a VBA script to automate the process. Always ensure you have a backup before any major data manipulation.
How can I keep formulas when splitting data?

+
When using methods like VBA or Power Query, you need to ensure that the formulas are copied along with the data. Use xlPasteFormulasAndNumberFormats in VBA or set up transformations in Power Query to preserve formulas.
Is there a way to automatically update the split sheets if the source data changes?

+
Yes, you can write VBA macros or use Power Query to refresh data from the source automatically. For Power Query, setting up a refresh connection can handle periodic updates.
What are the limitations of using VBA for splitting data?

+
VBA has a steep learning curve for beginners and requires enabling macros, which can pose security risks if not carefully managed. Also, very large datasets might exceed VBA’s performance capabilities.