5 Ways to Print Oversized Excel Sheets Clearly

Mastering Oversized Excel Sheets for Better Printing

Printing large Excel spreadsheets can often turn into a puzzling task, especially when trying to ensure all your data is clearly visible and easy to read. In this extensive guide, we'll explore five effective techniques to print oversized Excel sheets clearly, ensuring your printouts are both professional and practical for presentations, reports, or personal references.
1. Adjusting Page Setup and Scaling

First things first, let's look at your page setup and scaling options, which are essential for handling oversized data:
- Go to "Page Layout": This is where you'll find settings to control how your Excel sheet will print.
- Page Scaling: Under "Scale to Fit", adjust the scale percentage to fit your data onto fewer pages. Aim for a balance between readability and page count.
- Page Orientation: Decide between portrait or landscape mode to see which better fits your data layout.
🖨️ Note: Scaling down too much can affect readability. Make sure text size remains legible.
2. Utilizing Print Area

The print area tool helps to focus on specific data, saving paper and making your printouts more targeted:
- Select Your Data: Highlight the range you want to print. This could be an entire worksheet or just specific tables.
- Set Print Area: Go to "Page Layout" > "Print Area" > "Set Print Area". This will print only the selected cells, ignoring the rest of the sheet.
- Clear Print Area: If you need to change or reset the print area, select "Clear Print Area" from the same menu.
3. Using Page Breaks

Page breaks ensure that your data doesn't get cut off awkwardly across pages:
- Insert Manual Page Breaks: From the "Page Layout" tab, click "Breaks" and then "Insert Page Break".
- Adjust Automatic Breaks: Right-click on any row or column header where automatic page breaks appear and choose to insert or remove breaks.
✂️ Note: Frequent page breaks can make your printed document look less professional. Use them strategically.
4. Formatting for Clarity

Proper formatting not only makes your data clearer on screen but also significantly enhances print clarity:
- Font Size and Style: Ensure headers and key data are bold or use larger fonts for emphasis.
- Cell Borders: Applying borders can outline cells, making data blocks more distinct.
- Colors and Fill: Use colors judiciously; bright colors might not print well in monochrome.
- Merge & Center: For headers or titles, this can create a clear, organized appearance.
| Feature | Usage Tips |
|---|---|
| Font Size | Adjust to ensure readability while balancing space constraints. |
| Borders | Use to define sections, making complex data easier to follow. |
| Colors | Choose colors that will print clearly in grayscale if not using a color printer. |

5. Printing to PDF and Preview

Before sending anything to the printer, consider the following steps:
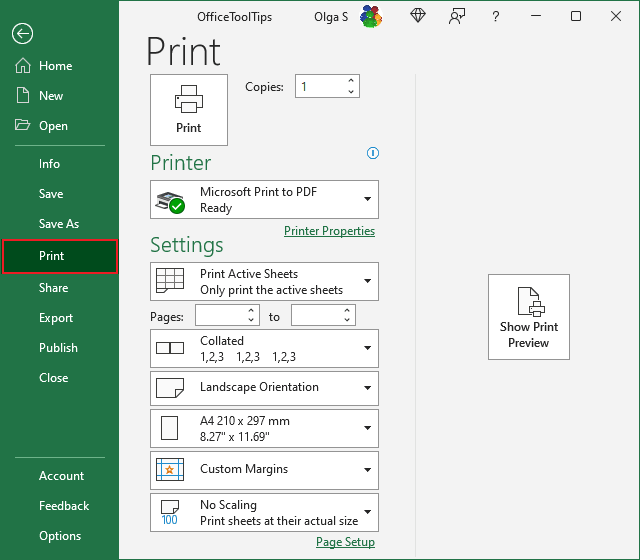
- Use Print Preview: Always preview your sheet to ensure all data is visible and correctly formatted.
- Print to PDF: This option allows you to create a PDF file, offering control over page setup and allowing for digital distribution.
In the world of data presentation, mastering the art of printing oversized Excel sheets can make all the difference in how your data is perceived. By understanding and applying these five methods, you ensure your spreadsheets are printed clearly, maintaining both clarity and professionalism:
- Adjusting Page Setup and Scaling allows you to fit your data on fewer pages without sacrificing too much readability.
- Utilizing Print Area focuses your printouts, making them more targeted and efficient.
- Using Page Breaks ensures that your data flows logically across pages.
- Formatting for Clarity helps to highlight essential data, ensuring readability and visual impact.
- Printing to PDF and Preview offers a digital alternative that can be easily shared, while providing a last chance to catch any errors before physical printing.
These strategies, when combined, provide a comprehensive approach to handling large datasets in Excel. They enable you to present your data in the most effective and reader-friendly manner possible, whether it’s for internal reports, client presentations, or your own record-keeping. Remember, the goal is to communicate your data effectively, and with these tools at your disposal, you’re well on your way to achieving just that.
What should I do if my spreadsheet is too wide to fit on one page?

+
Use the “Scale to Fit” feature under Page Layout to reduce the size of your spreadsheet, or consider printing to PDF for a digital solution.
Can I print just a specific part of my Excel sheet?

+
Yes, by setting a print area in “Page Layout” > “Print Area”, you can print only the selected part of your spreadsheet.
What if the color scheme on my spreadsheet doesn’t print correctly?

+
Ensure your printer is set to color printing, or check how colors convert to grayscale if it’s not. Adjust colors in Excel for better grayscale printing.
How do I handle data that spans multiple pages?

+
Use manual page breaks strategically to avoid splitting important data across pages, or adjust the orientation and scaling to fit your content better.
Is there a way to ensure headers appear on every printed page?

+
Set the print titles under “Page Layout” > “Print Titles”, which allows you to repeat row or column titles on each page.


